How to make Pinterest pins from your whole Etsy shop
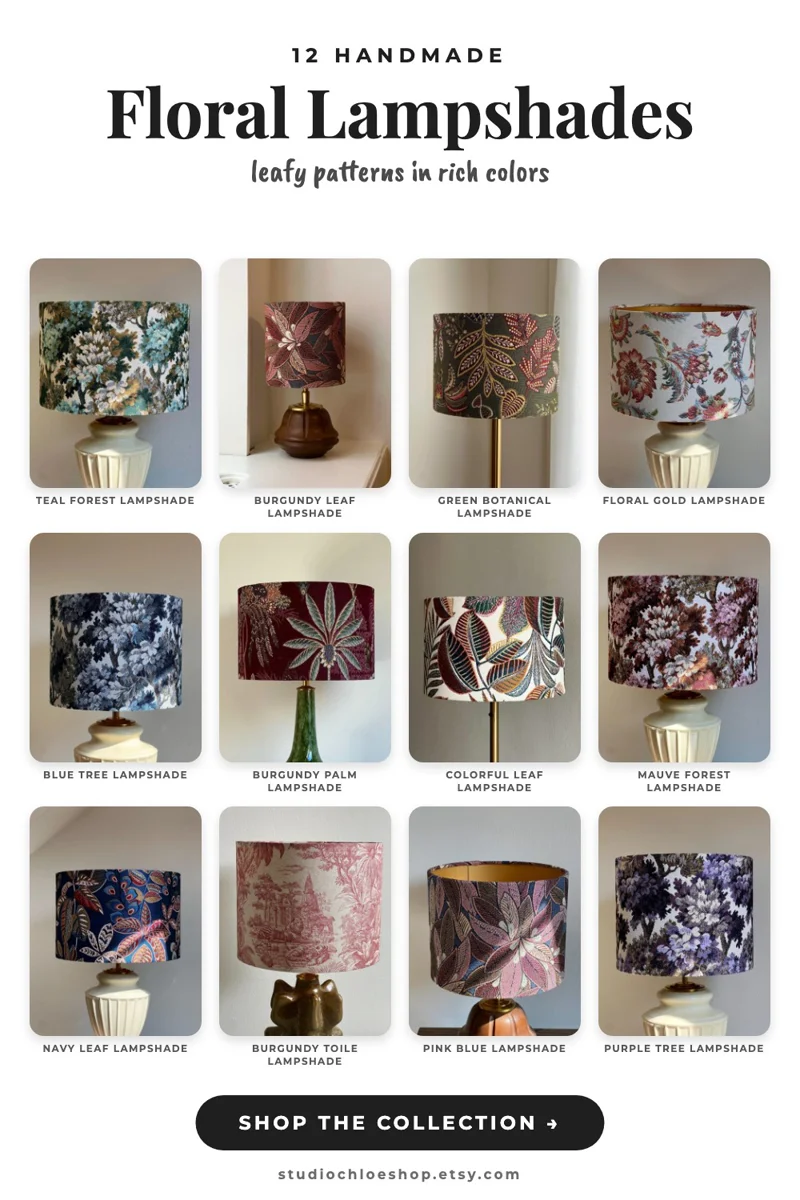
Open your Etsy shop, pick a section like Floral Lampshades, tick the listings you want, and get one pin with all of them, or a pin for each. Here's the whole thing, click by click, with a real shop on Etsy.
Before you start
A Made to Spark account. New here? Use Create your account at the end of this guide.
Your Etsy shop name. Connecting the shop is not needed.
To make a pin for each of several listings at once, Bulk Pins on the Solo and Growth plans. Clicking one listing, and one pin with several listings, work on every plan.
To schedule pins, a plan or the 7-day trial, and Pinterest connected once. Downloading the pins works without either.
1
Open your Etsy shop in Made to Spark
Once you are signed in to Made to Spark:
1Click New Pin on the left. On a phone or tablet, tap the menu button at the top left first.
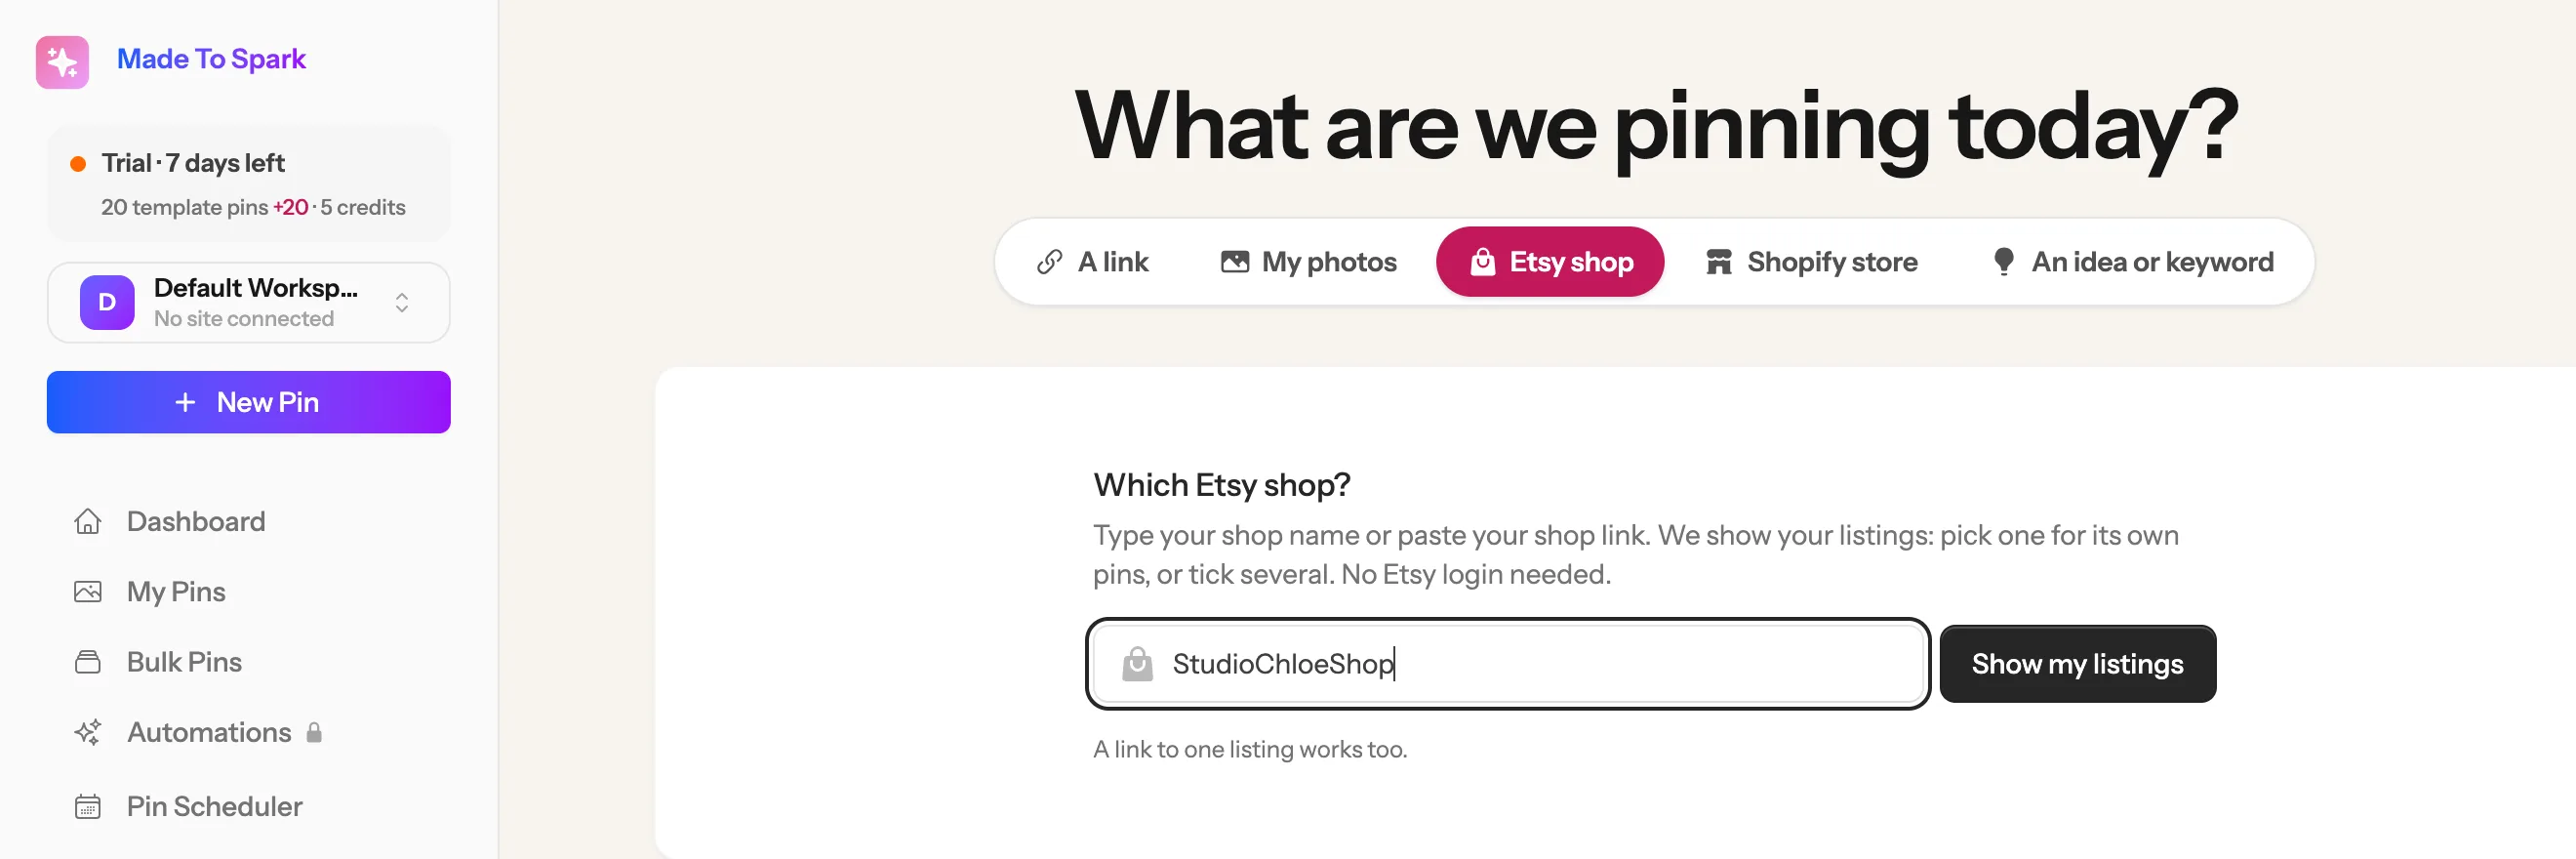
2Click the Etsy shop tab.
3Type your shop name, as it shows in your shop link (etsy.com/shop/YourShop). Pasting the whole shop link works too, and so does a link to one section of your shop.
4Click Show my listings. No Etsy login is needed: your listings are read the way shoppers see them.
1234Tap to enlarge
1234
Tip: Connected your Etsy shop in Integrations? Then the tab opens your shop straight away, with nothing to type.
2
Pick a section of your shop
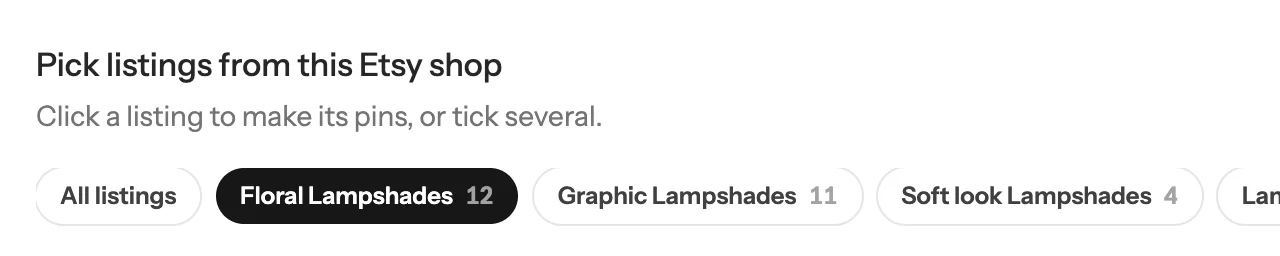
Your listings show in a grid. Above them sit your shop’s sections, the ones you made on Etsy. Click one (1), like Floral Lampshades, and the grid shows only that section. One pin with all of them then links to that section, so shoppers land on exactly those listings.
1Tap to enlarge
1
Tip: Want pins for just one listing? Click its photo instead of ticking it: its pick screen opens, and the guide Make pins for your Etsy listings takes it from there. No sections in your shop? Then there is no row, and you pick from the whole shop.
3
Tick the listings you want
Pick which listings go on your pins:
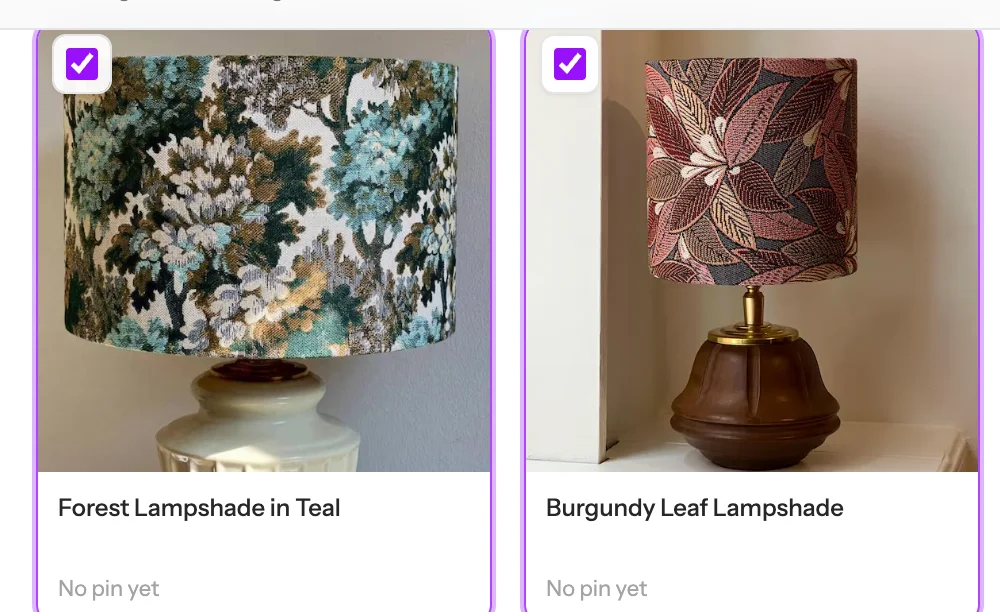
1Tick the box at the top left of each listing (1). Want the whole section? Click Tick all 12 under the search box instead.
2A bar slides up at the bottom with what you ticked. One pin with all 12 (2) puts them all on one pin: see the next step.
3A pin for each (12) (3) gives every listing its own pins in Bulk Pins, on the Solo and Growth plans: see step 5.
1Tap to enlarge
1
23Tap to enlarge
23
4
One pin with all of them
With at least 4 ticked, click One pin with all 12 · included. My Pins opens, and in about a minute your pin is there: your listings in a tidy grid, a headline on top and a shop button. It links to the section you picked, or to your whole shop.
Tap to enlarge
Tip: It takes 4 to 20 listings. The headline is written from your photos, like Floral Lampshades. Want your own? Type it in the Headline box on the bar first. It costs the same as a template pin: included in your plan up to its monthly amount, otherwise 1 credit. The button says which.
5
A pin for each: make them in Bulk Pins
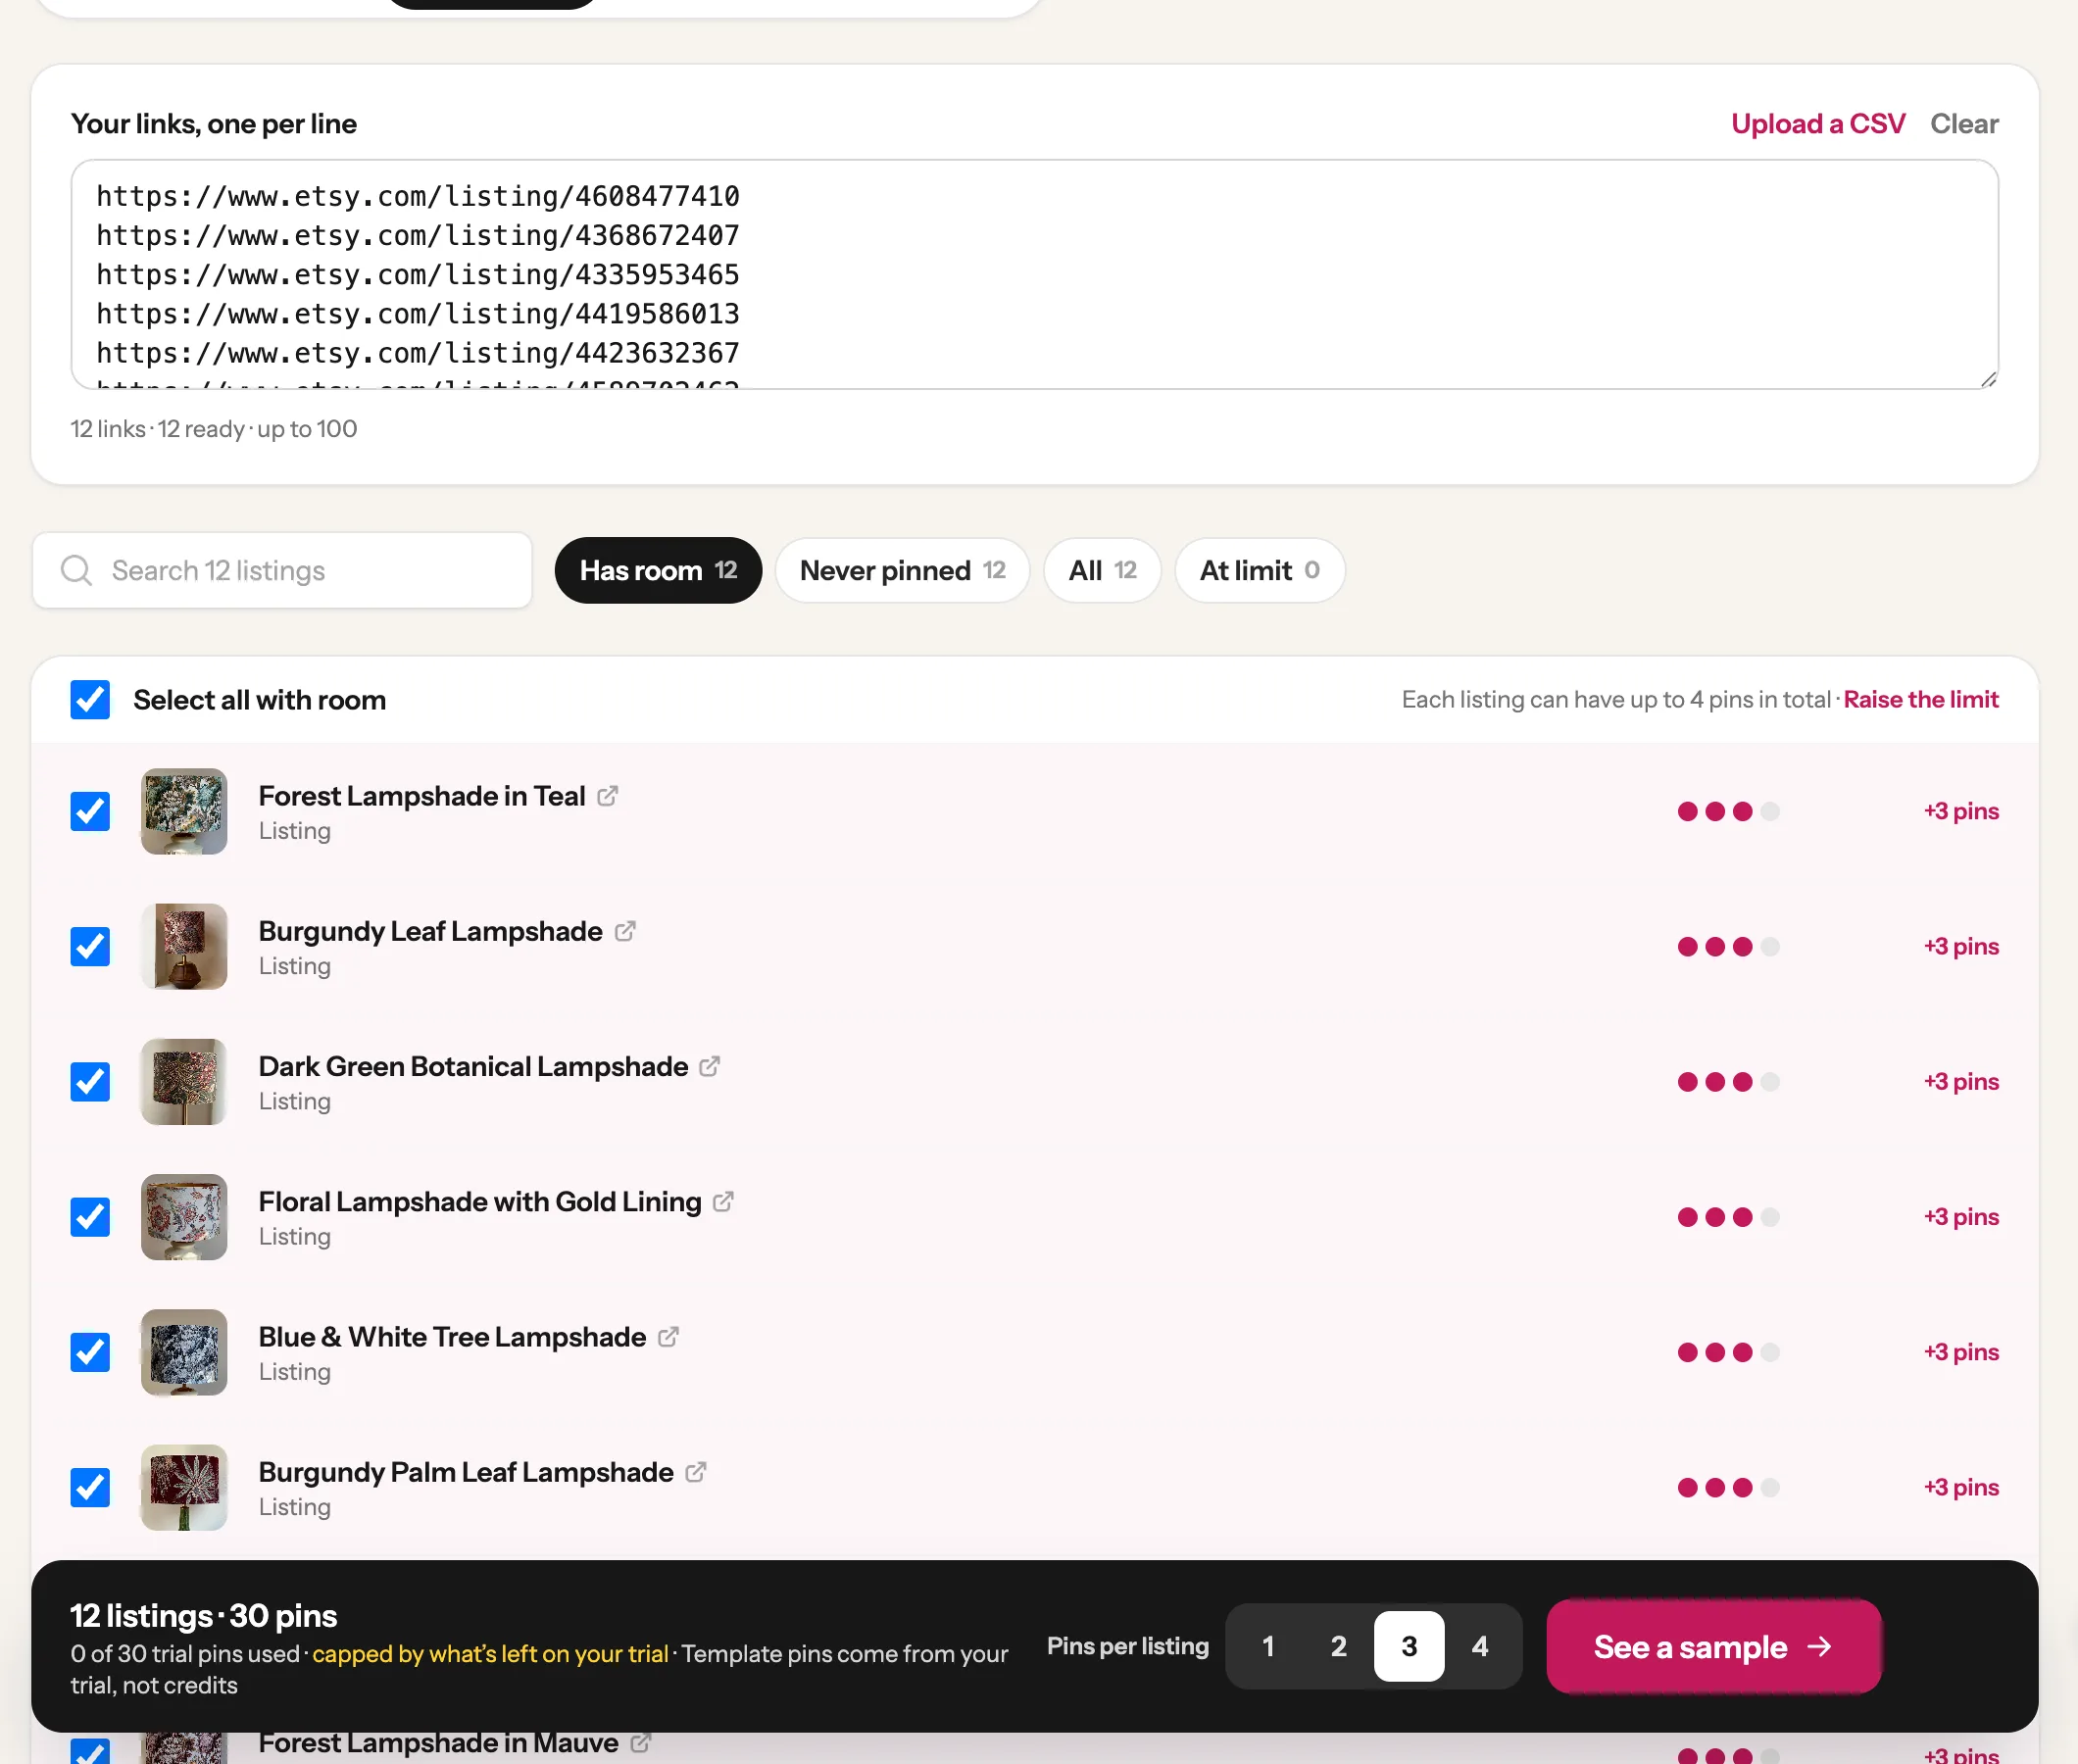
Bulk Pins opens with your listings already in the list of links (1). Each one gets a line with its photo and name, ticked and ready (2). Pick how many pins each listing gets, then click See a sample (3). You see real pins for one listing before anything is made, and every pin waits in Pending pins for you to approve. The rest works like any bulk run: see the guide Make pins in bulk, from Look at a sample.
123Tap to enlarge
123
Done! Two guides take it from here
One listing: its pick screen works like any Etsy listing. Several: one pin with all of them, or Bulk Pins shows a sample, then makes a pin for each.
Should I make one pin with all of them, or a pin for each?
Both. They catch different searches. One pin with several listings shows up when people look for ideas, like “floral lampshades” or “boho living room decor”, and sends them to your section or shop. A pin for each shows up when people look for that one thing, like “burgundy leaf lampshade”, and sends them straight to the listing.
Do I need to connect my Etsy shop?
No. Typing your shop name or pasting your shop link is enough: your listings are read the way shoppers see them. Connecting the shop only saves typing the name each time.
Which links work?
Your shop link (etsy.com/shop/YourShop, or yourshop.etsy.com), a link to one of your shop’s sections (it has section_id= in it, and the shop opens on that section), or a link to one listing, which opens that listing straight away.
Why doesn’t my section show?
The row shows sections that have listings for sale, and only when your shop has two or more of them. Sold-out and switched-off listings are left out, since a pin should lead to something shoppers can buy.
Can I mix listings from different sections on one pin?
Not on one pin: picking another section clears the ticks, because the pin links to the section its listings came from. To mix them, stay on All listings and tick from there. The pin then links to your whole shop.
Can new listings get pins on their own?
Yes, with Automations. Set it up with your Etsy shop, and each listing you add after that gets its own pins.
What if something goes wrong?
If Etsy is busy, the grid says so and offers Try again. If your shop isn’t found, check the spelling: shop names have no spaces. You can always paste one listing’s link instead.
Stuck on a step? Just reply to any email from us, or use the chat button at the bottom right.