Clicky

Step-by-step guide · 6 steps · about 3 minutes

How to make Pinterest pins for your Etsy listings

Type your Etsy shop name, pick a listing, and get finished Pinterest pins that show your product in fresh new photos and link to your listing. Here's the whole thing, click by click, with a real Etsy necklace.
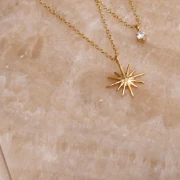
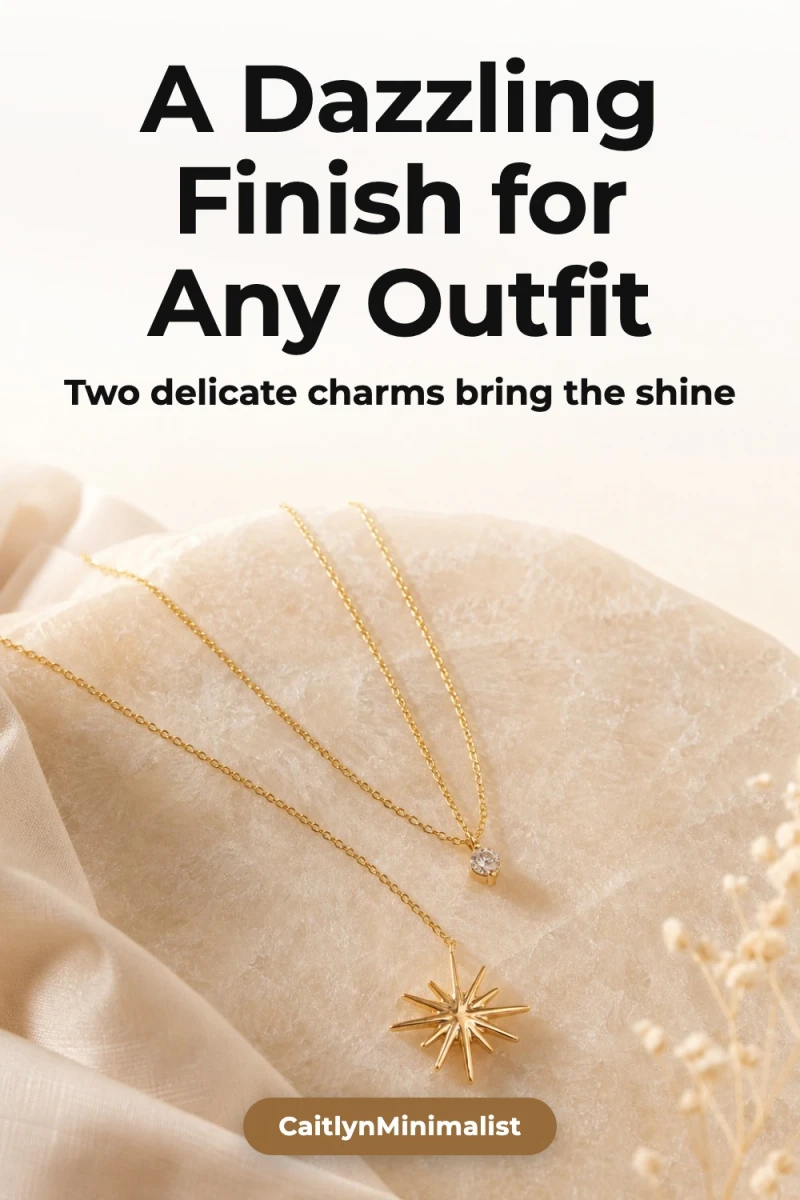
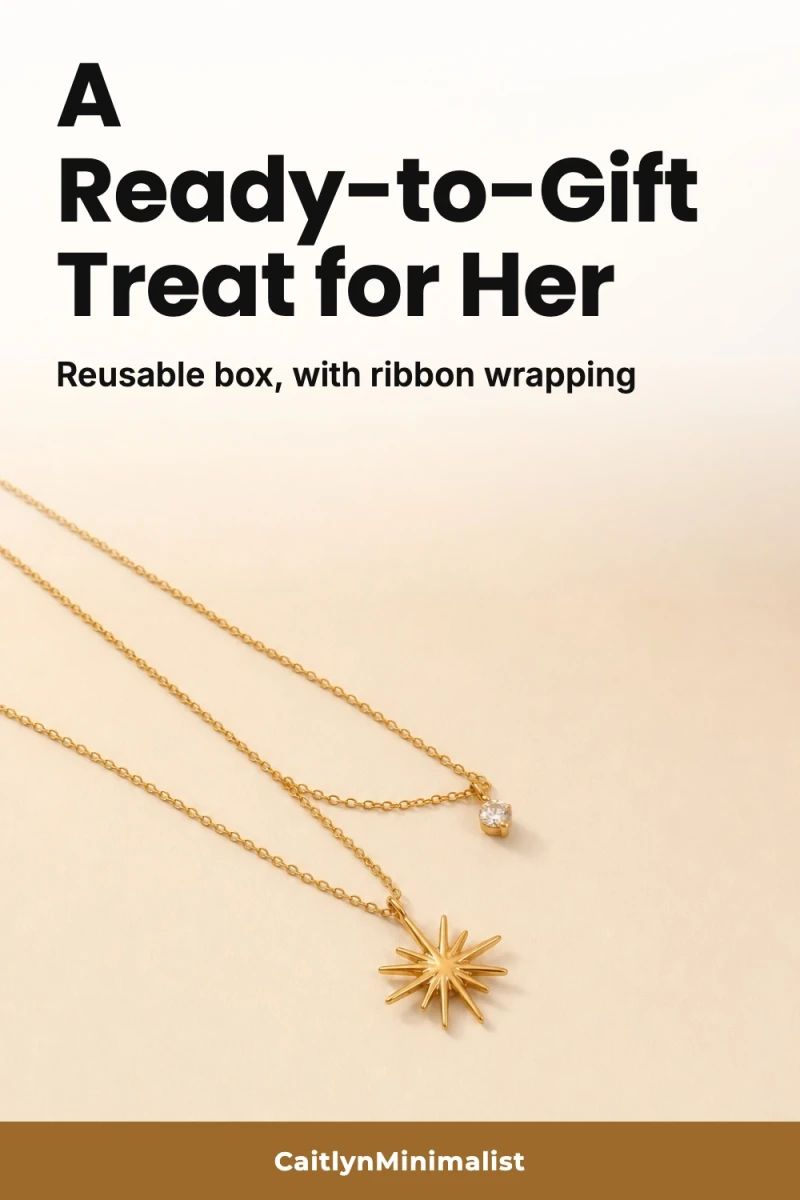
The star necklace photo from its Etsy listing
The Etsy listing photo
Finished Pinterest pin 1 of the star necklace Finished Pinterest pin 2 of the star necklace
2 pins, about a minute later

Before you start

  1. 1

    Click New Pin, then “Etsy shop”

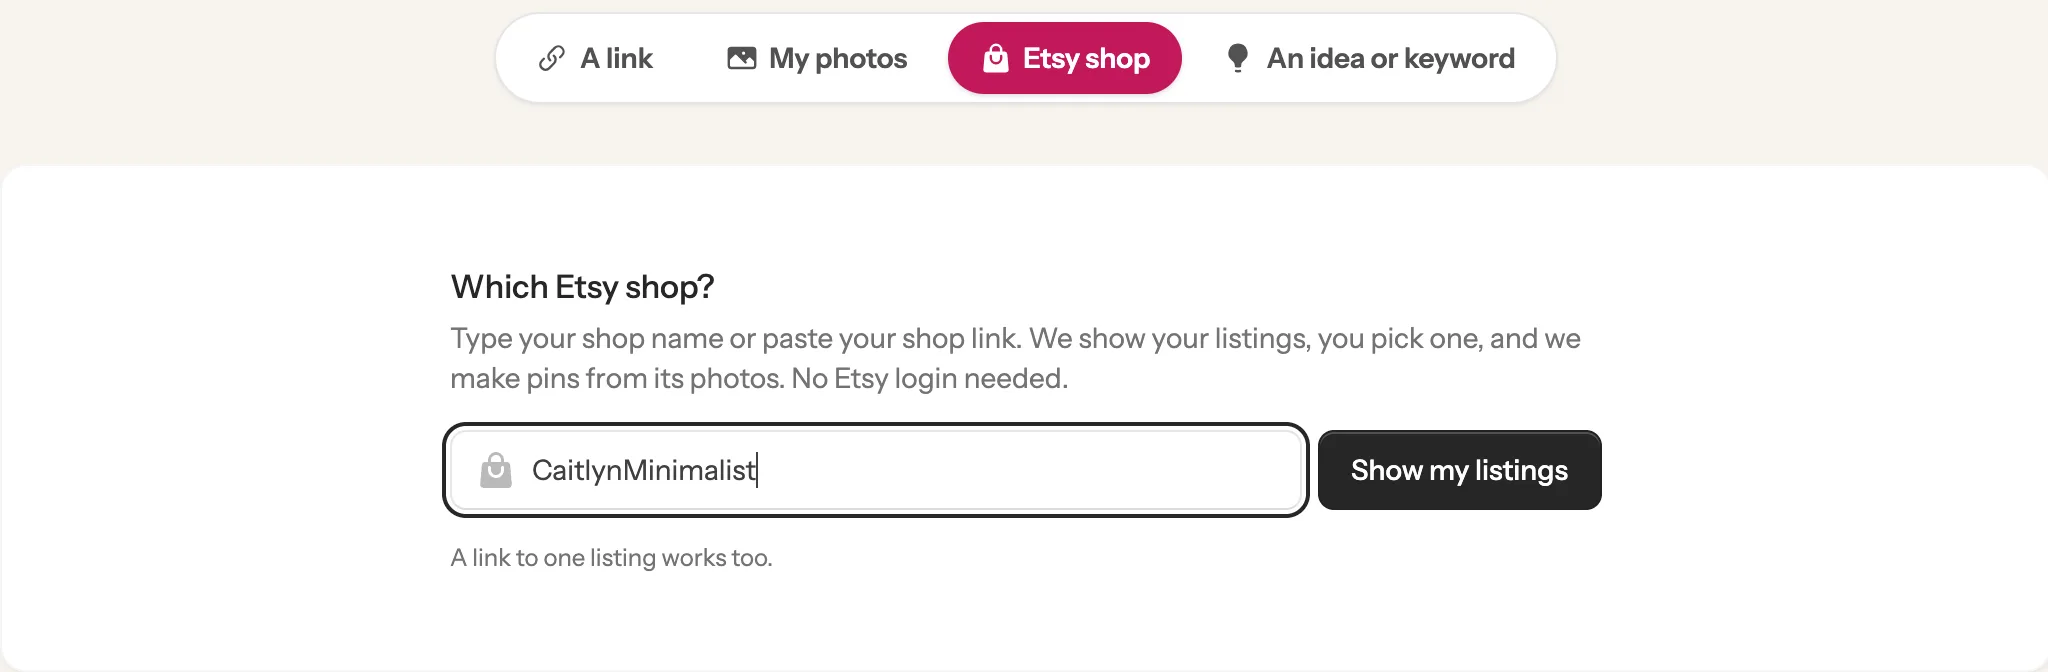
    Sign in to Made to Spark and click New Pin on the left (on a phone or tablet, tap the menu button at the top left first). At the top, click the Etsy shop tab. Type your shop name, or paste your shop link, and click Show my listings. You don’t need to log in to Etsy. Already connected your Etsy shop? Then the tab reads My Etsy shop and your listings open straight away, so go on to step 2.

    The Etsy shop tab with a shop name typed in and the Show my listings button 1 2 3
    Tip: A link to one listing works too: paste it in the same box and you skip straight to step 3.
  2. 2

    Pick a listing

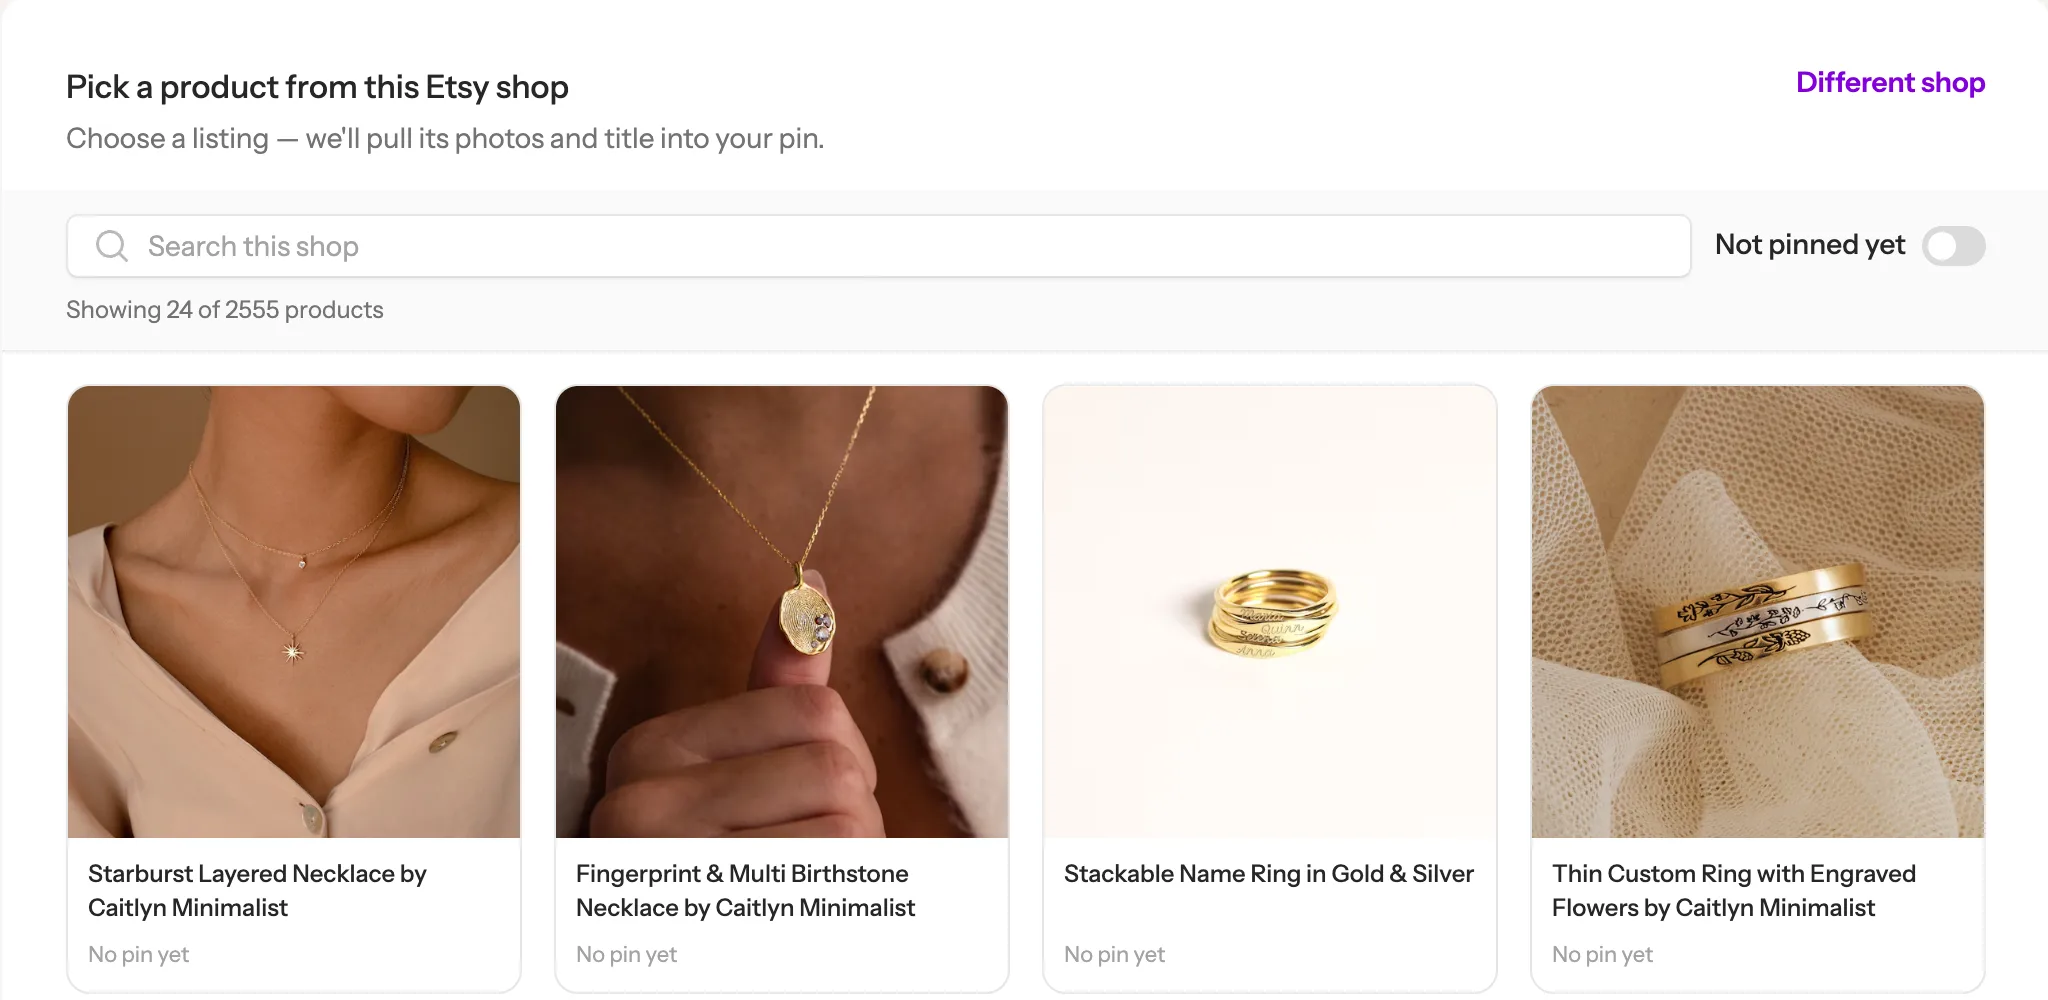
    Your listings appear with their photos. Click the one you want pins for. Use Search this shop to find it fast, or turn on Not pinned yet to see only the listings that have no pin. Here we use a star necklace from the Caitlyn Minimalist shop.

    The listings of an Etsy shop with photos, a search box and a Not pinned yet switch Click a listing
  3. 3

    Choose where your product should be shown

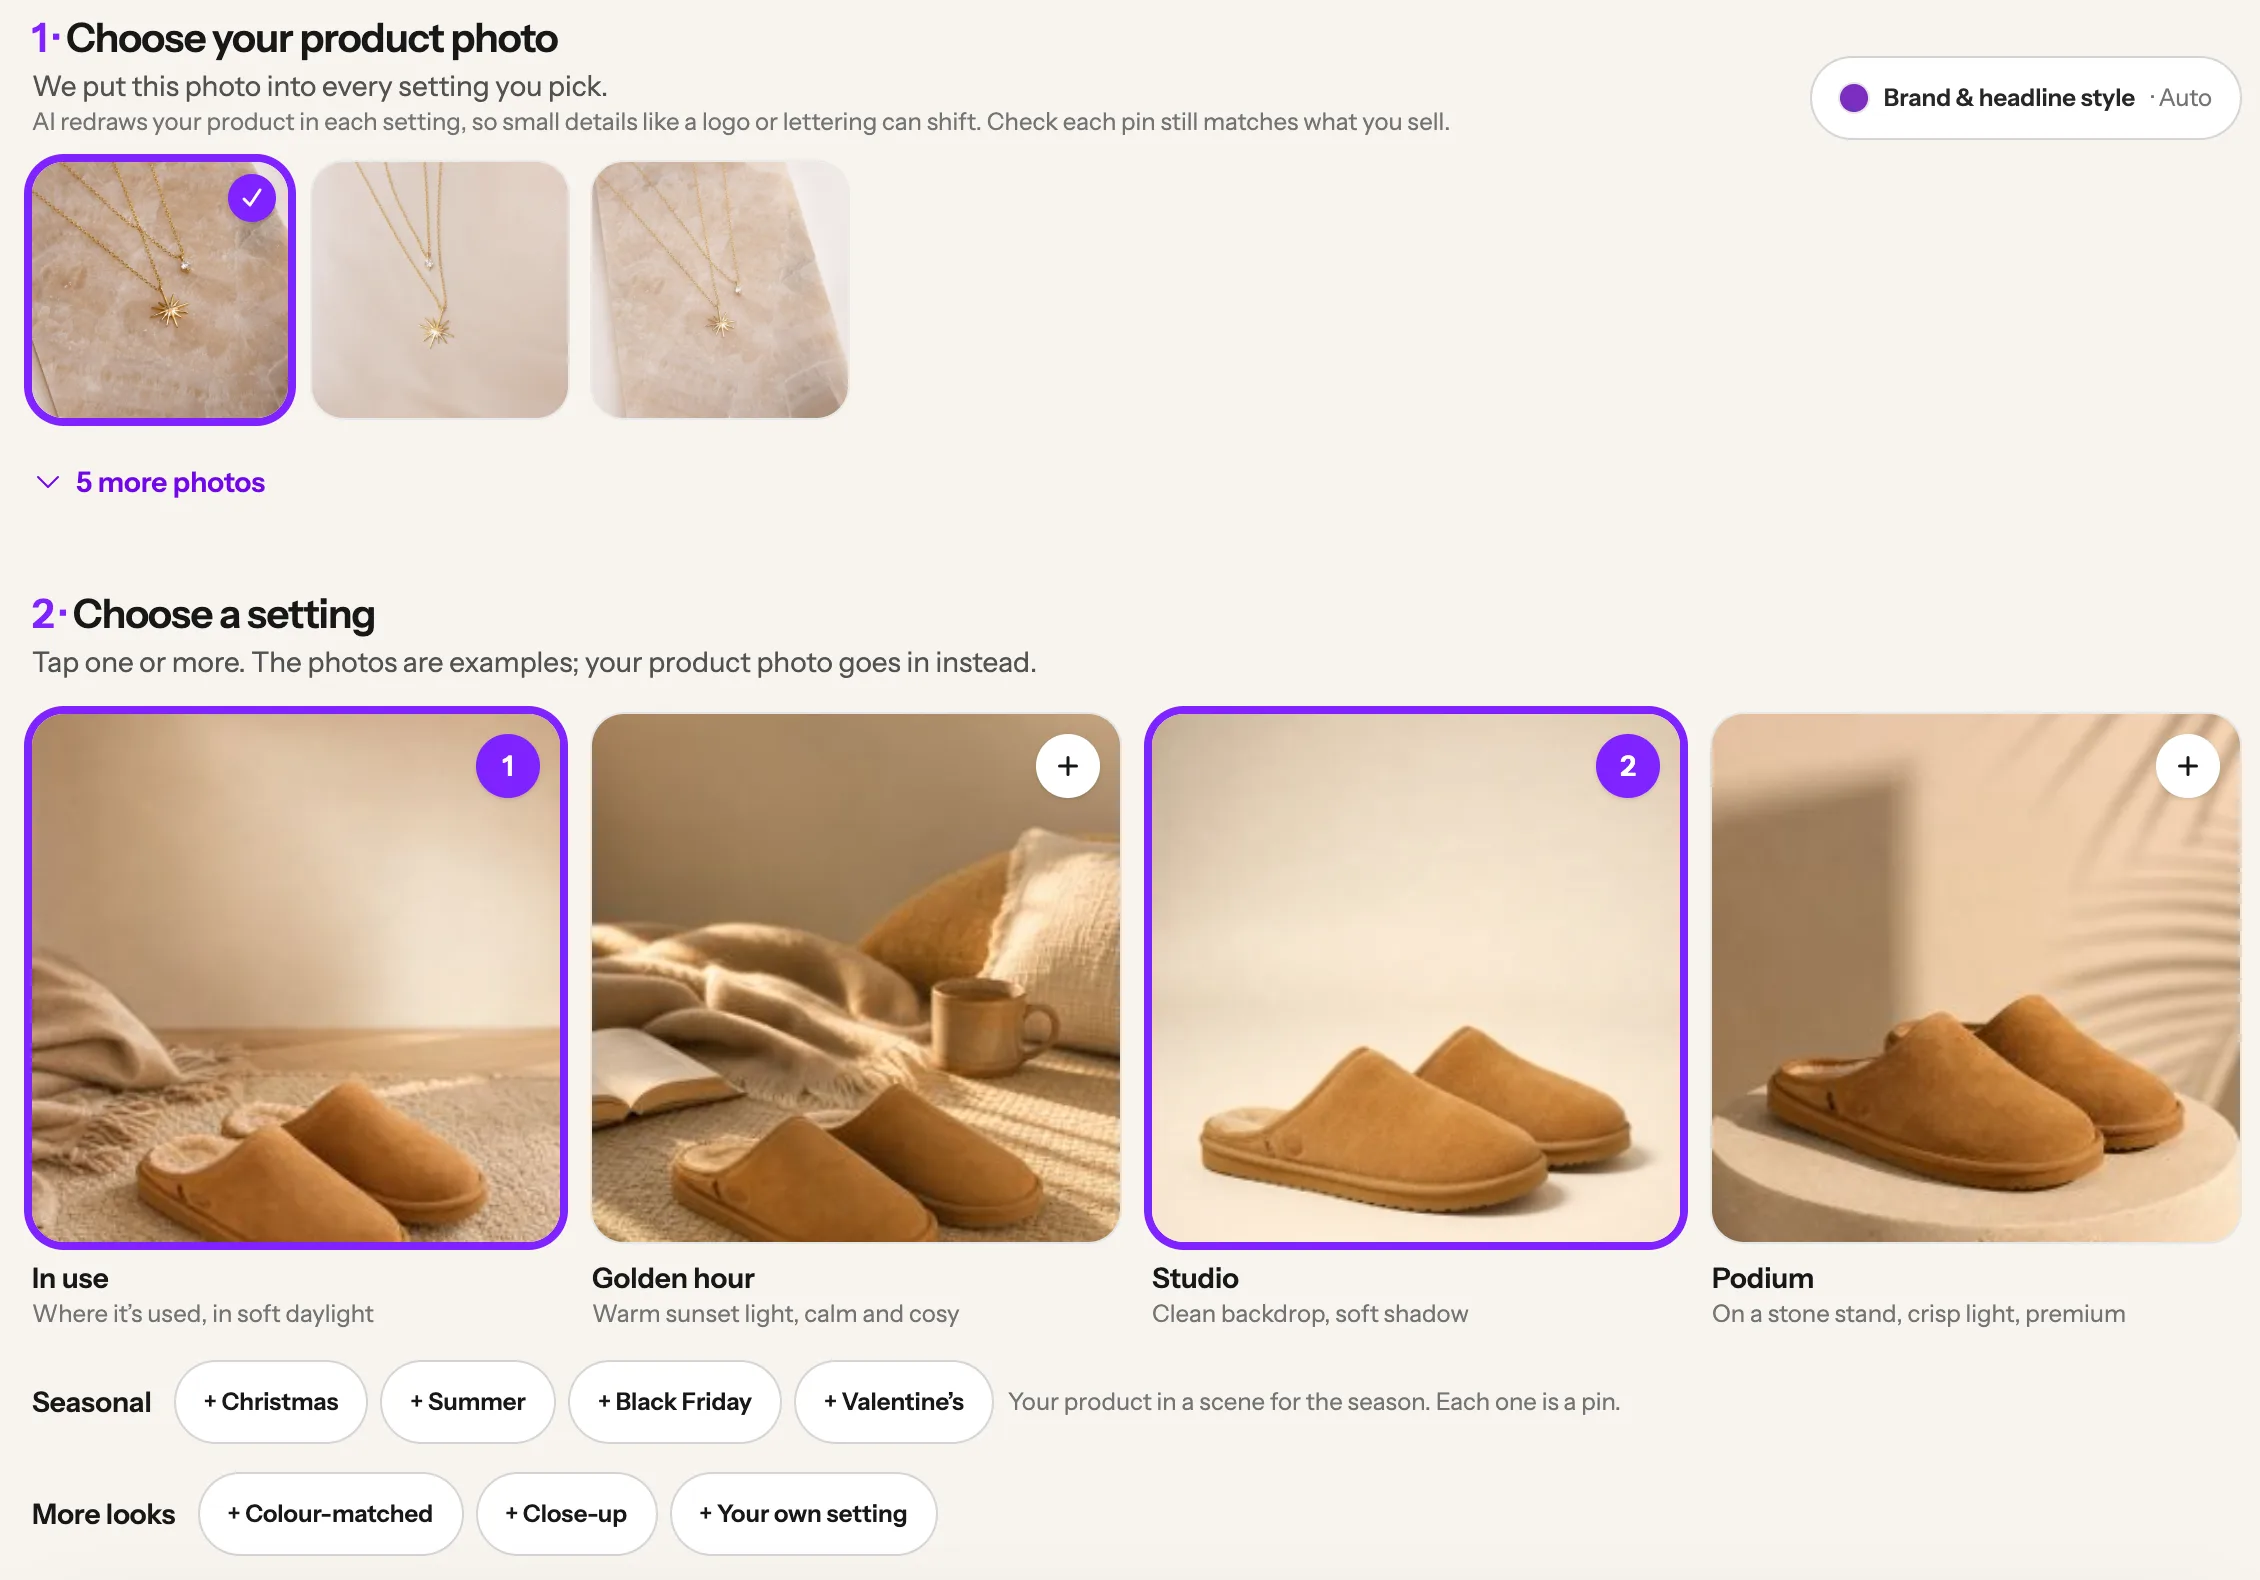
    Made to Spark picks your clearest listing photo and puts your product into new photo settings. Each setting you choose becomes one pin and uses 1 credit.

    1. 1 Check the product photo at the top. If there’s more than one, tap the one you like best.
    2. 2 If you have enough credits, two settings are already chosen for you: In use and Studio. A chosen card shows a number. Tap + on another card to add it, and tap a chosen card to take it out. The photos on the cards are examples (here, slippers): your product goes in instead.
    3. 3 Want more ideas? The chips under Seasonal and More looks work the same way, and + Your own setting lets you describe a place in your own words.
    The listing photos with the chosen one ticked, then setting cards: In use, Golden hour, Studio and Podium, and the Seasonal and More looks chips 1 2 Tap + to add 3
    Tip: AI redraws your product in each setting, so a tiny detail can shift. Check each pin still matches what you sell. Want pins made from your own listing photos instead? Click the Templates tab at the top right. Selling a digital download? Then the Templates tab opens first and no settings are chosen for you.
  4. 4

    Check the words, then click Make

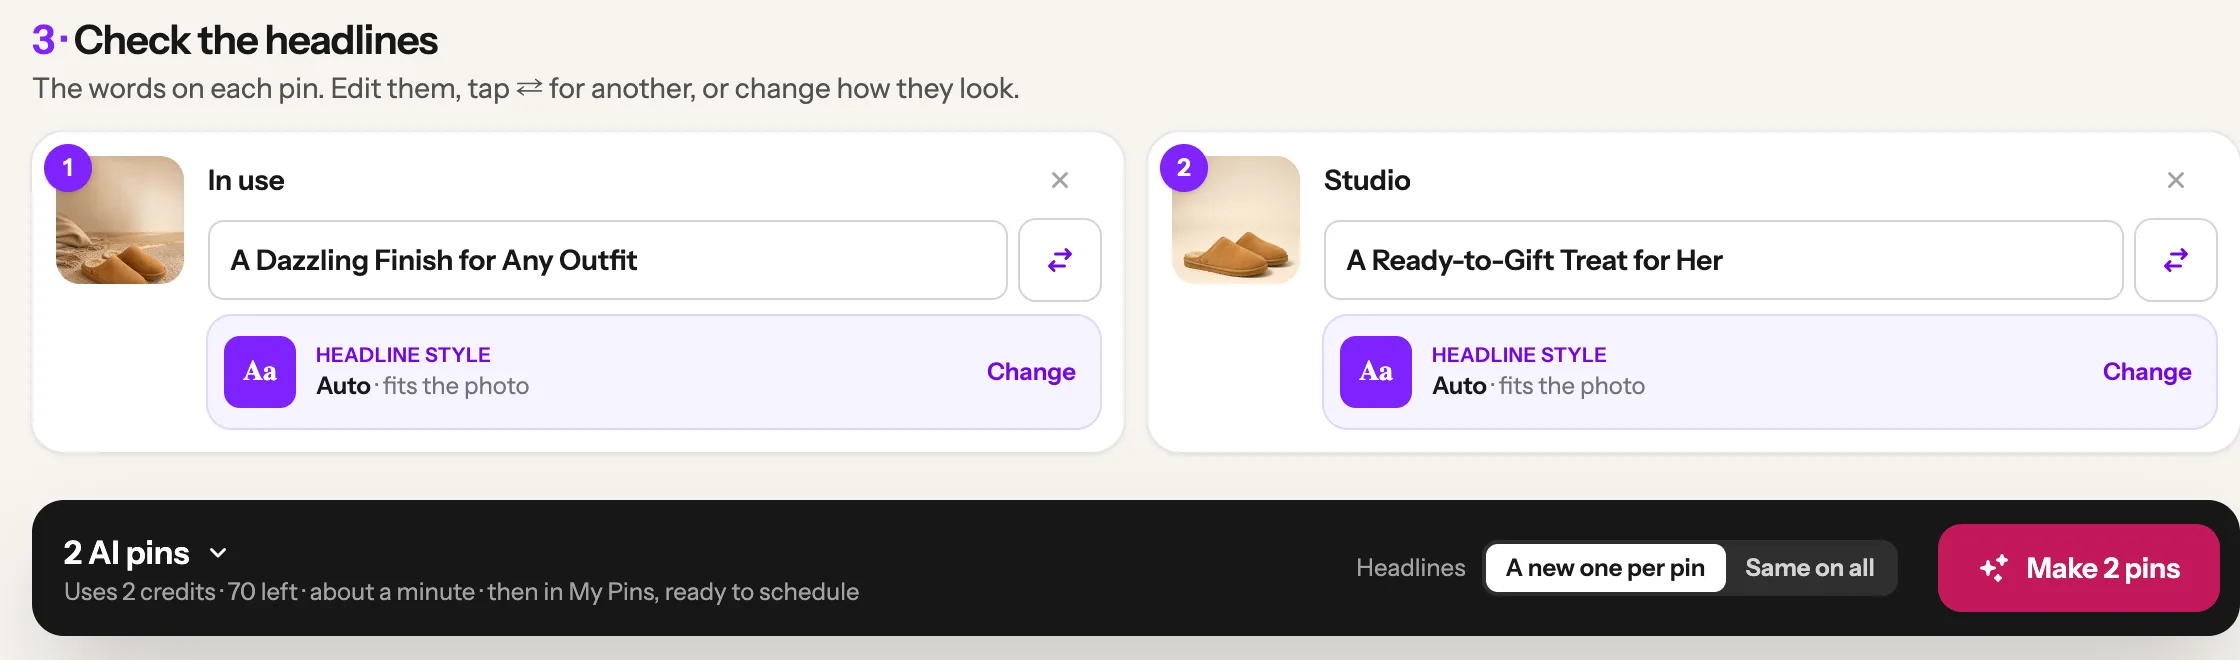
    Each pin gets a short headline written from your listing. The small picture next to it is the example photo of that setting, not your pin:

    1. 1 Click a headline to change the words, or tap the arrows next to it for a new one.
    2. 2 Click the Make button at the bottom. It counts the settings you chose: with the two chosen for you, it reads Make 2 pins. The bar shows what it uses: one credit per setting. Not enough credits? The button turns into one to get more.
    The headline for each pin and the Make 2 pins button 1 2
    Tip: To change how the words look, click Change next to Headline style. Auto picks the design that suits each photo.
  5. 5

    Wait about a minute: your pins are ready

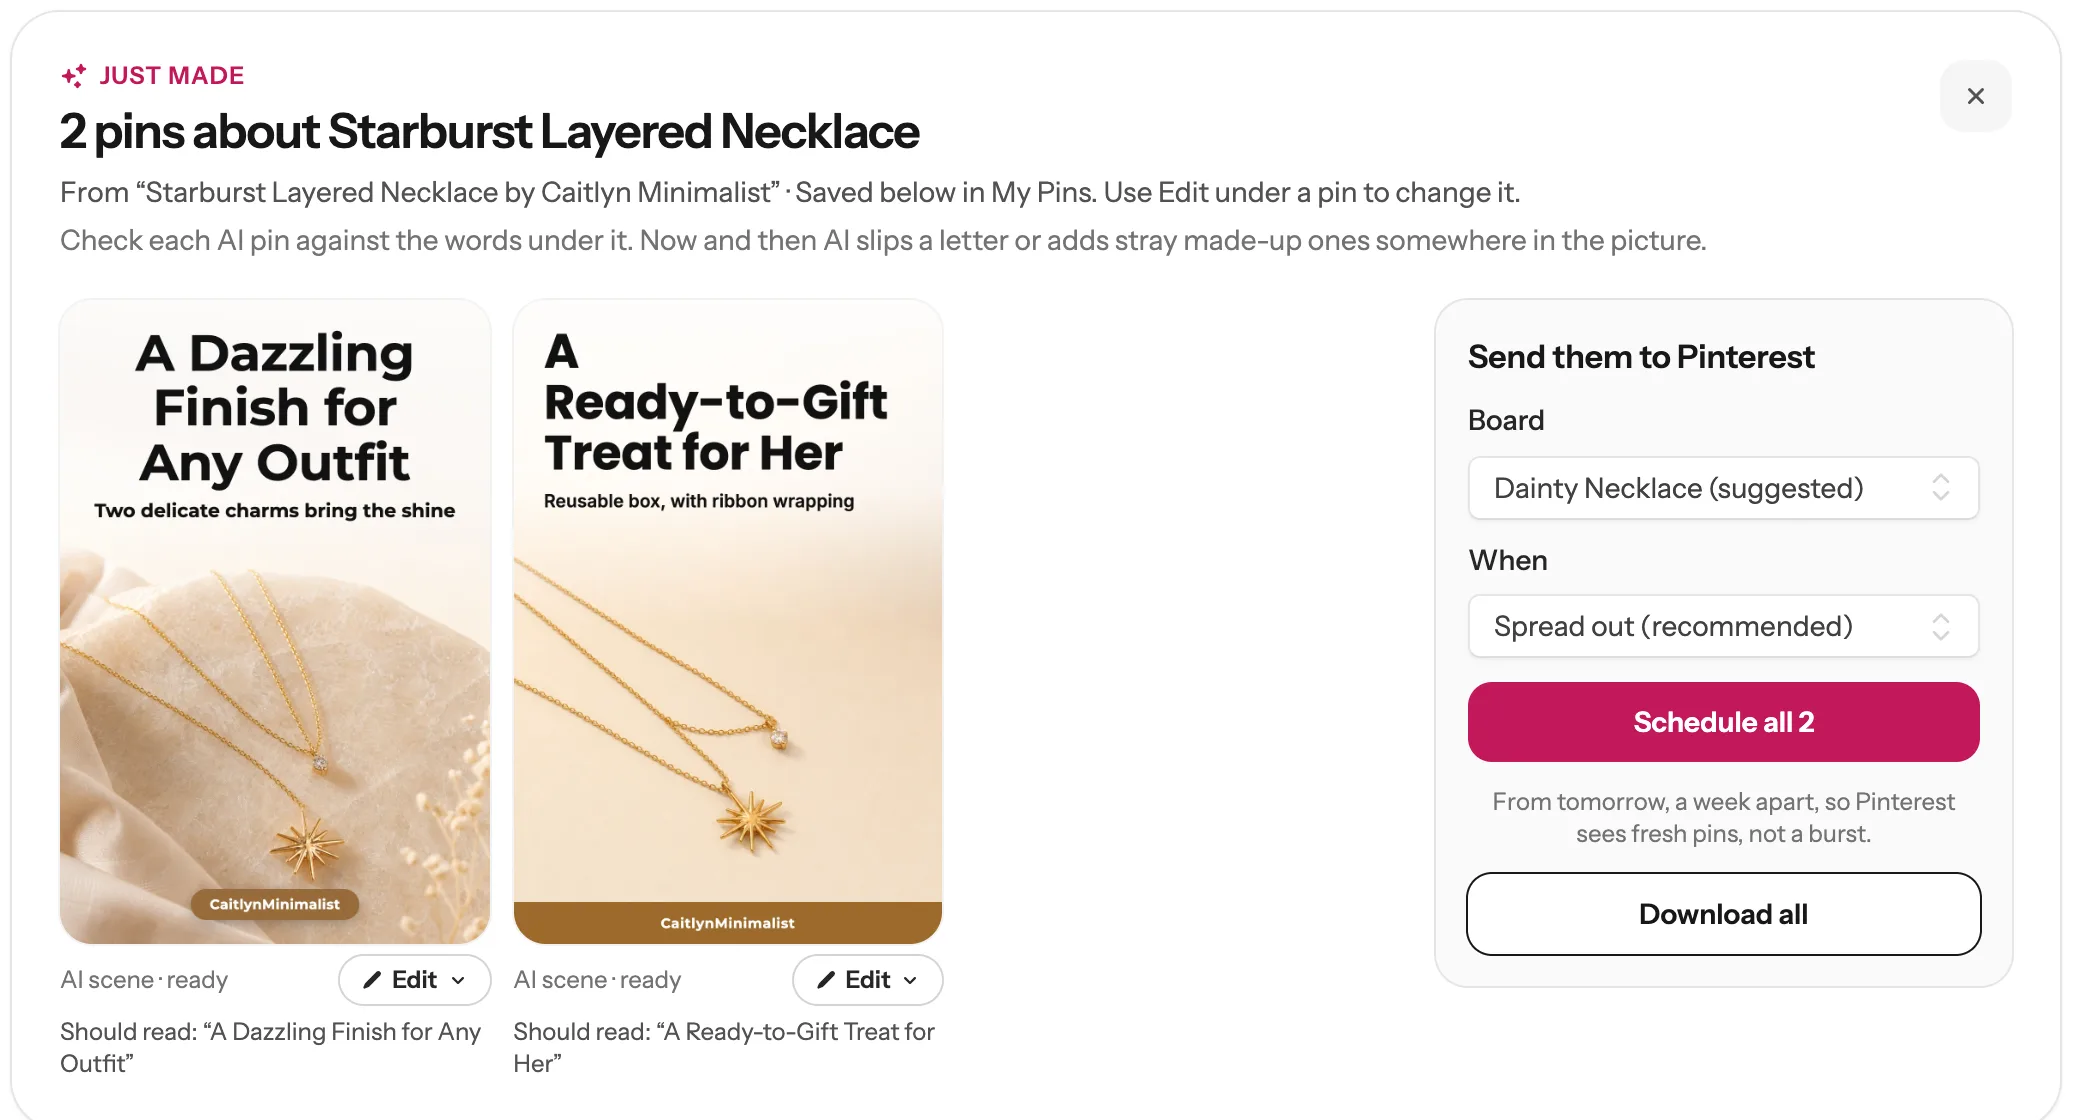
    You land on My Pins, where the “Just made” panel at the top shows them being drawn. Under each pin it says what the words should read. Compare them: now and then AI slips a letter or adds a few made-up ones. If a word is wrong, click Edit under that pin, then Edit headline (no credit).

    Two finished Pinterest pins of the star necklace, each with the words it should read underneath
  6. 6

    Send them to Pinterest

    On the right of your pins:

    1. 1 First time? Click Connect Pinterest and allow access on Pinterest. You only do this once, and it brings you straight back to your pins.
    2. 2 Pick a board. AI looks at your pins and your board names and chooses the best match, marked (suggested). If you pinned this page before, it picks that board. You can always choose another one.
    3. 3 Leave When on Spread out (recommended). Pins for the same listing go out a week apart, so Pinterest sees fresh pins, not a burst.
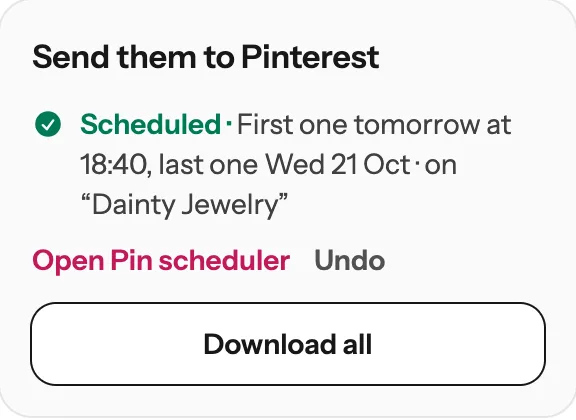
    4. 4 Click Schedule all 2. You see when they go out and on which board. Changed your mind? Click Undo.
    The Send them to Pinterest box with the board, When and Schedule all 2 controls 2 3 4
    Scheduled: first one tomorrow, last one next week, on the Dainty Jewelry board
    Tip: Every pin links to your Etsy listing. Rather upload them to Pinterest yourself? Click Download all. If you see See plans with the scheduler instead of Connect Pinterest, scheduling isn’t in your account yet (it comes with every subscription plan): click Download all and upload the pins to Pinterest yourself.

Done! Here are the 2 pins from this guide

One Etsy listing, two settings, two pins ready for Pinterest. Each one links to the listing.

Pinterest pin of a star necklace, in use setting
In use
Pinterest pin of a star necklace, studio setting
Studio

Next guide

Schedule your pins, and post them to more than one board

From My Pins, or fill your whole Pinterest calendar in one click.

Questions

Do I need to connect my Etsy account?

No. Type your shop name or paste your shop link and Made to Spark shows your public listings. No Etsy login is needed.

How many credits does this use?

Each AI setting uses 1 credit, so 2 settings use 2 credits. Pins made with the Templates tab use your listing photos and are included in subscription plans. If you don’t have enough credits, the Make button turns into a button to get more.

Where does the pin link to?

Straight to your Etsy listing, so people who click the pin on Pinterest land on the product.

Can I make pins for many listings at once?

Yes, with Bulk Pins. Click Bulk Pins on the left, then the Etsy shop tab, type your shop name and click Show my listings. If your plan doesn’t include Bulk Pins, the same page shows you how it works.

What if something goes wrong?

If a pin doesn’t work, the Just made panel says why, and nothing is charged for it. When you see Try again under it, click it. If no listings show up, check the shop name and that the shop has active listings. If your product looks a little off in a setting, pick another setting and make a new pin.

Stuck on a step? Just reply to any email from us, or use the chat button at the bottom right.