Before you start
- Pinterest connected once: click Connect Pinterest next to your new pins, or click Integrations on the left.
- A plan that includes the scheduler. Scheduling never uses credits.
- Some finished pins in My Pins.
-
1
From My Pins: one pin at a time
Good when you want to choose the board, date and words for one pin yourself.
- 1 Click My Pins on the left.
- 2 Under the pin, click Not scheduled (or the ⋯ button, then Schedule to Pinterest).
- 3 Check the board. AI picks the best match from your boards; you can choose another one.
- 4 Pick the date and time. You can also change the title, the description and the Destination URL (the page people land on when they click your pin).
- 5 Click Confirm & Schedule. Or Publish Now to send it straight away.
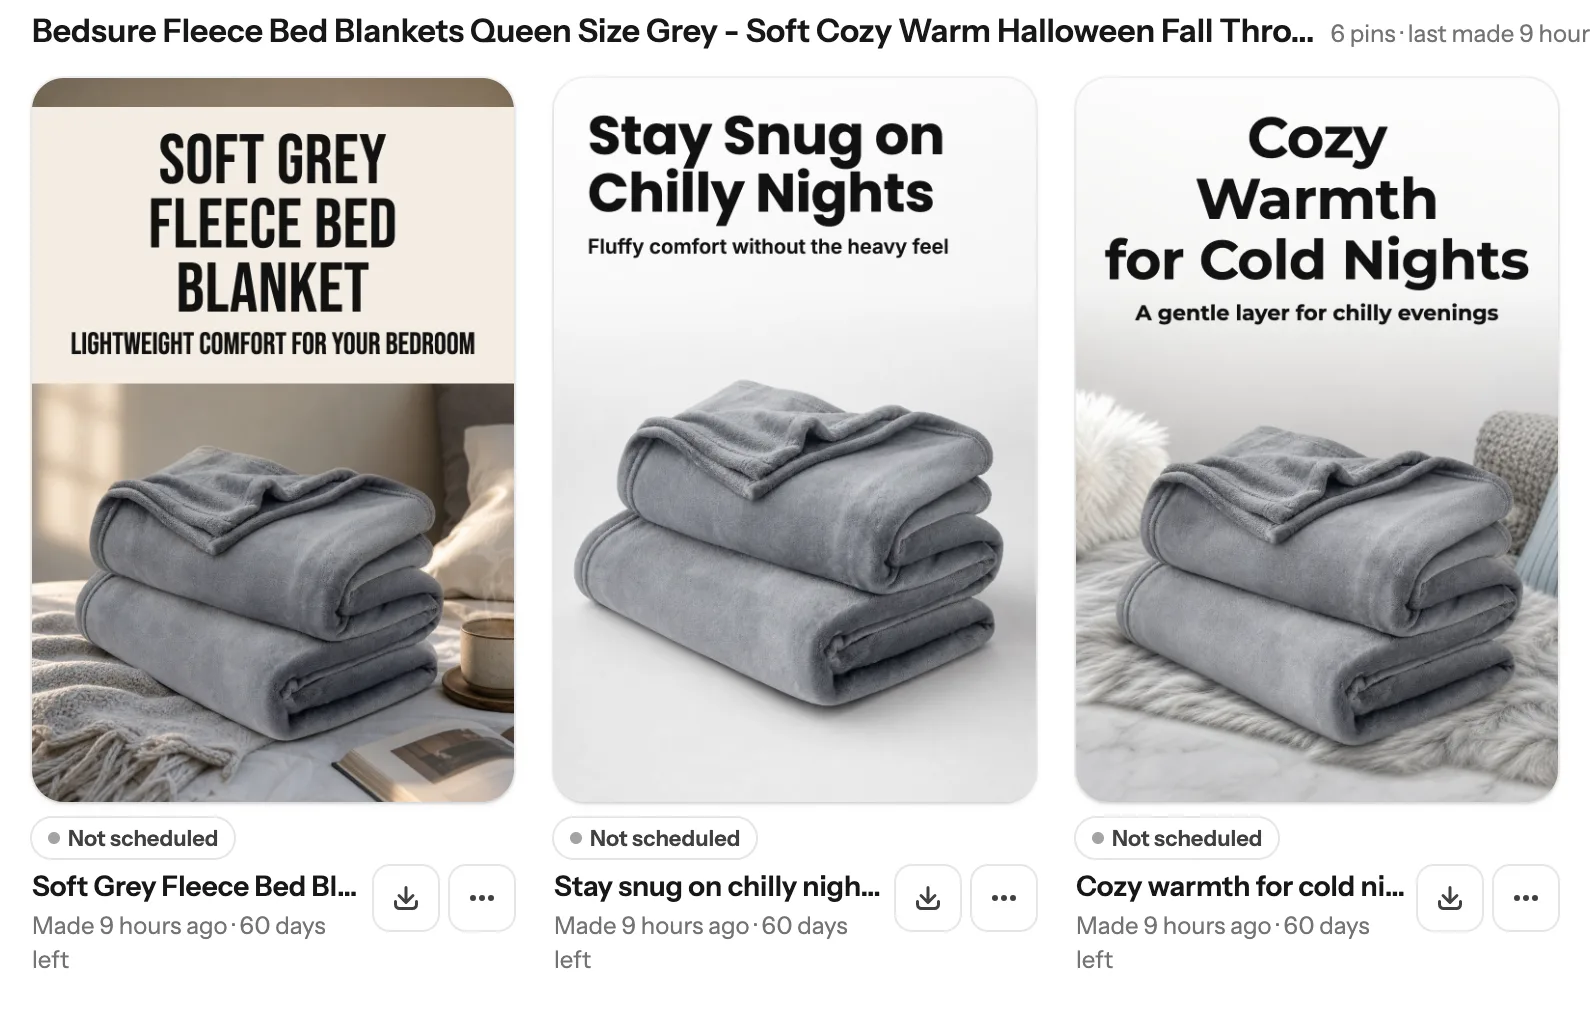 Click Not scheduled
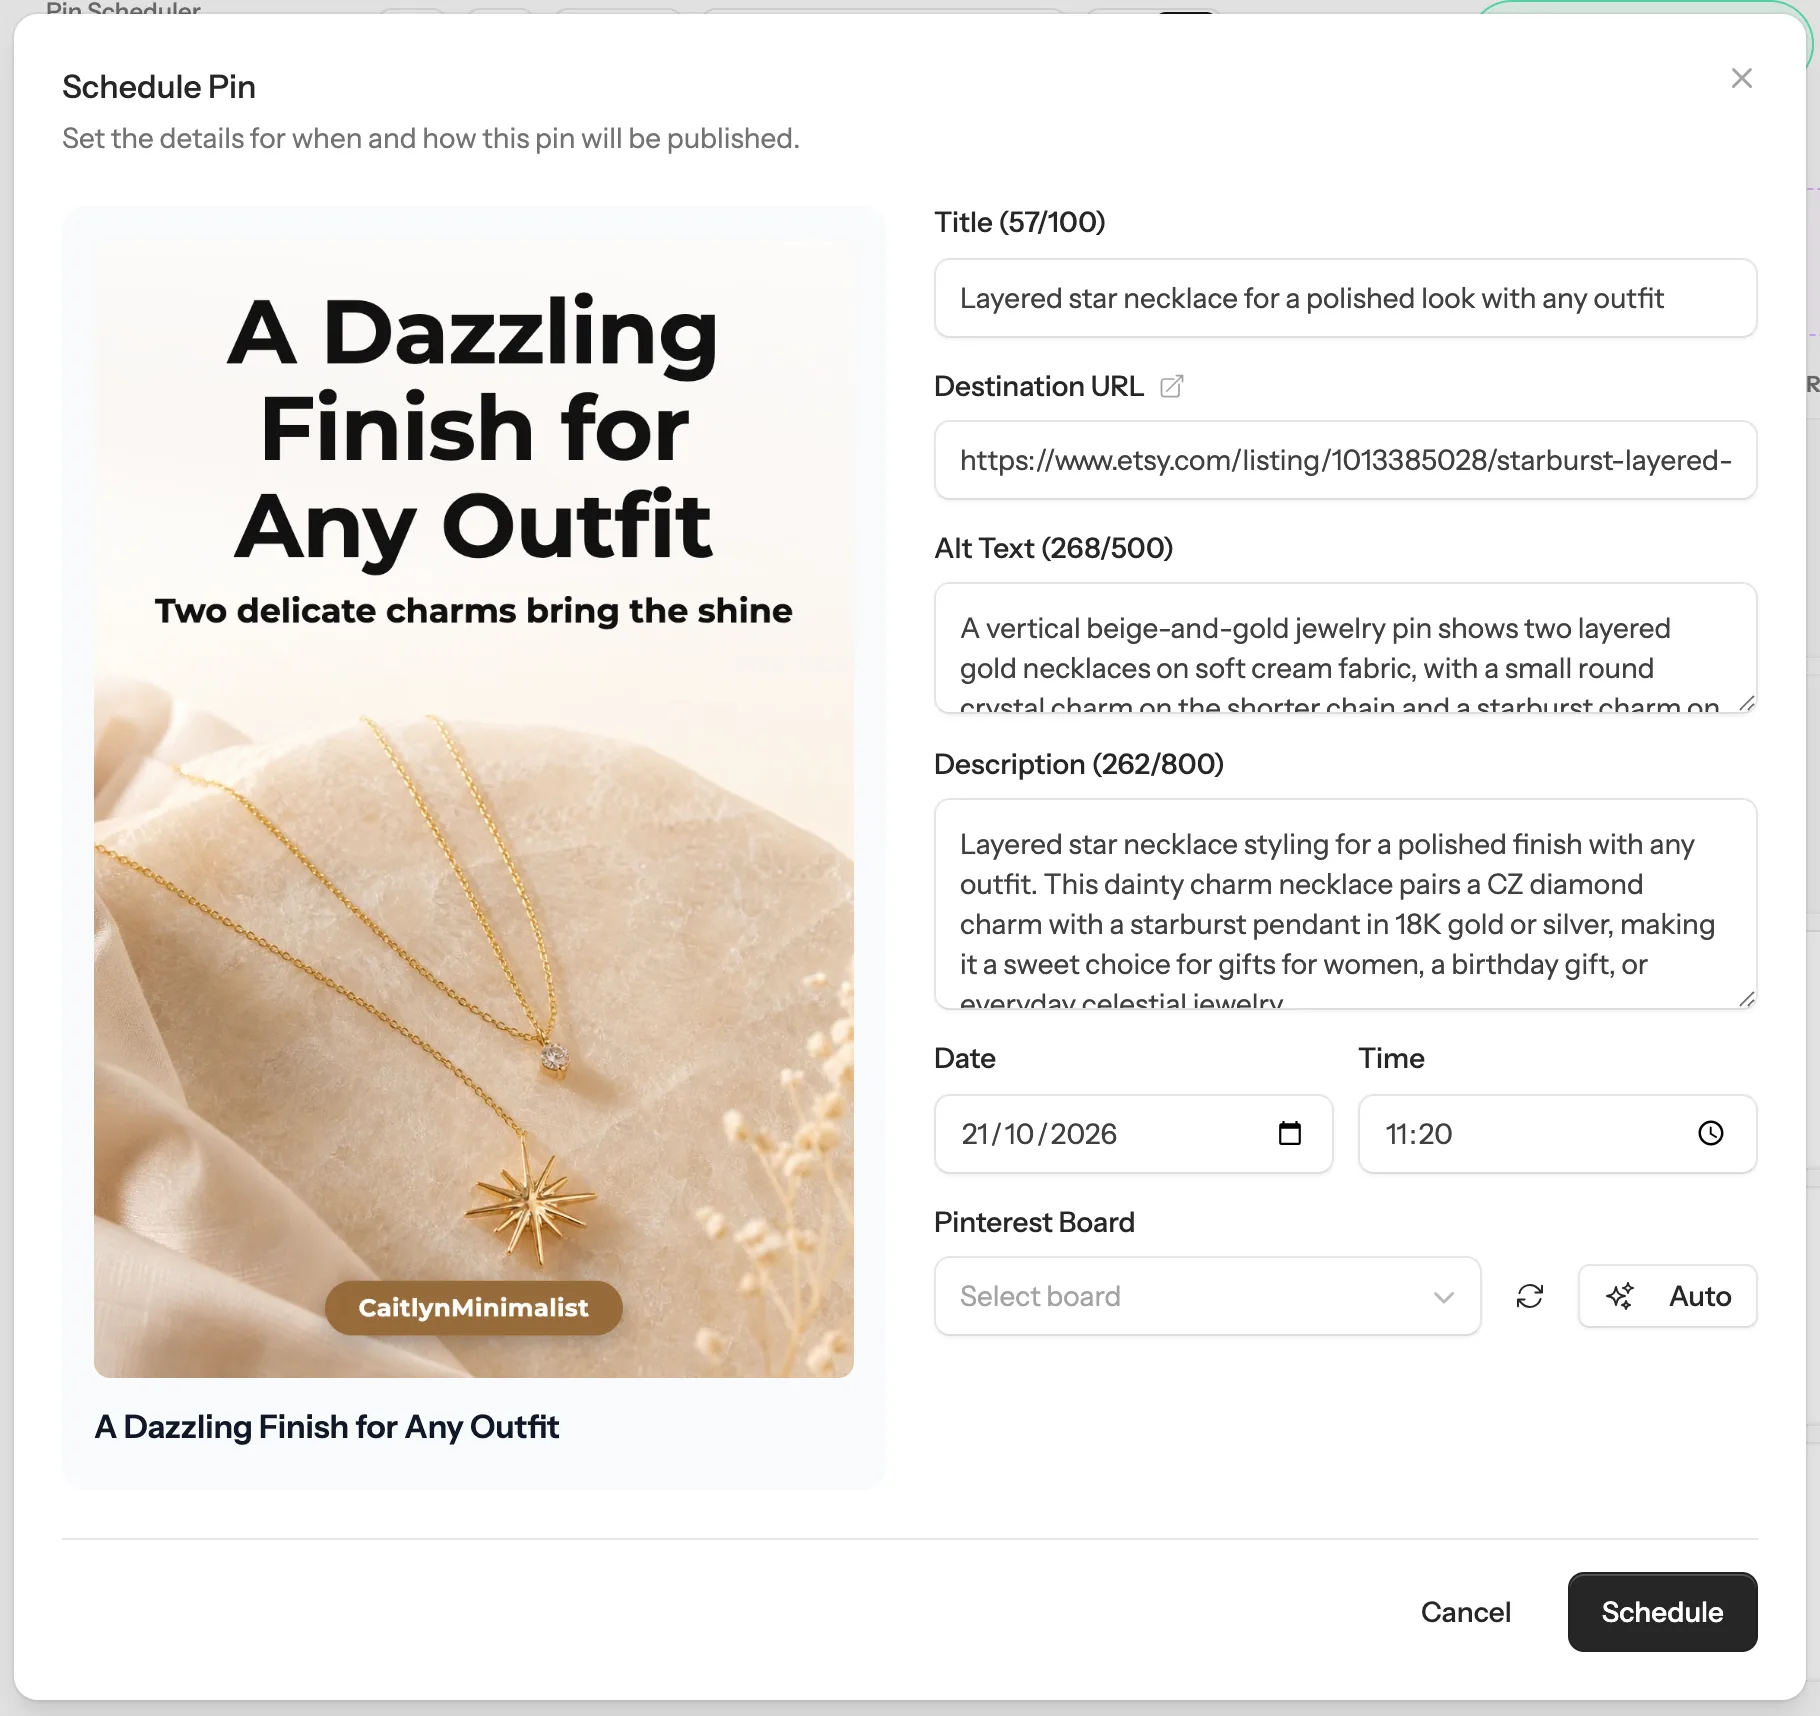 1
2
3
Tip: Just made some pins? You don’t need this: the box next to your new pins has a board picker and a “When” choice. Leave it on “Spread out (recommended)” and click Schedule all (Schedule it for one pin), and they are spread out for you. Prefer your own dates? Choose “Pick dates myself”.
1
2
3
Tip: Just made some pins? You don’t need this: the box next to your new pins has a board picker and a “When” choice. Leave it on “Spread out (recommended)” and click Schedule all (Schedule it for one pin), and they are spread out for you. Prefer your own dates? Choose “Pick dates myself”. -
2
From the calendar: fill it in one click
The fastest way to schedule many pins.
- 1 Click Pin Scheduler on the left. Check the switch at the top: it should say “Auto publish on”. If it says “CSV mode”, your pins won’t go to Pinterest on their own, so click the switch to turn it on.
- 2 At the top right, click the link that ends in ready to schedule (it starts with a number, like “28 ready to schedule”). You see every finished pin that isn’t scheduled yet.
- 3 Click Auto-fill open slots. For each pin, AI picks the best board and a good time, and pins from the same page go out days apart.
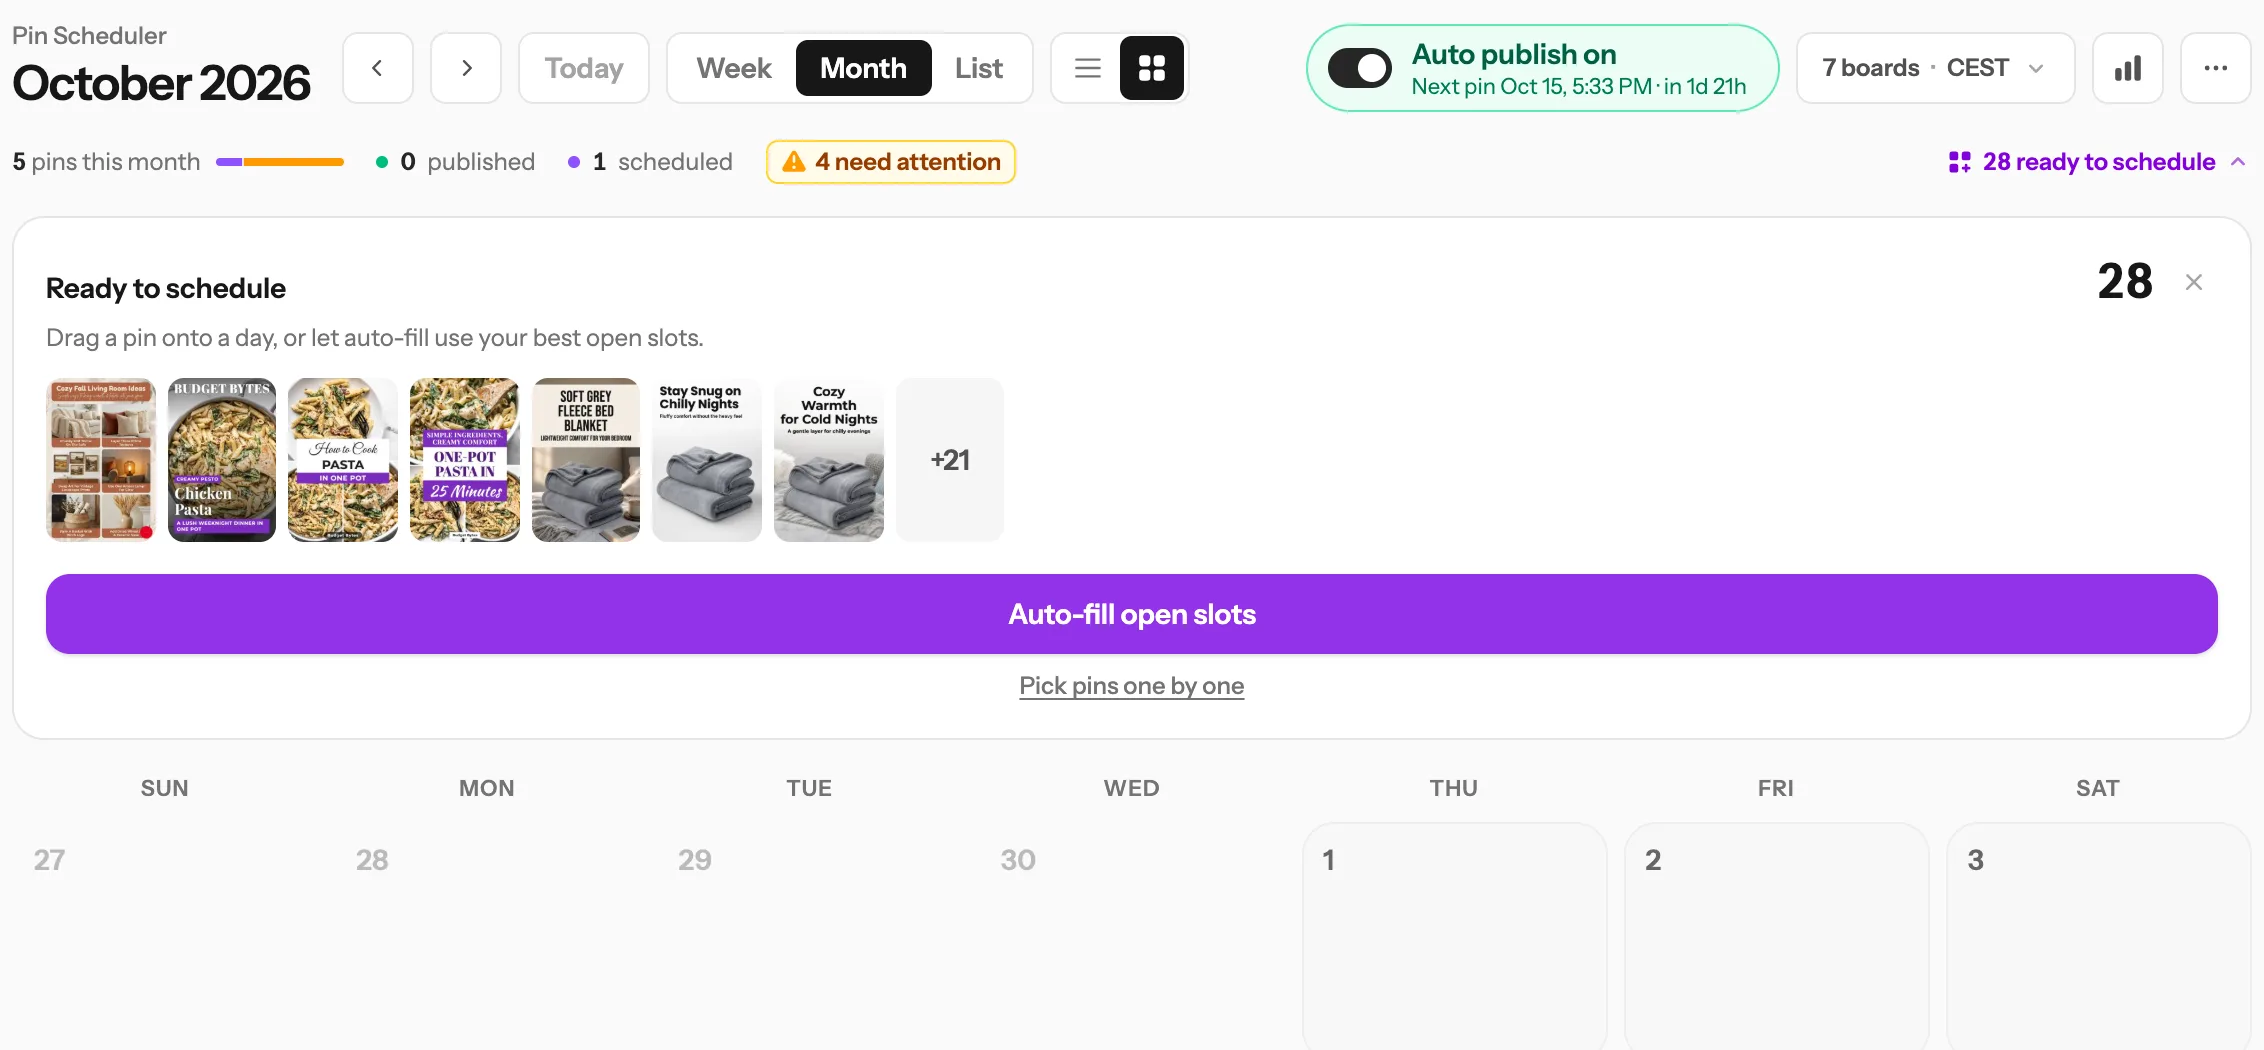 1
2
3
1
2
3
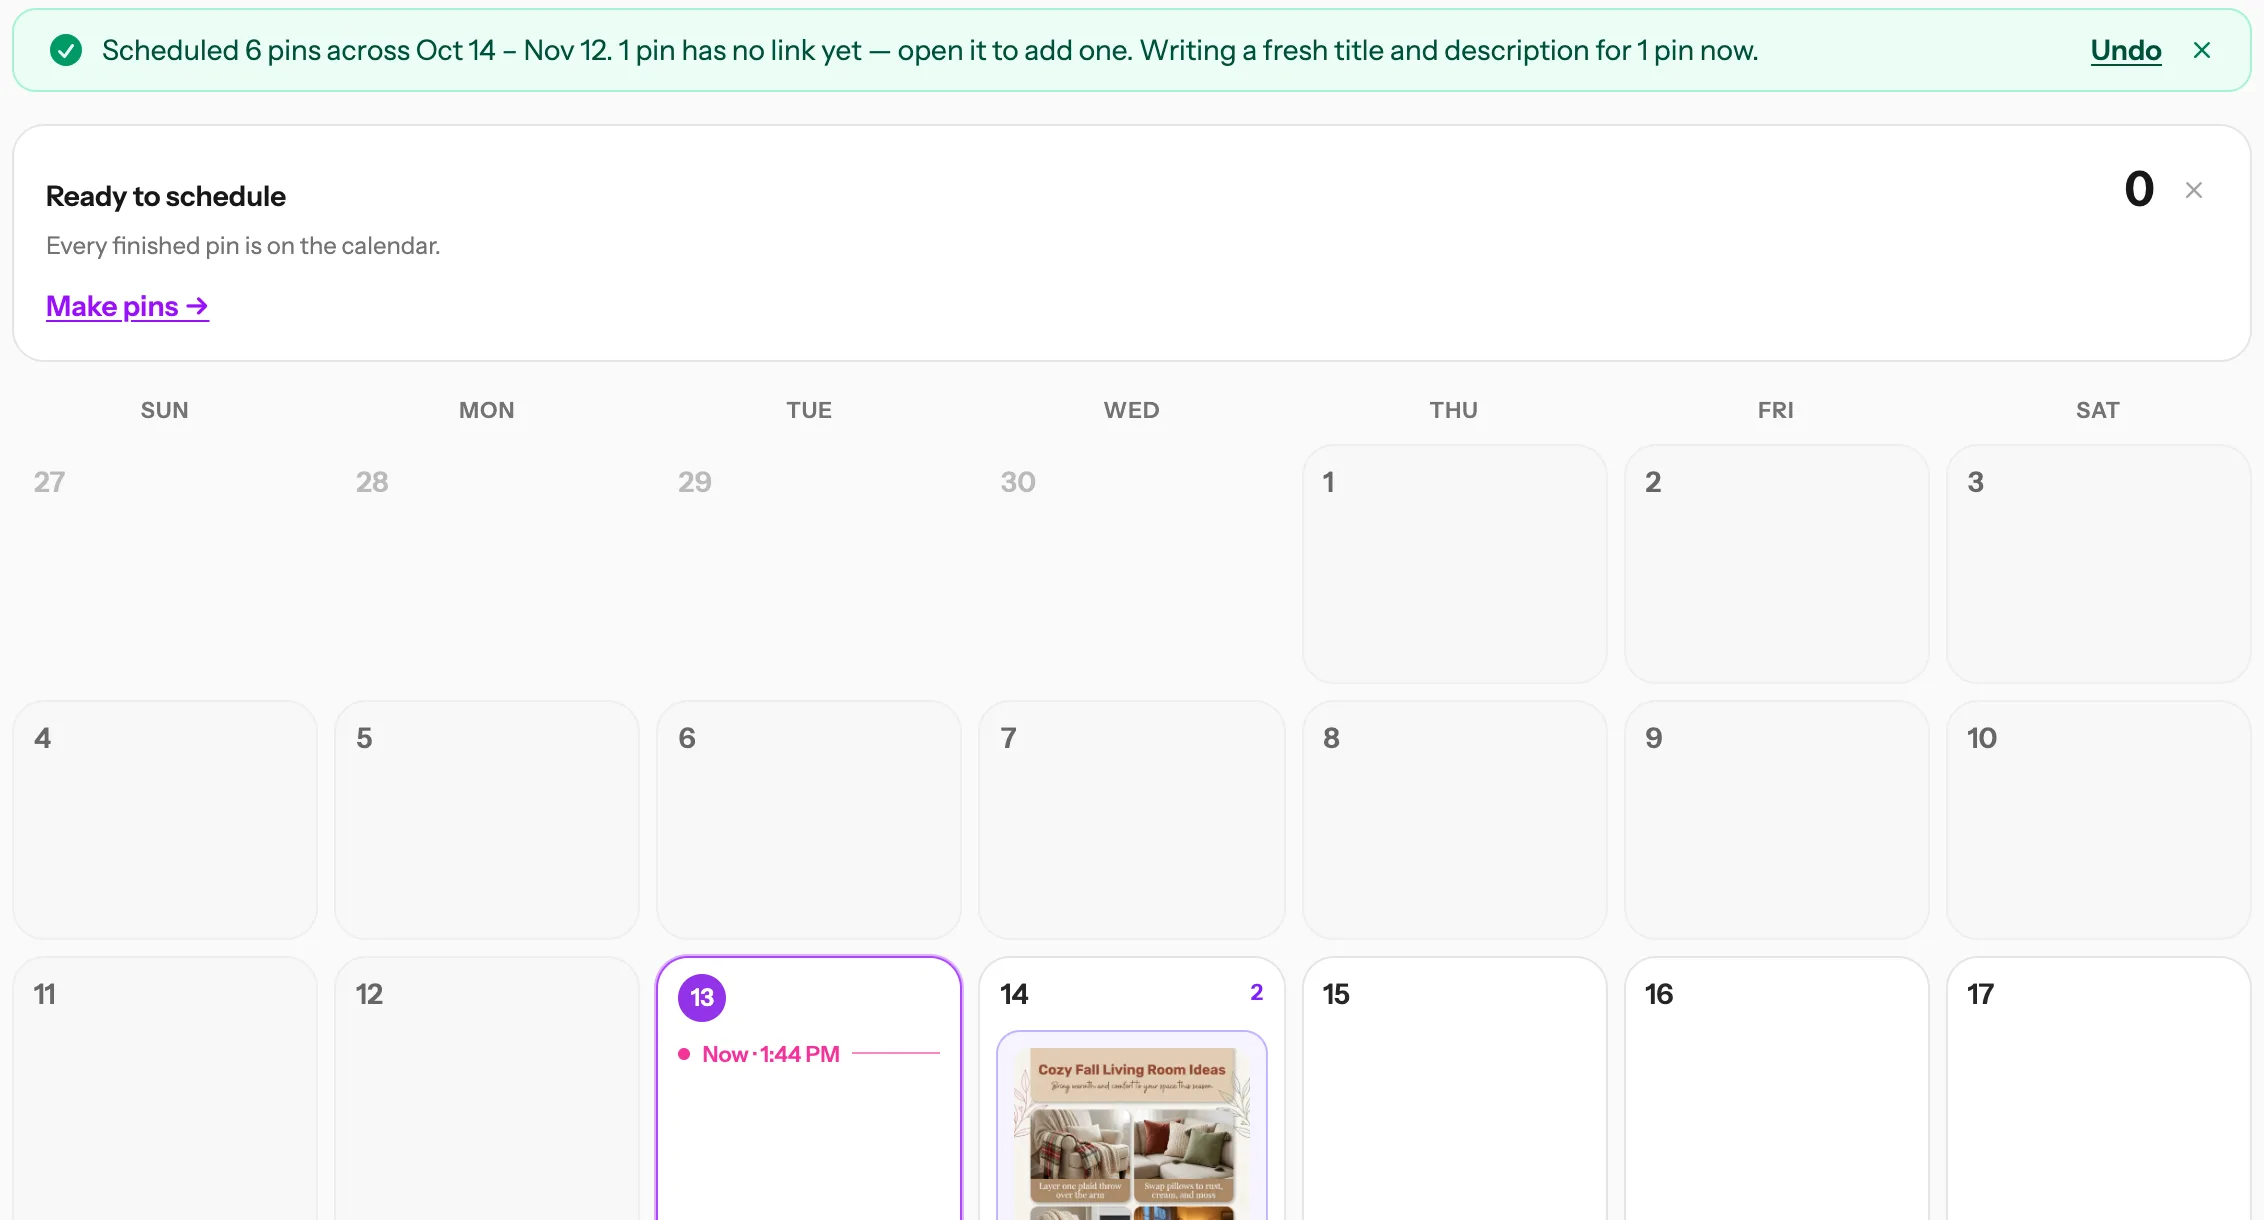 Undo
Tip: Not happy with it? Click Undo in the green bar. You can also drag a pin from the tray onto any day yourself. If the green bar says a pin “has no link yet”, that pin doesn’t know which page to send people to: click it on the calendar and fill in the Destination URL.
Undo
Tip: Not happy with it? Click Undo in the green bar. You can also drag a pin from the tray onto any day yourself. If the green bar says a pin “has no link yet”, that pin doesn’t know which page to send people to: click it on the calendar and fill in the Destination URL. -
3
From the calendar: pick a pin for a day
Good when you want a certain pin on a certain day, like a Christmas pin in early December.
- 1 In the Pin Scheduler, click an empty day (or Pick pins one by one in the tray).
- 2 Click the pin you want for that day. You can search your pins at the top. If the day already has pins, click Add Pin to This Day first to see the rest.
- 3 The Schedule Pin window opens with that day filled in. Choose a board (or click Auto next to it and AI picks one), check the time, then click Schedule.
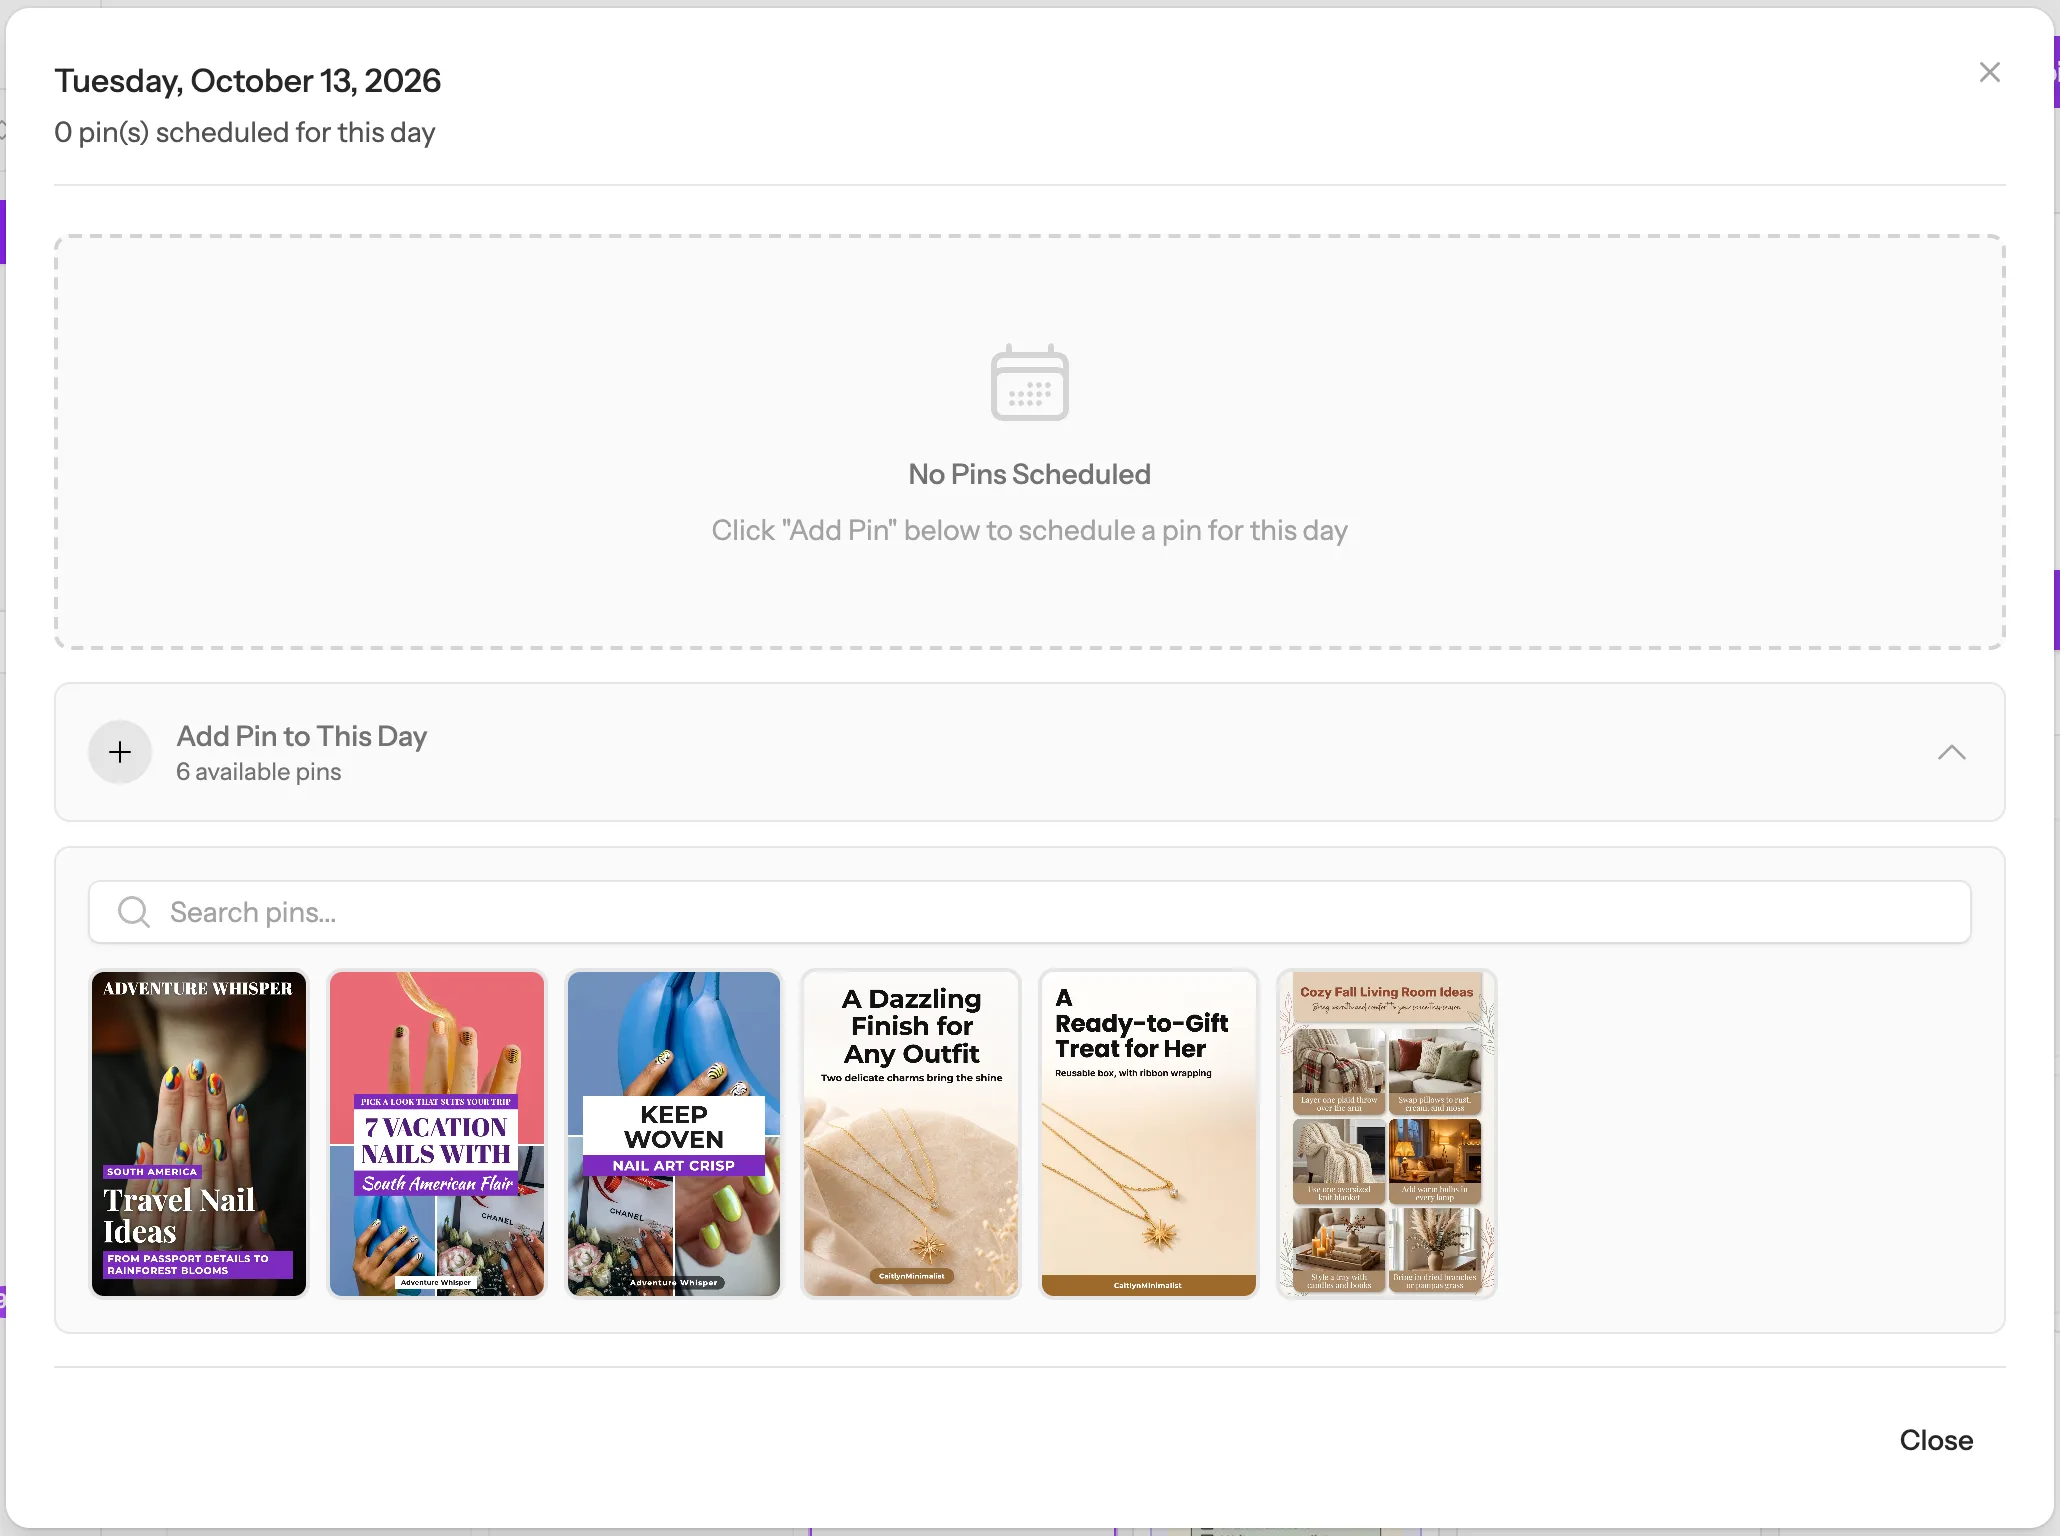 Click a pin
3
Schedule
Click a pin
3
Schedule
Then choose a board and click Schedule. -
4
Change or move a scheduled pin
Click any pin on the calendar. You can change its date and time, board, title, description and Destination URL (its link). Each change saves as soon as you make it. Publish Now sends it right away, and Remove takes it off the calendar (the pin stays in My Pins).
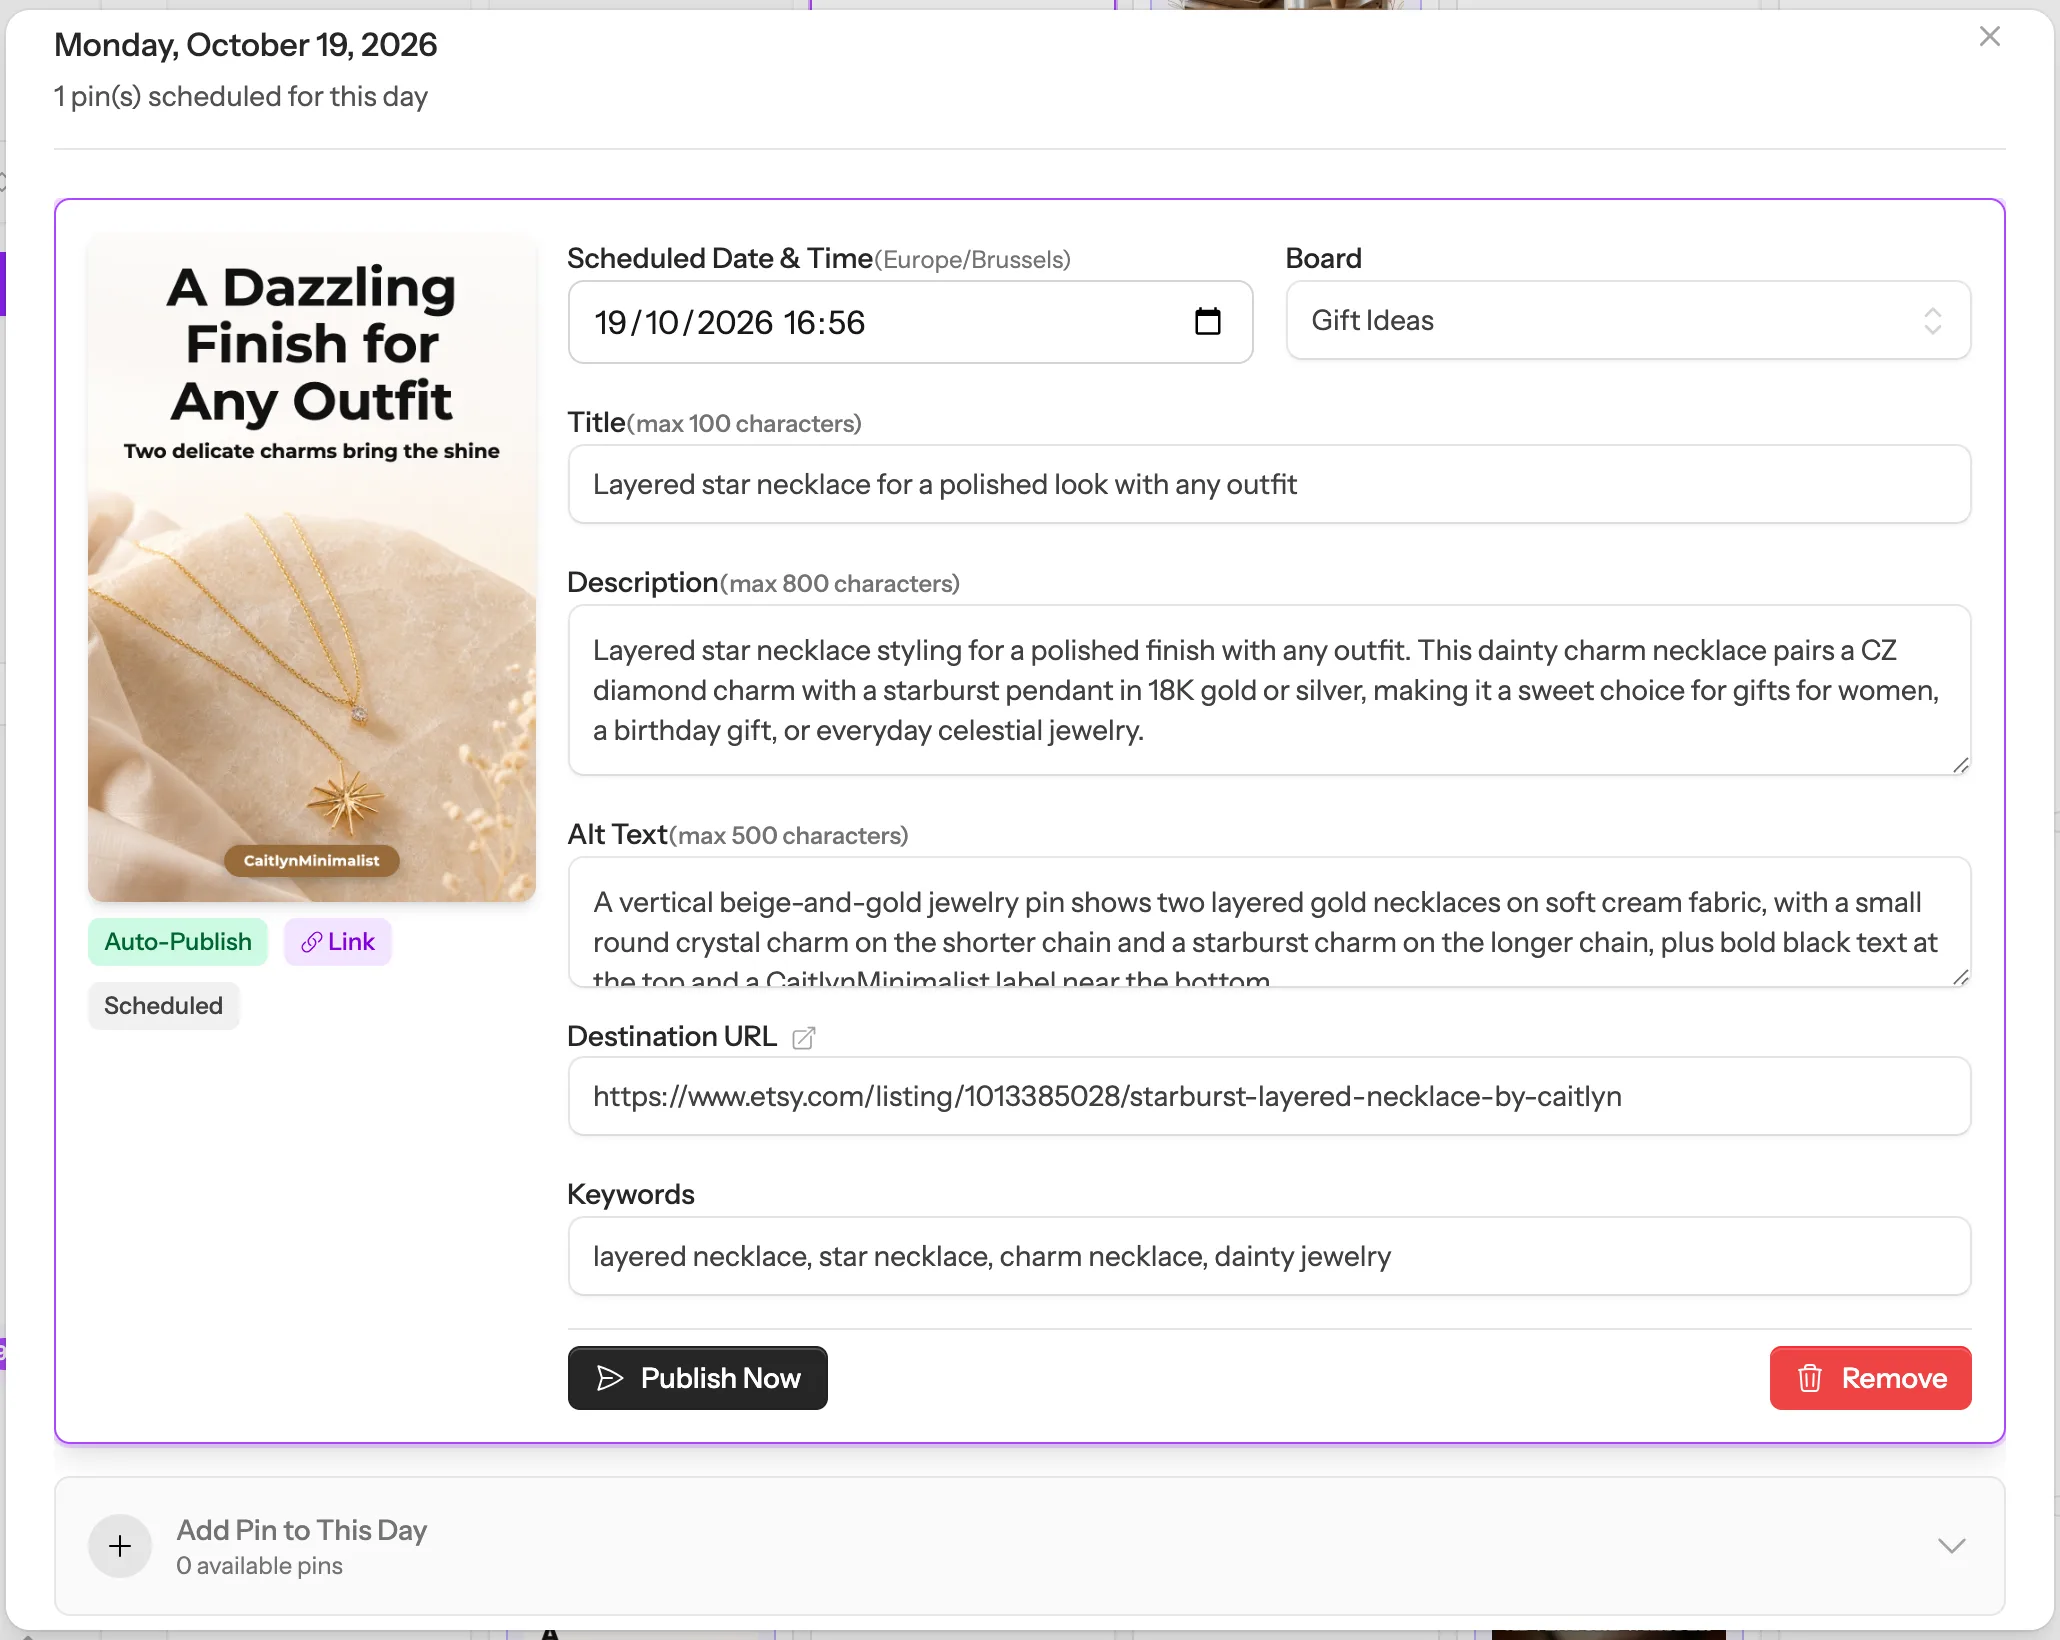 1
2
3
4
1
2
3
4
What about pinning to several boards?
The best way: make a few different pins for the same page, then let Auto-fill open slots or Schedule all spread them out. Each design goes to a board that fits, days apart. Under your new pins, Make more for this page gets you fresh designs in a minute.
The same pin again: once a pin has gone out, open it in My Pins and click Schedule again. Made to Spark starts you on a board that pin hasn’t been to, and asks for a later date so Pinterest sees it as new. A pin that’s still waiting can only sit on one board; scheduling it again just moves it.
Questions
Can I post the same pin to more than one board?
Not at the same time: clicking Schedule on a pin that is already waiting just moves it. Once it has gone out, open it again in My Pins and choose Schedule again. Made to Spark starts you on a board that pin hasn’t been to and asks for a later date, so Pinterest sees it as new.
What is the best way to cover several boards?
Make a few different pins for the same page (Make more for this page, under your new pins) and let Auto-fill or Schedule all spread them out. Each design can go to a different fitting board, and fresh pins do better on Pinterest than the same picture again.
Does scheduling use credits?
No. Scheduling never uses credits. It comes with every subscription plan; with credits only, download your pins and upload them to Pinterest yourself.
How is the “(suggested)” board picked?
In the box next to your new pins, Made to Spark looks in this order: first the board you used before for pins from the same page, then a board whose name matches the topic, and if neither fits, AI picks the closest one. You only see a suggestion when you have at least two boards. You can always choose a different board.
What does “Didn’t post” mean in My Pins?
Pinterest didn’t take that pin when its time came. Open the Pin Scheduler: the pin sits on its day with a short reason. Click Retry to send it again. If it says Reconnect, connect Pinterest again first. If it says Pick board, choose a board and it can go out.
Is there a limit on how many pins go out each day?
Yes. There is a daily limit on how many pins you can schedule, and it depends on your plan. Auto-fill stays within it for you. If you move a pin to a day that is already full, you are asked to pick another day.
Do I need to connect Pinterest first?
Yes, once. Click Connect Pinterest next to your pins or in Settings, Integrations. Made to Spark uses the official Pinterest API.
Stuck on a step? Just reply to any email from us, or use the chat button at the bottom right.