Clicky

Step-by-step guide · 6 steps · about 4 minutes

How to make Pinterest pins in bulk

Tick a few blog posts, or paste a list of Amazon links. A minute later you have a pile of finished pins, each in its own design. You check them, fix the odd one and approve them all at once. Here’s the whole thing, click by click, with a real travel blog and three Amazon products.
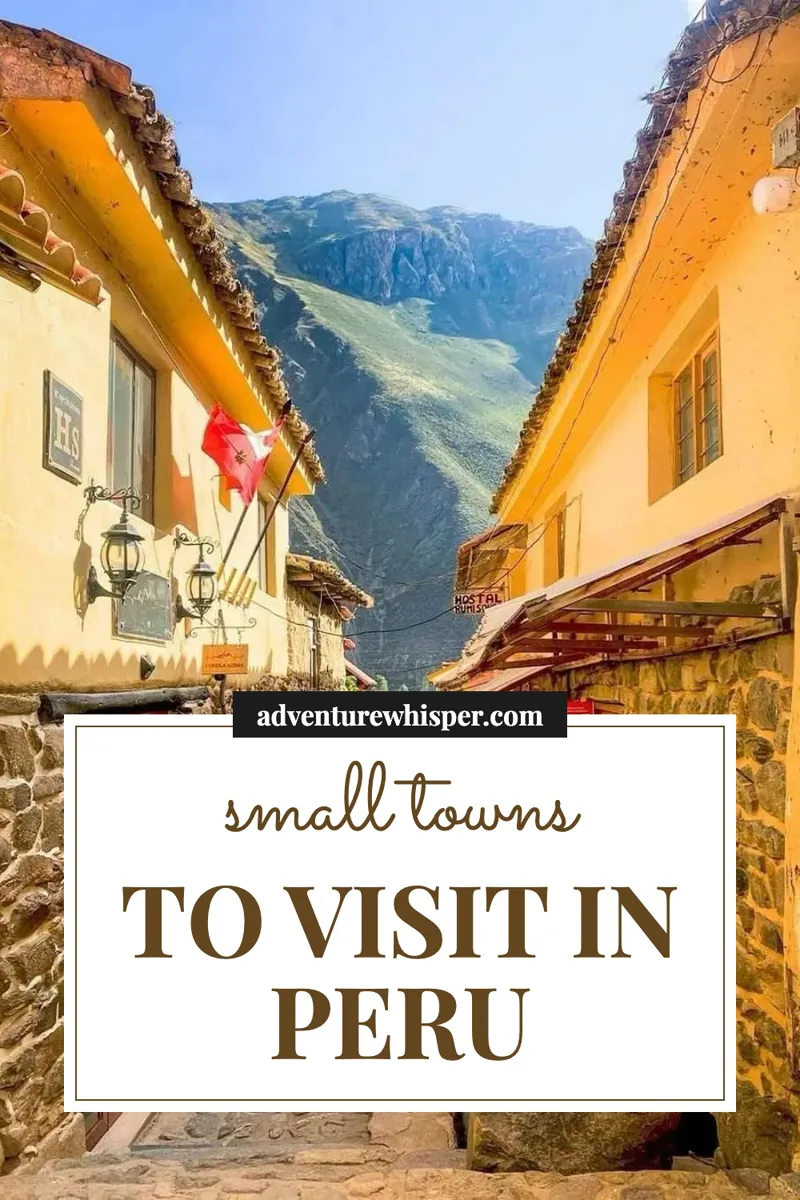
Pinterest pin made from a Peru travel post Pinterest pin made from a Peru travel post Pinterest pin made from a Peru travel post
From 3 travel blog posts
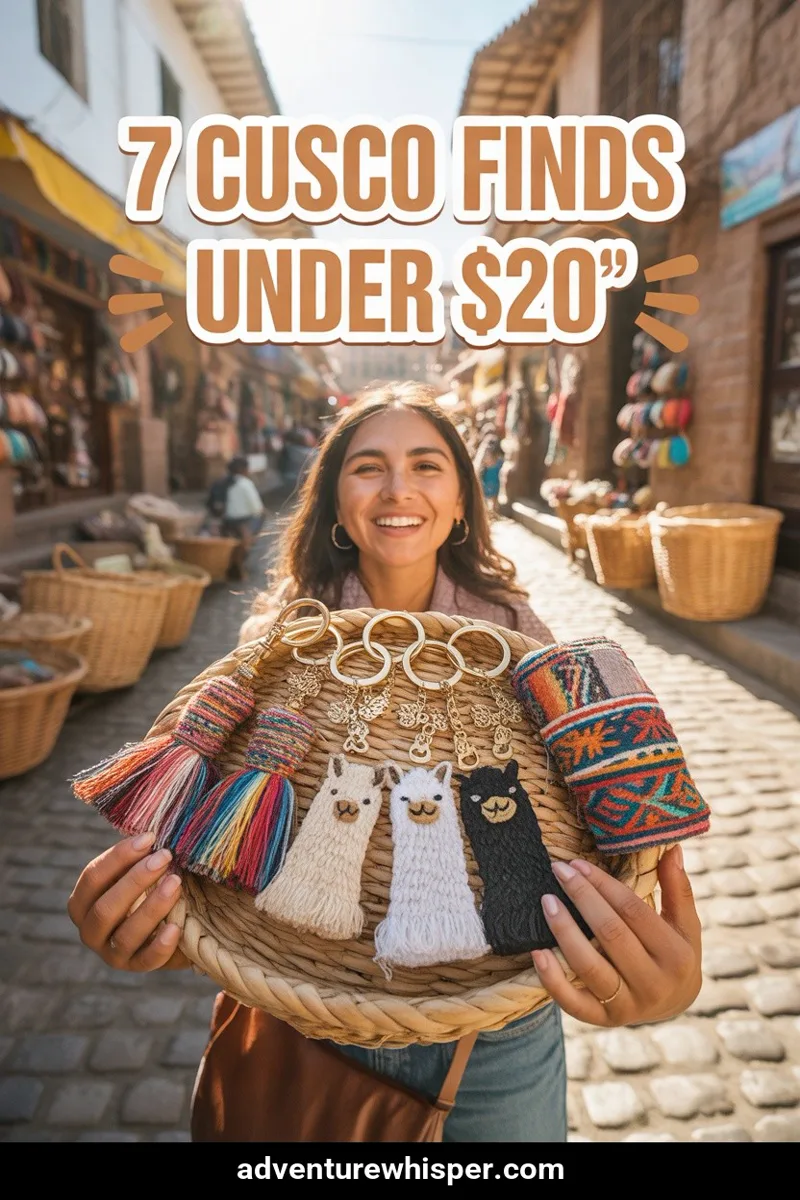
Pinterest pin made from an Amazon product Pinterest pin made from an Amazon product Pinterest pin made from an Amazon product
From 3 Amazon links

Before you start

  1. 1

    Click Bulk Pins, then choose where your pages come from

    Click Bulk Pins on the left. On a phone or tablet, tap the menu button at the top left first. Then click the tab for where your pages come from. Do only the line that fits you:

    1. 1 Blog: click Your website, type your blog’s address and click Read my pages. It lists the posts it finds on your blog. On a big blog, only the newest posts are listed.
    2. 2 Amazon: click A list of links and paste your Amazon product links, one per line. Short amzn.to links work too. Up to 25 at a time.
    3. 3 Etsy: click Etsy shop, type your shop name and click Show my listings. No Etsy login needed.
    The Bulk Pins page with the Your website tab open and adventurewhisper.com typed in the box For a blog For Amazon links
    Tip: Been here before? Your site is already read, so you see your pages right away. To read a different one, click Use another site or sitemap.
  2. 2

    Tick the pages you want

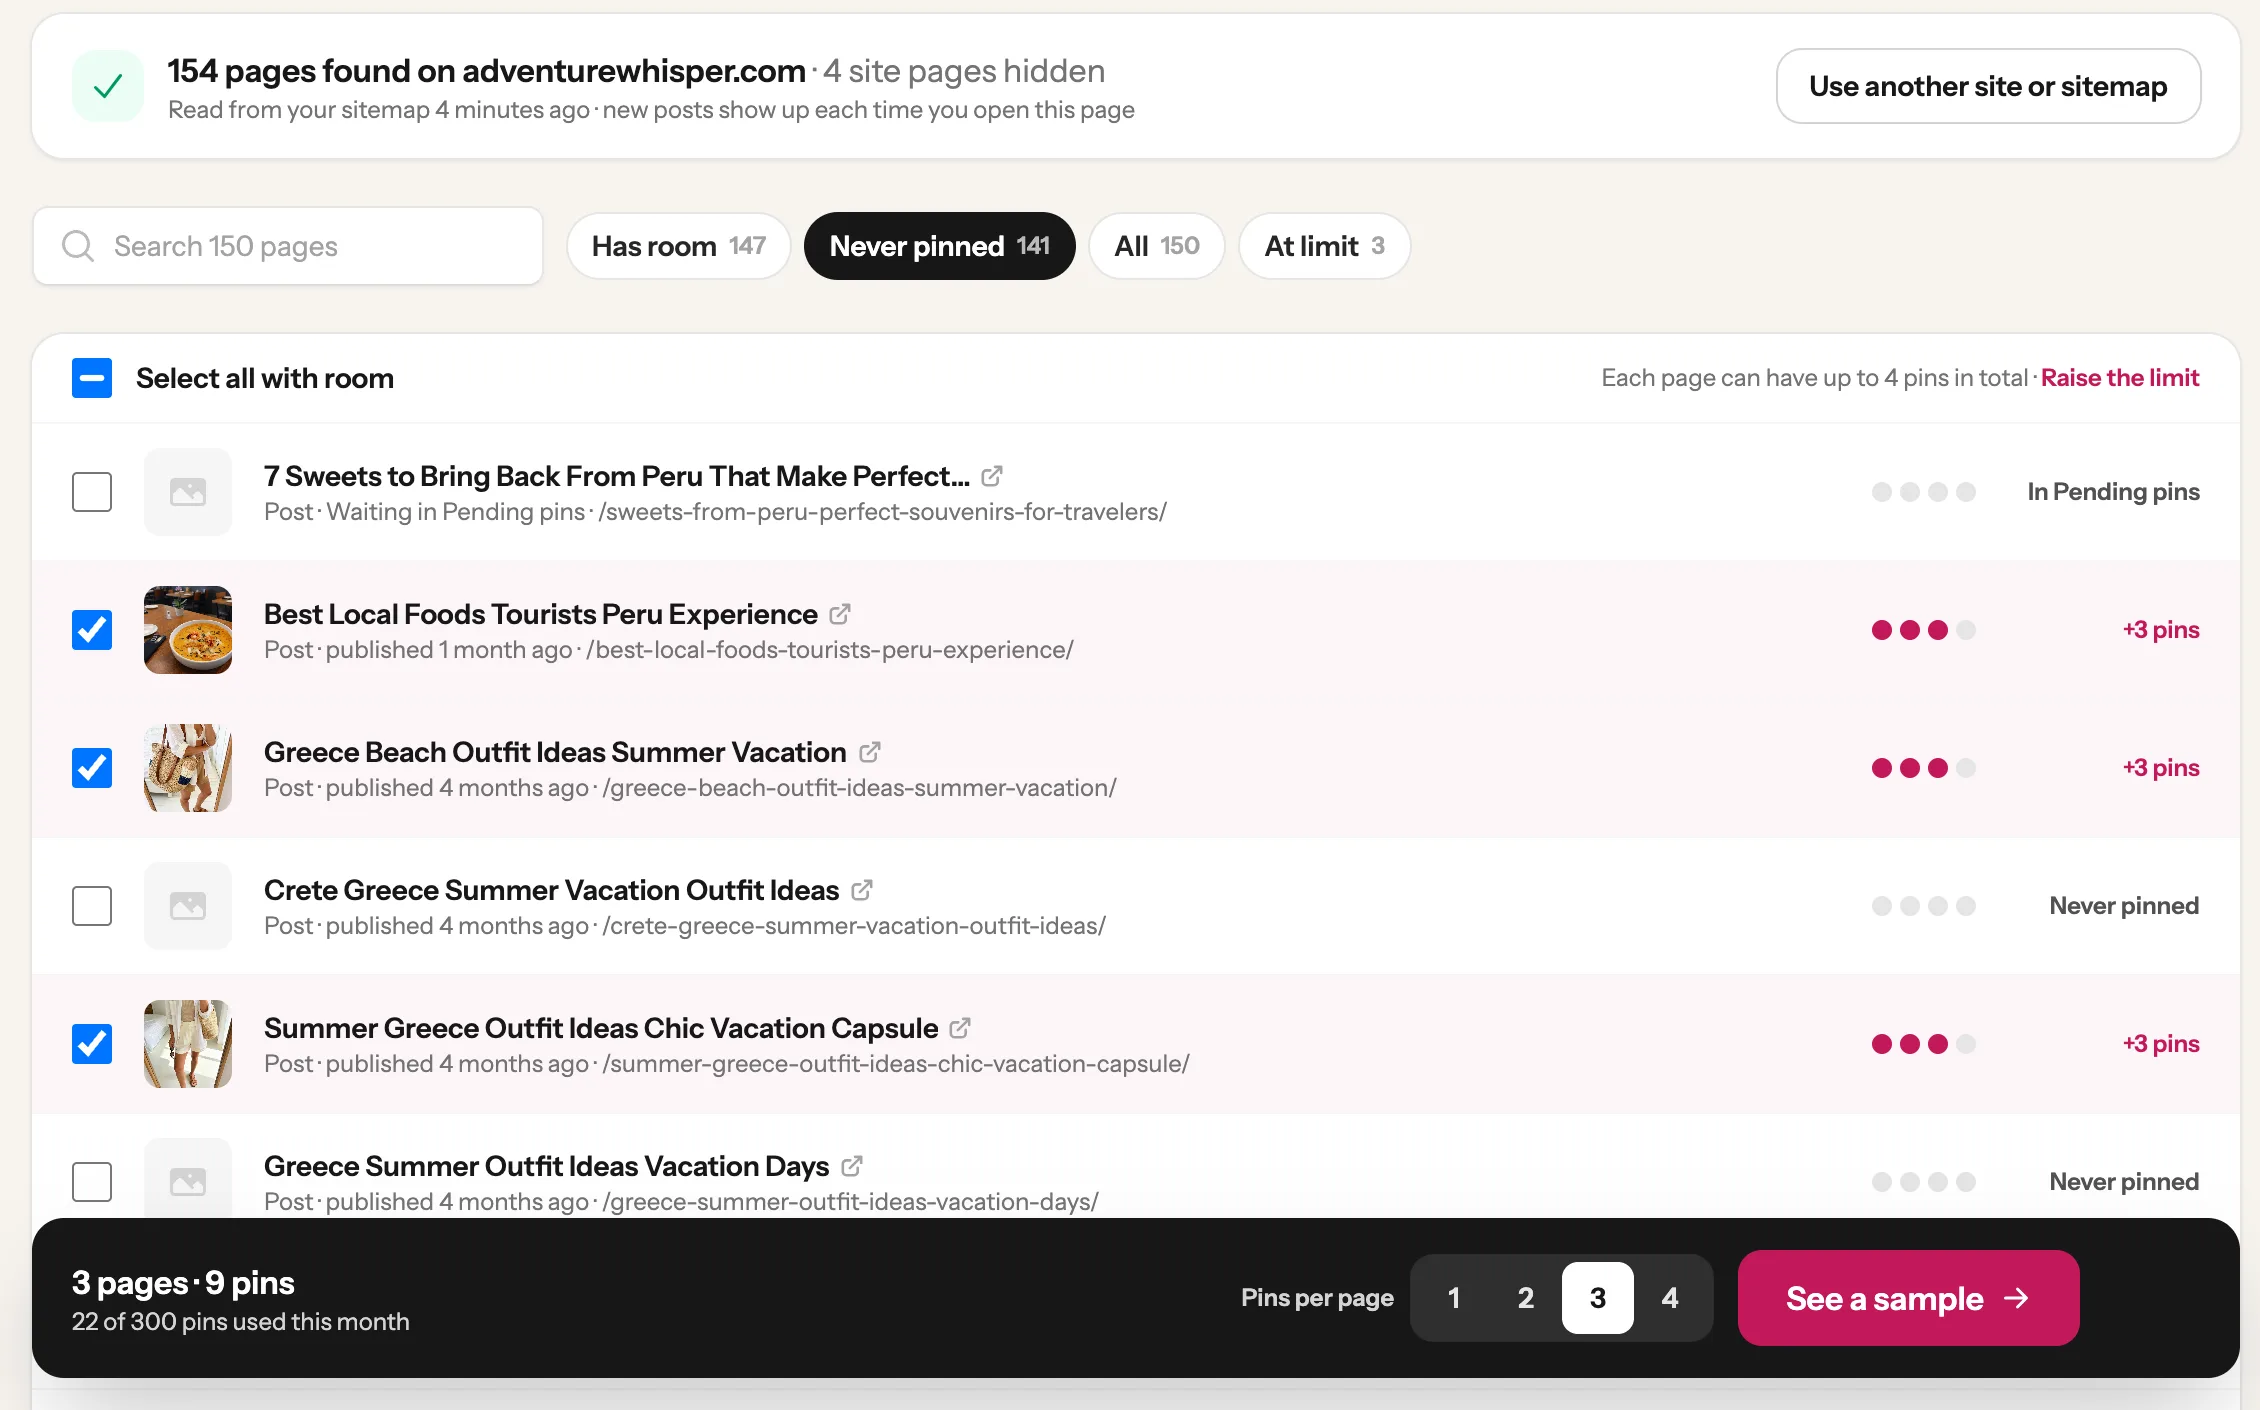
    Tick each post you want pins for. At the bottom, next to “Pins per page”, choose how many pins each page gets (3 is picked for you). Then click See a sample. Nothing is made yet.

    A list of blog posts from adventurewhisper.com with three of them ticked, and a See a sample button 1 1 1 2 3
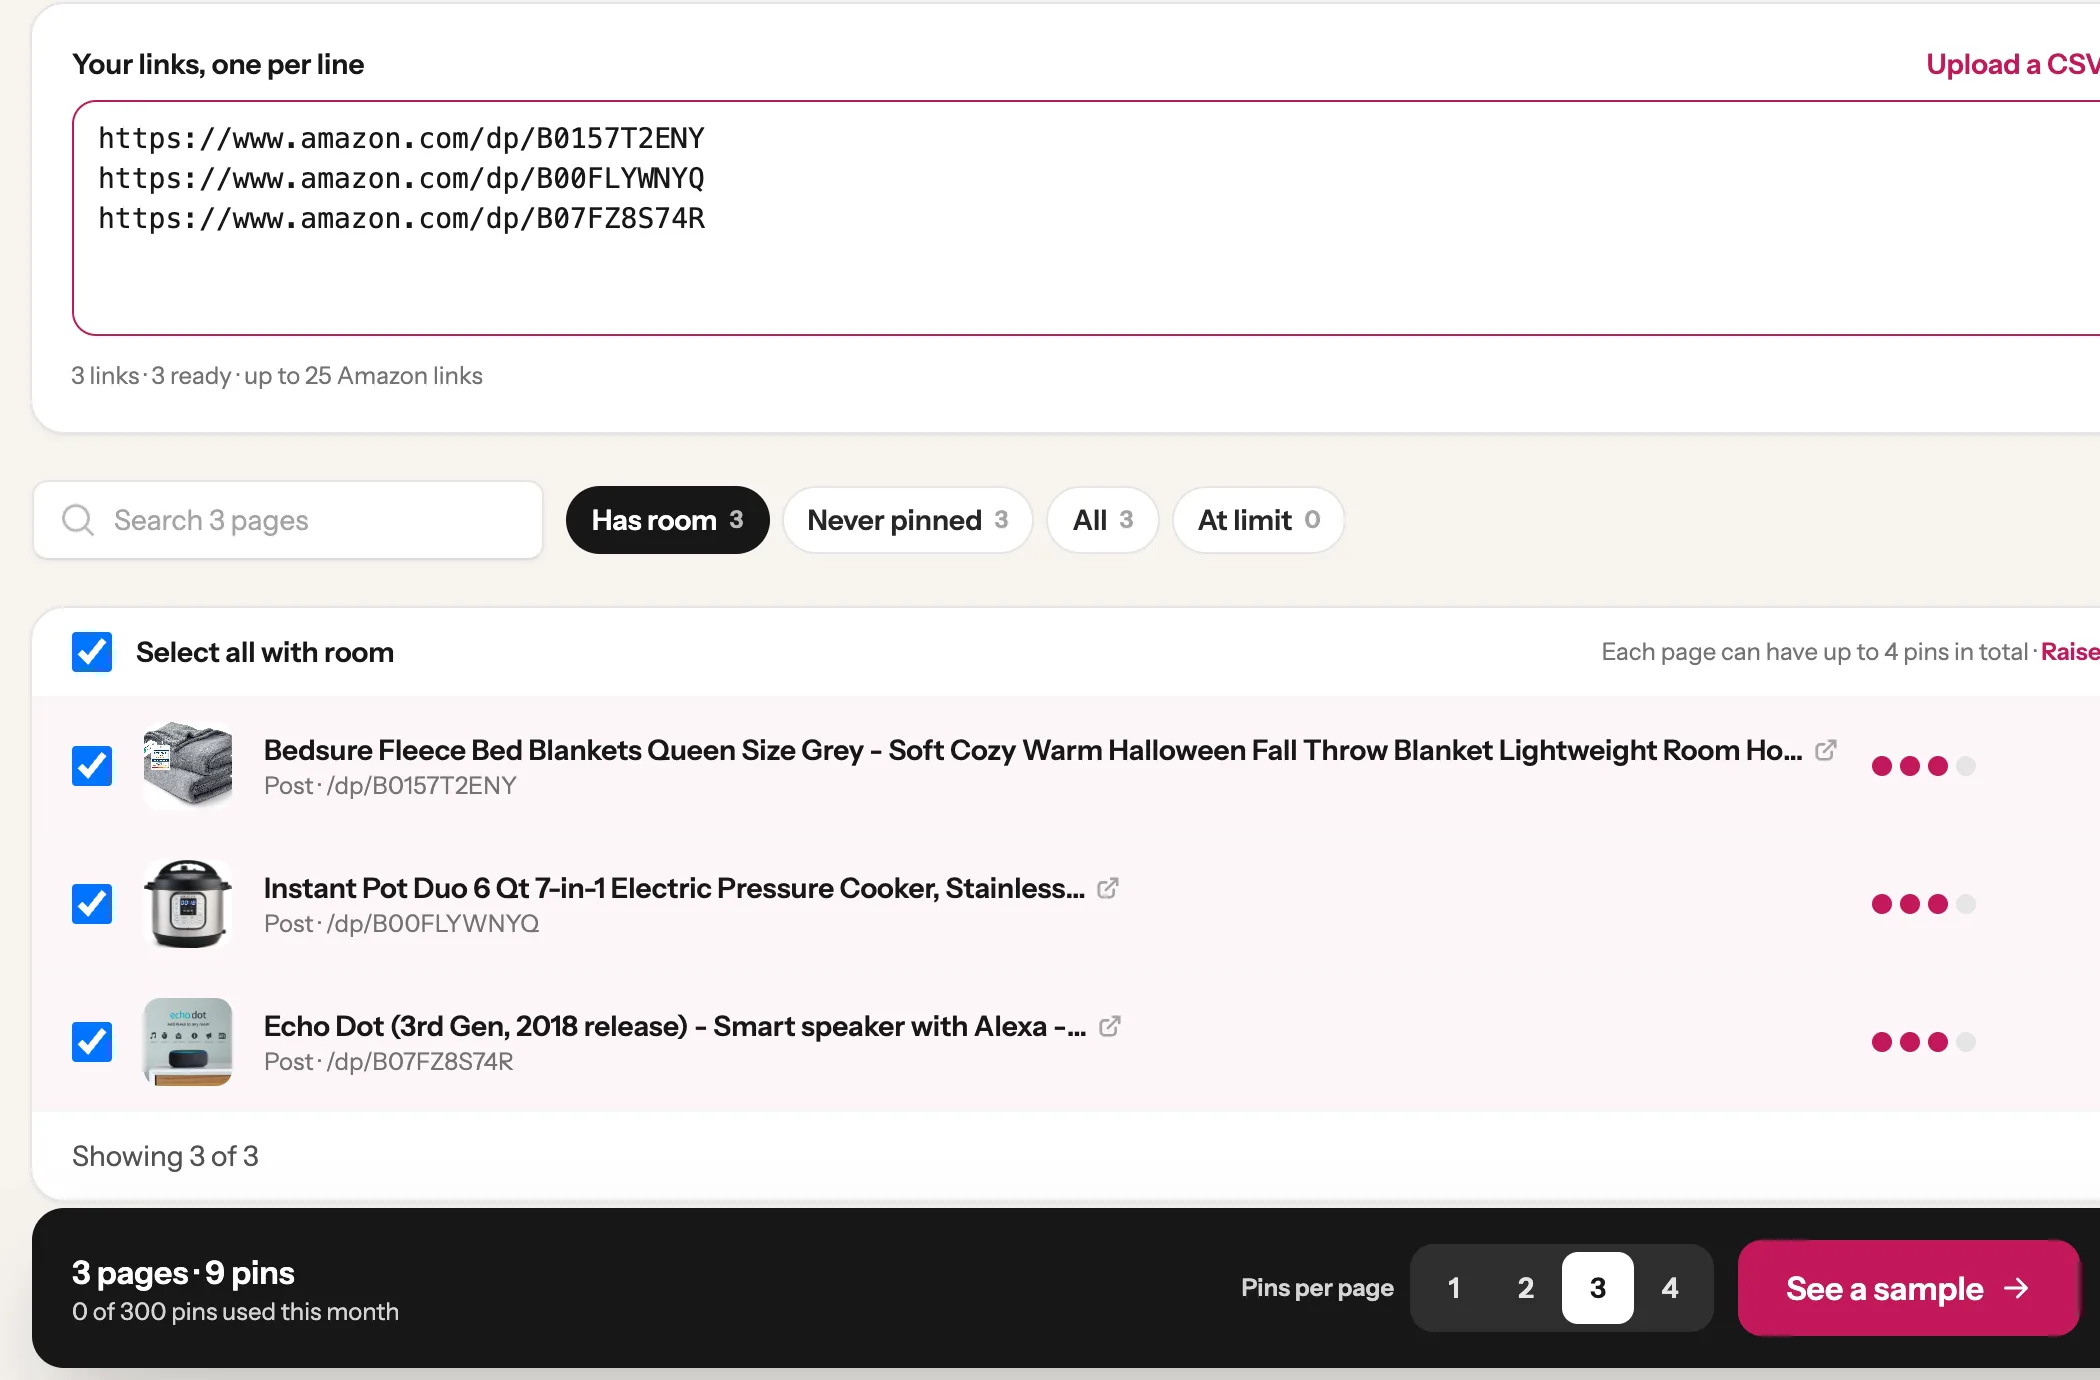
    Tip: Amazon links are ticked for you, with each product’s photo and name. The affiliate tag you saved under Integrations goes on every pin. Links that already have your tag in them keep it.
    Three Amazon product links pasted in the box: a fleece blanket, an Instant Pot and an Echo Dot, all ticked One link per line
  3. 3

    Look at the sample, then click Make

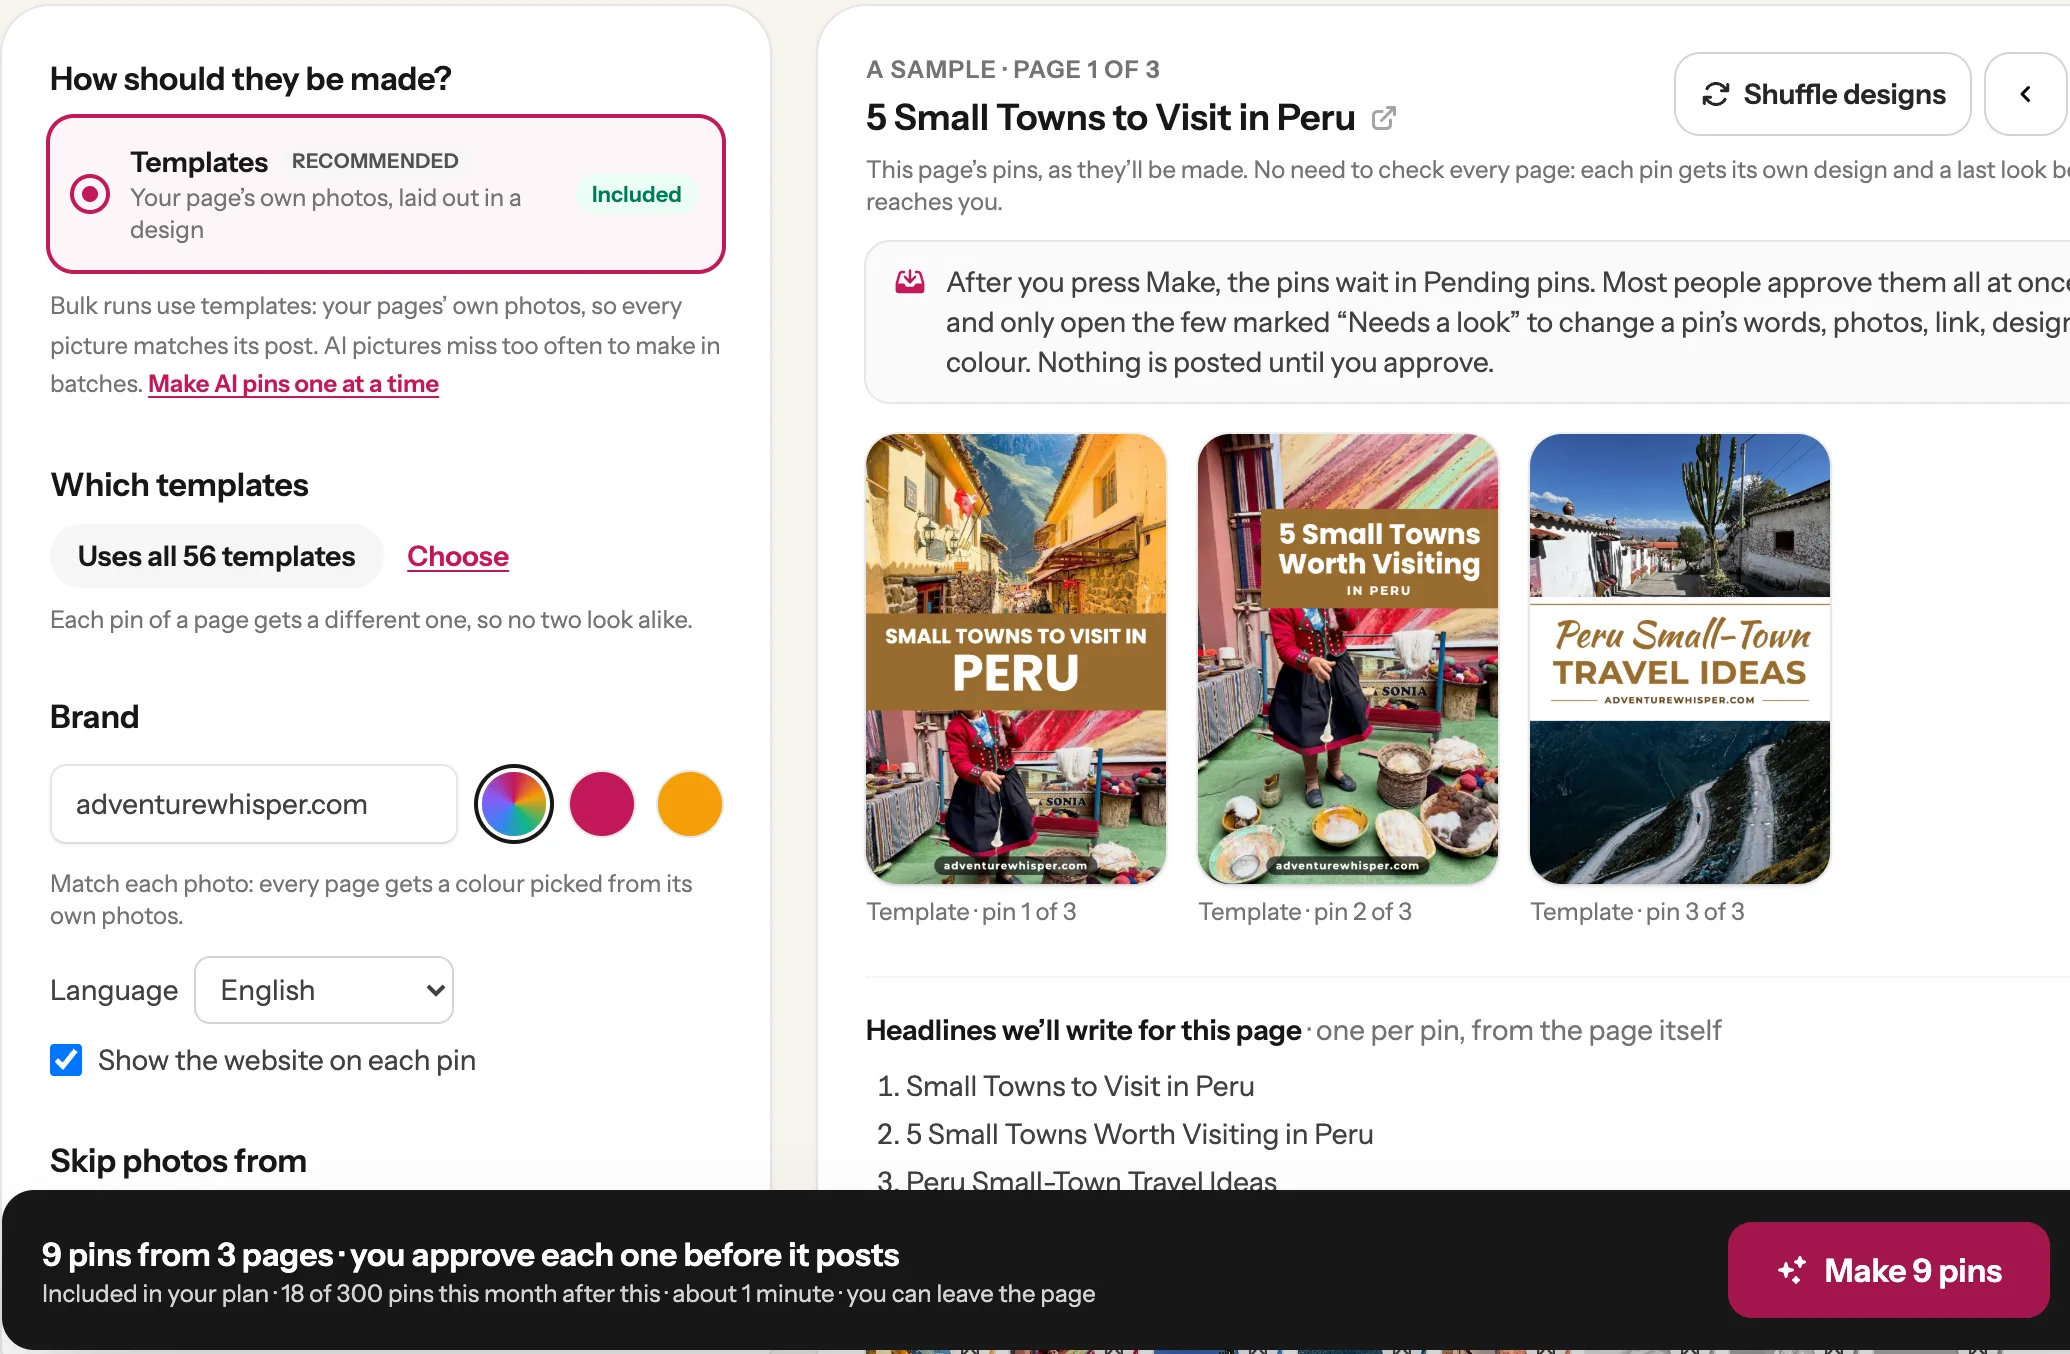
    On the right you see the real pins for your first page, with the headlines they get. Click the arrows to see your other pages, or Shuffle designs for other looks. Happy? Click Make 9 pins at the bottom. The number is your pages times the pins per page: here 3 pages × 3 pins.

    Three sample pins for the 5 Small Towns to Visit in Peru post, and the Make 9 pins button Your real pins Click Make
    Tip: On the left, the Brand box is the name printed at the bottom of each pin. For Amazon links it uses the brand name from your Brand Voice page. No brand name there? It uses your own site’s address, and with neither it stays empty, so your pins never say amazon.com. Type a name in the box to use it for just this batch.
  4. 4

    Wait about a minute, then look at Pending pins

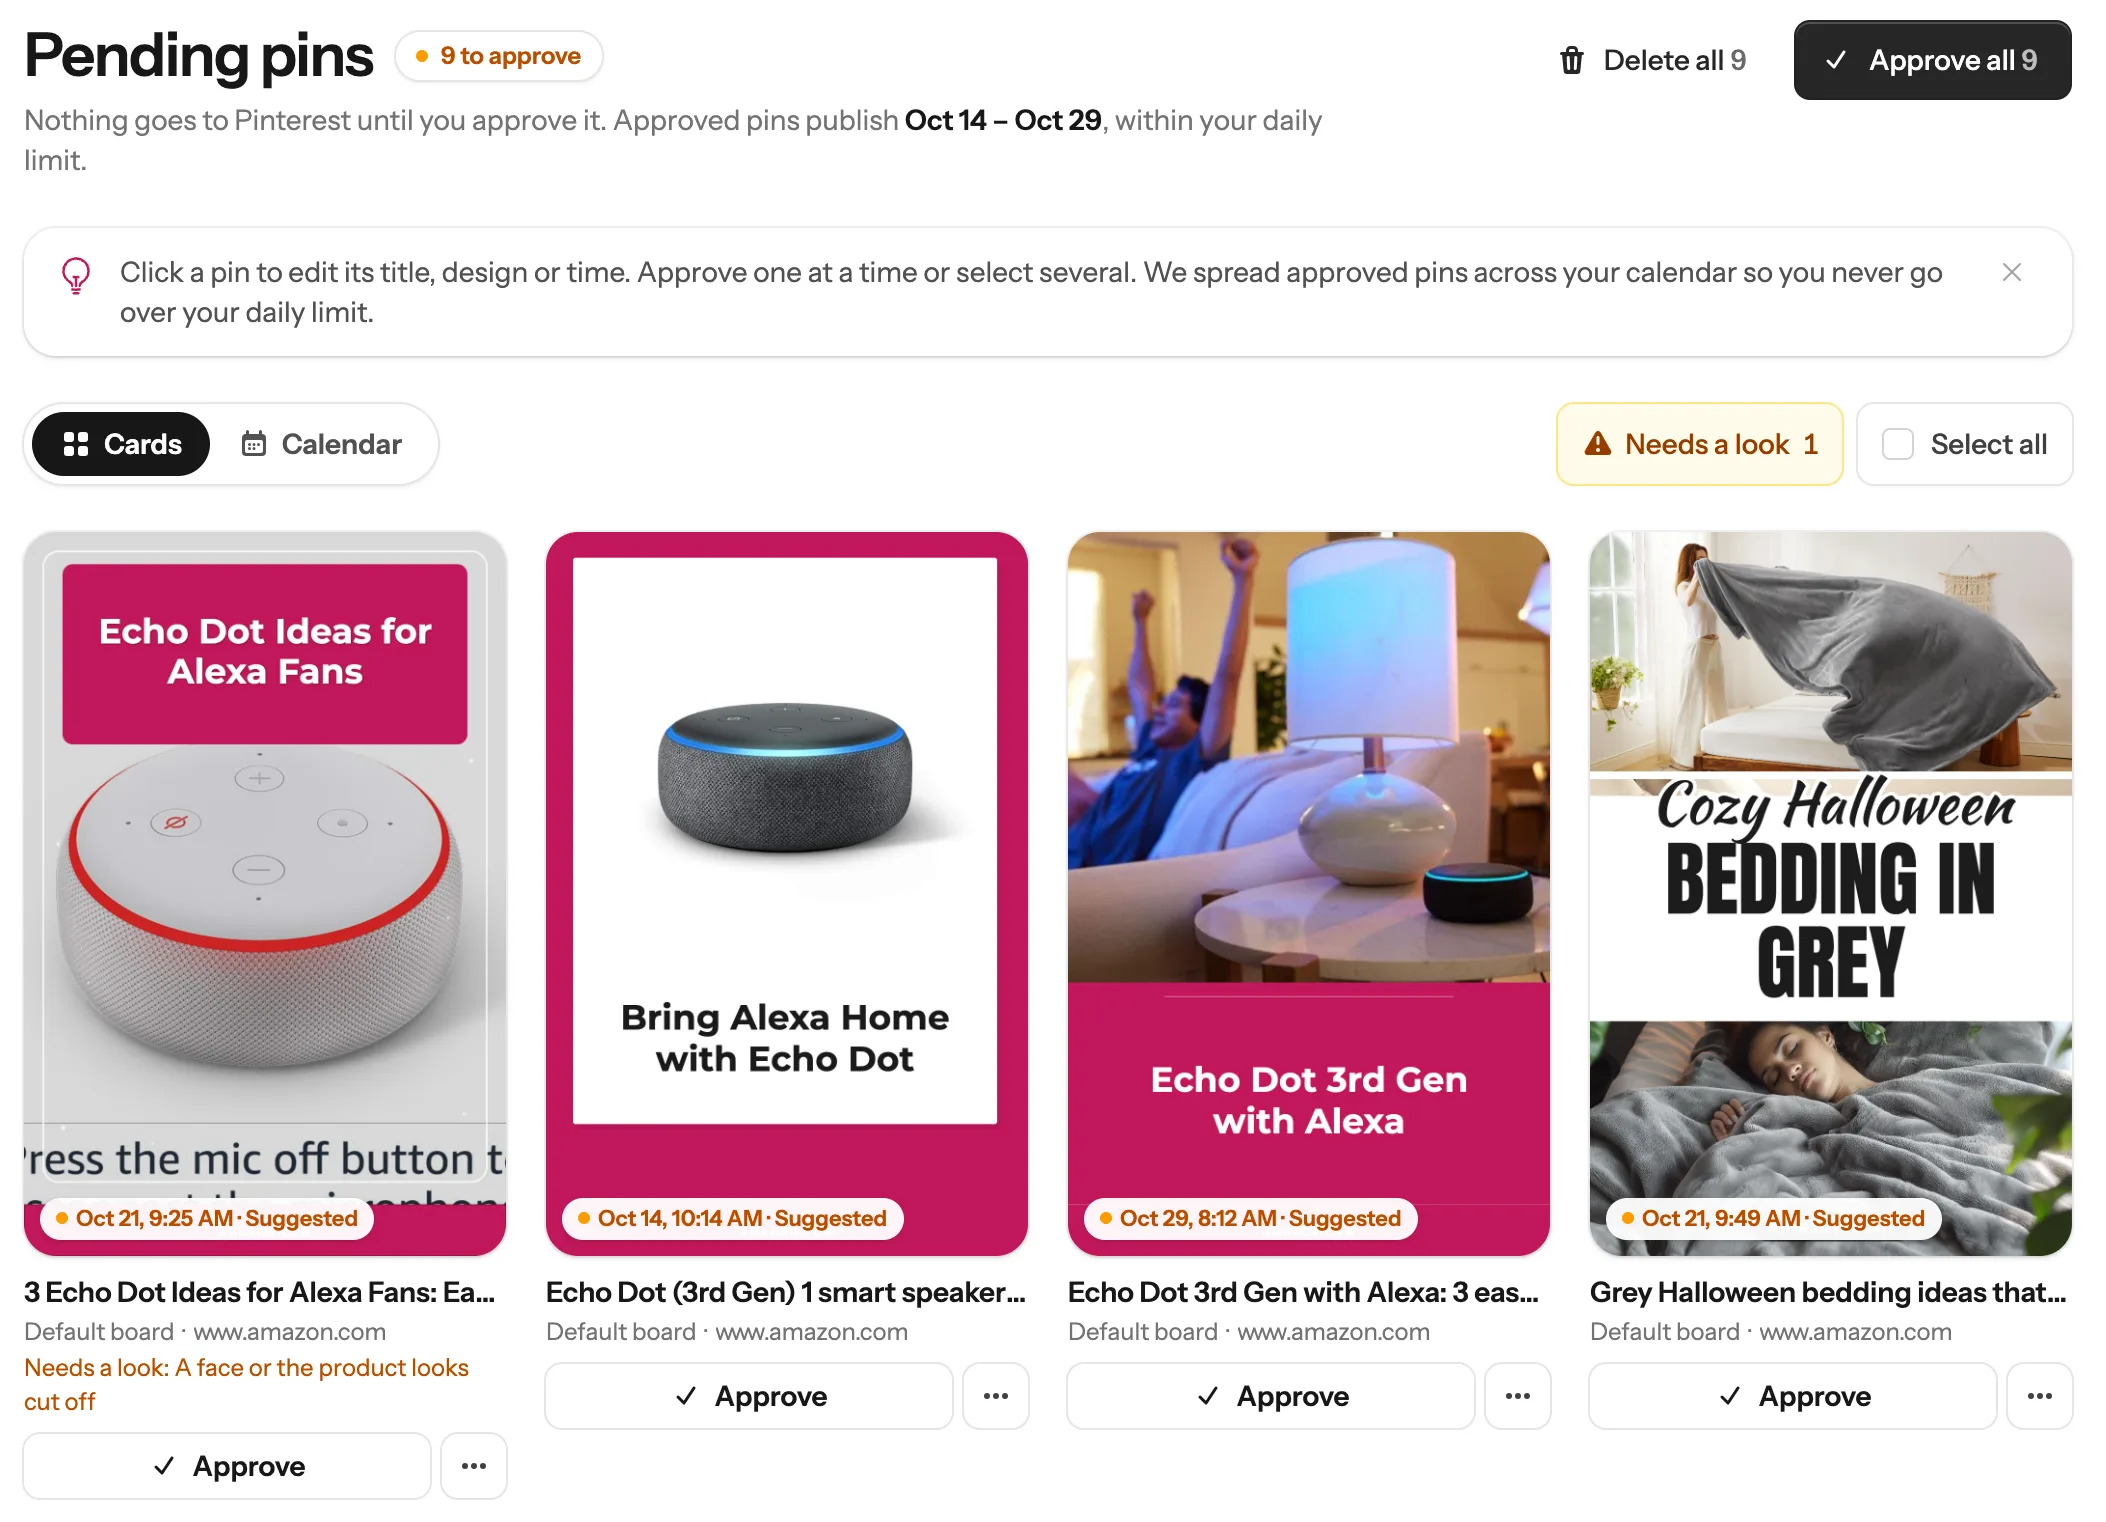
    You land on Pending pins and watch your pins arrive. You can leave the page; they keep going. Every pin gets a last look before you see it, and a pin that still looks off is marked Needs a look, with the reason under it. The reason tells you what to check, for example a face or the product cut off at the edge, or a photo with its own words on it. Here, one Echo Dot pin uses a photo with words on it, and the words are cut off. Click Needs a look at the top to see only those pins.

    Pending pins with 9 pins to approve, one marked Needs a look: A face or the product looks cut off Show only these !
  5. 5

    Fix a pin marked “Needs a look”

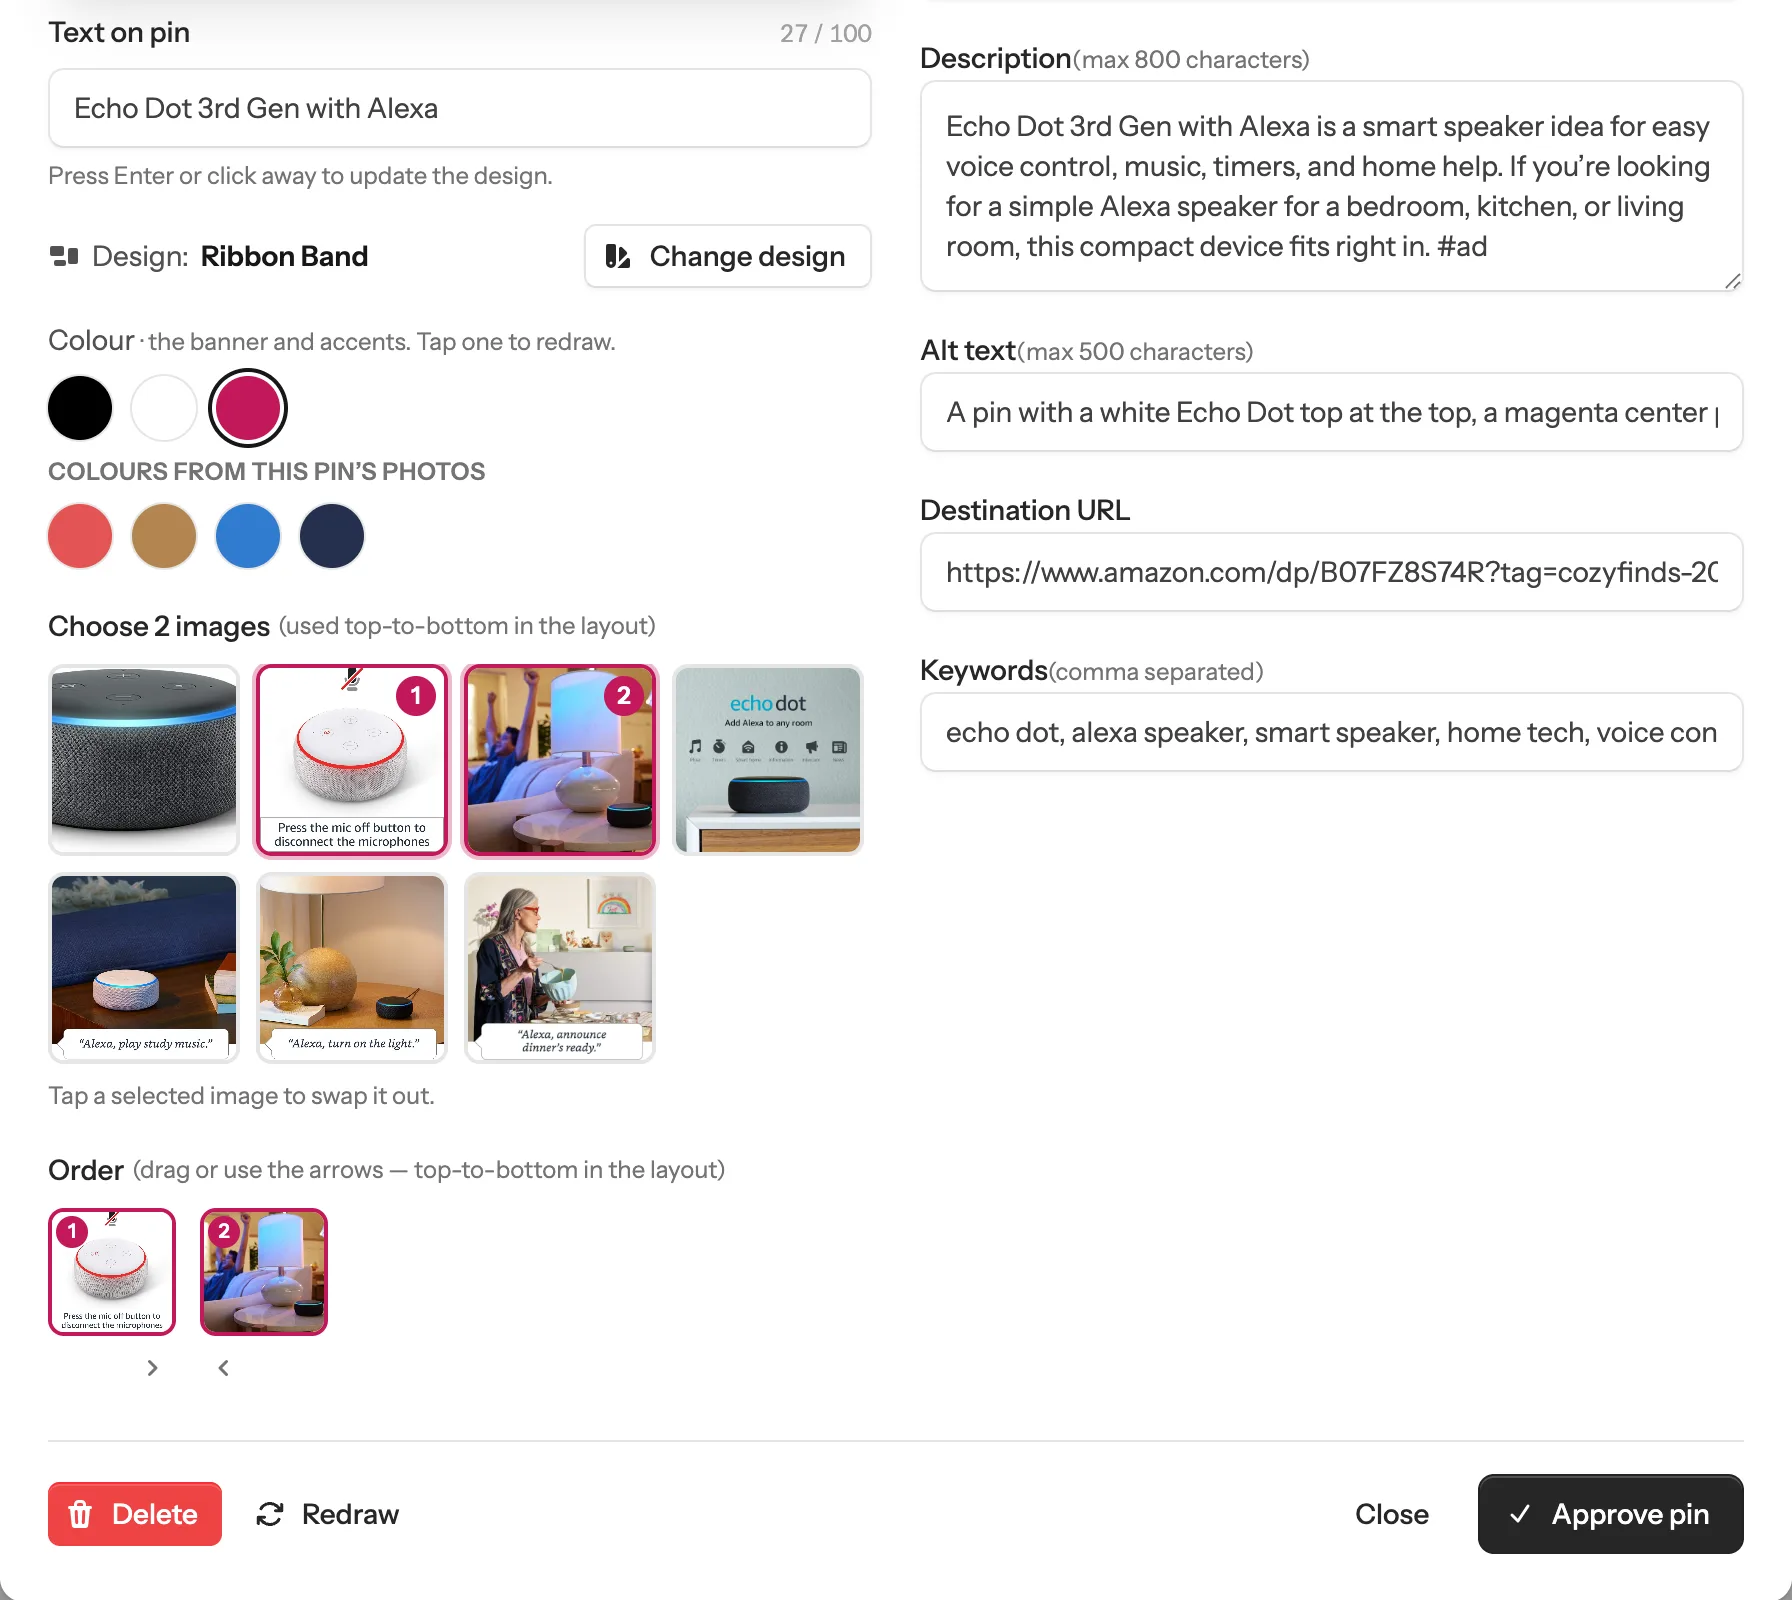
    Click the pin to open it. Change its words, design or colour, or swap a photo: first tap the picked photo you don’t want (it has a number on it), then tap the one you want instead. The pin is drawn again in a few seconds and the mark goes away. Fixing a pin here uses no credit. Pins you don’t like at all? Click Delete.

    The pin details window with the photos from the Amazon page; the photo with words on it is picked Tap to remove ✓ Your affiliate tag
  6. 6

    Pick the boards, then approve

    Nothing goes to Pinterest until you approve. Approved pins are spread over the next days, so you never go over your daily limit. To send pins to a board:

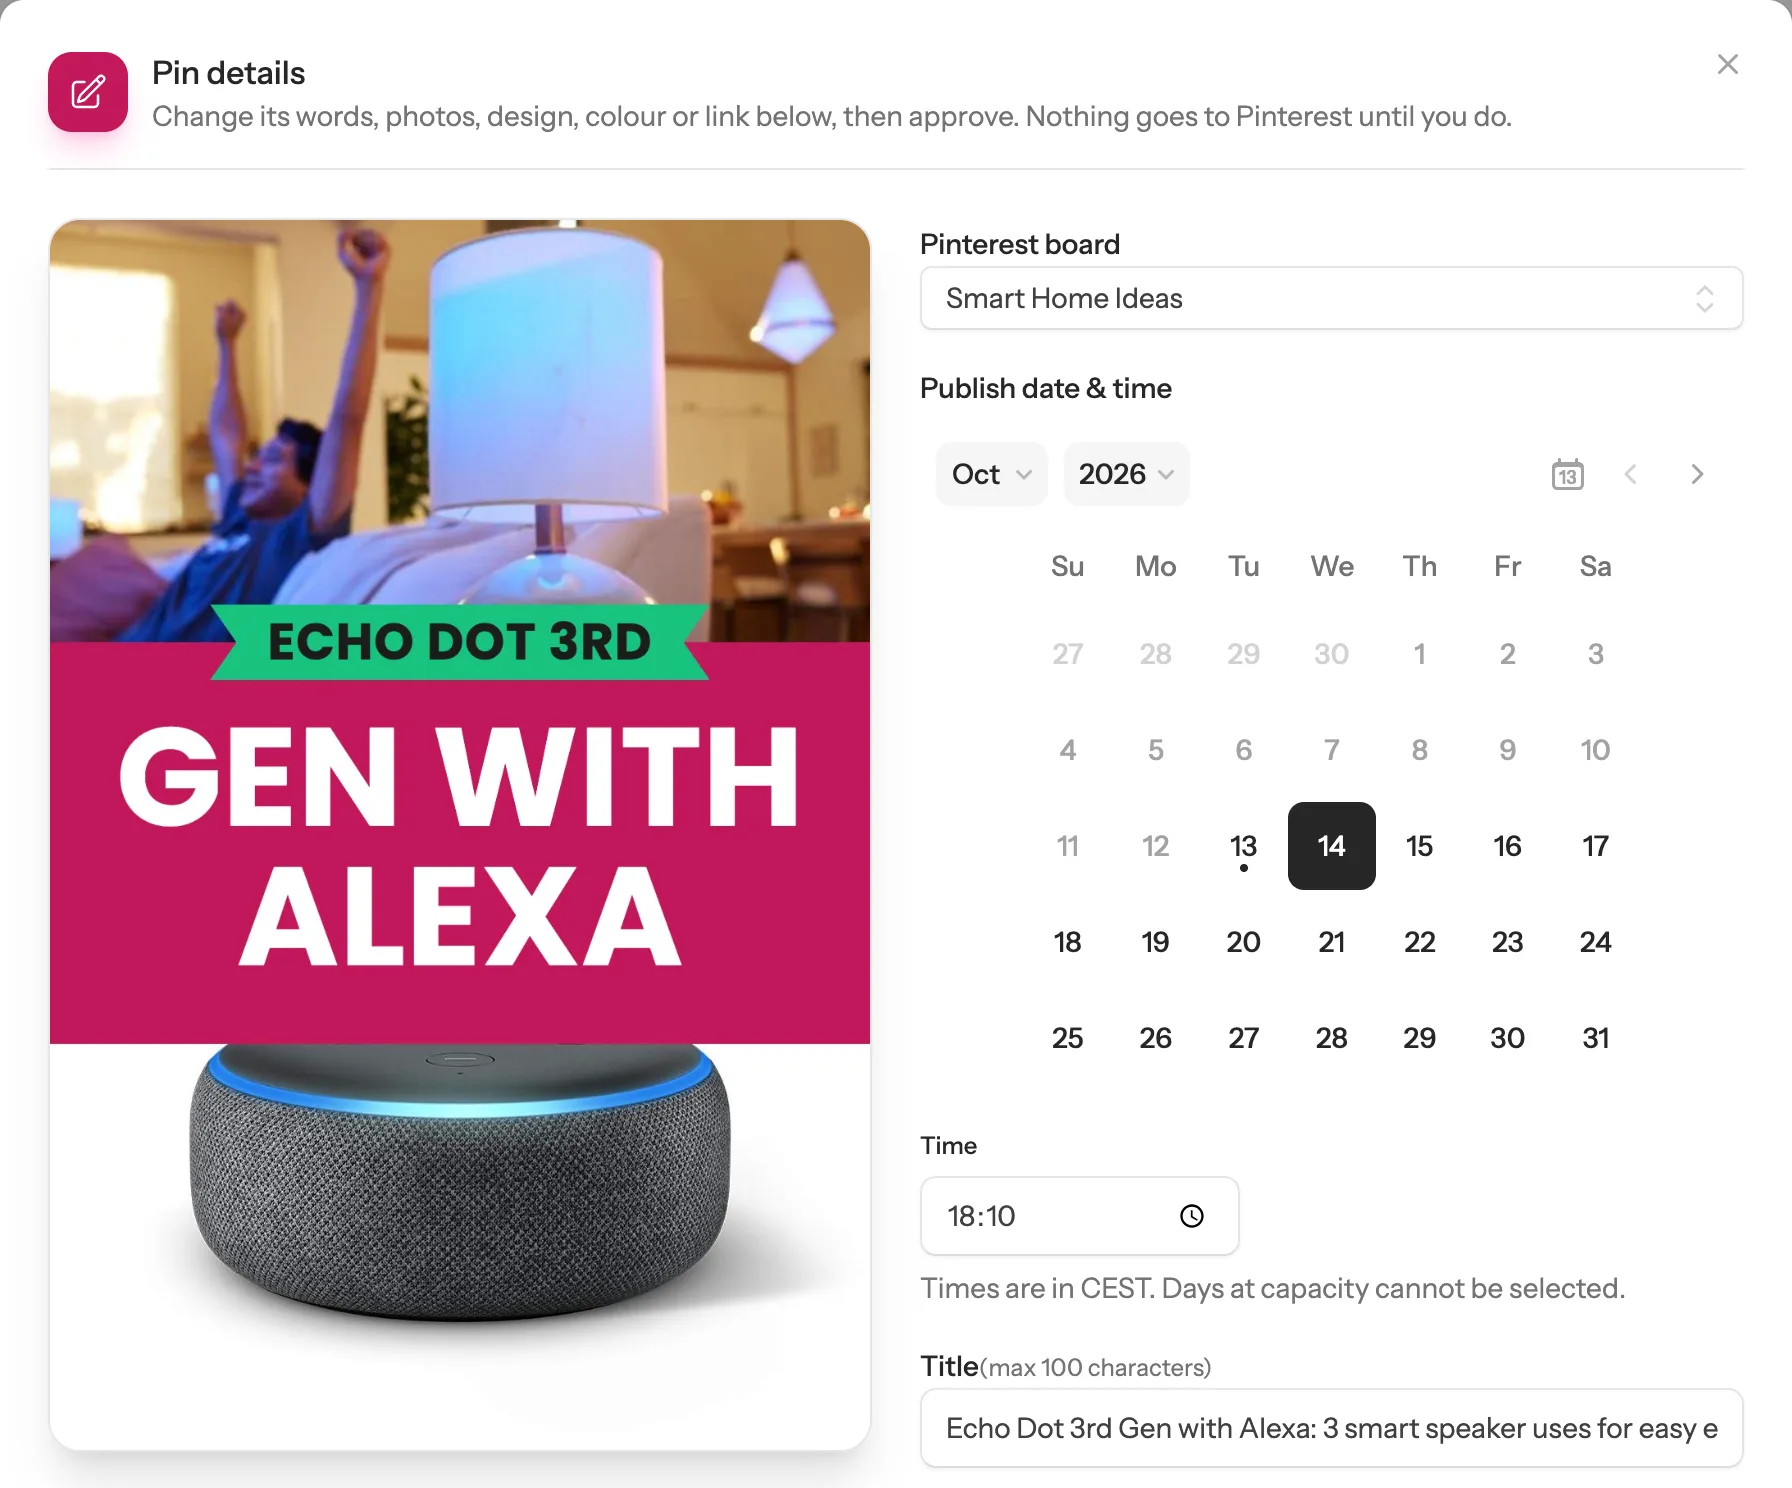
    1. 1 One pin: open it and choose the board under Pinterest board.
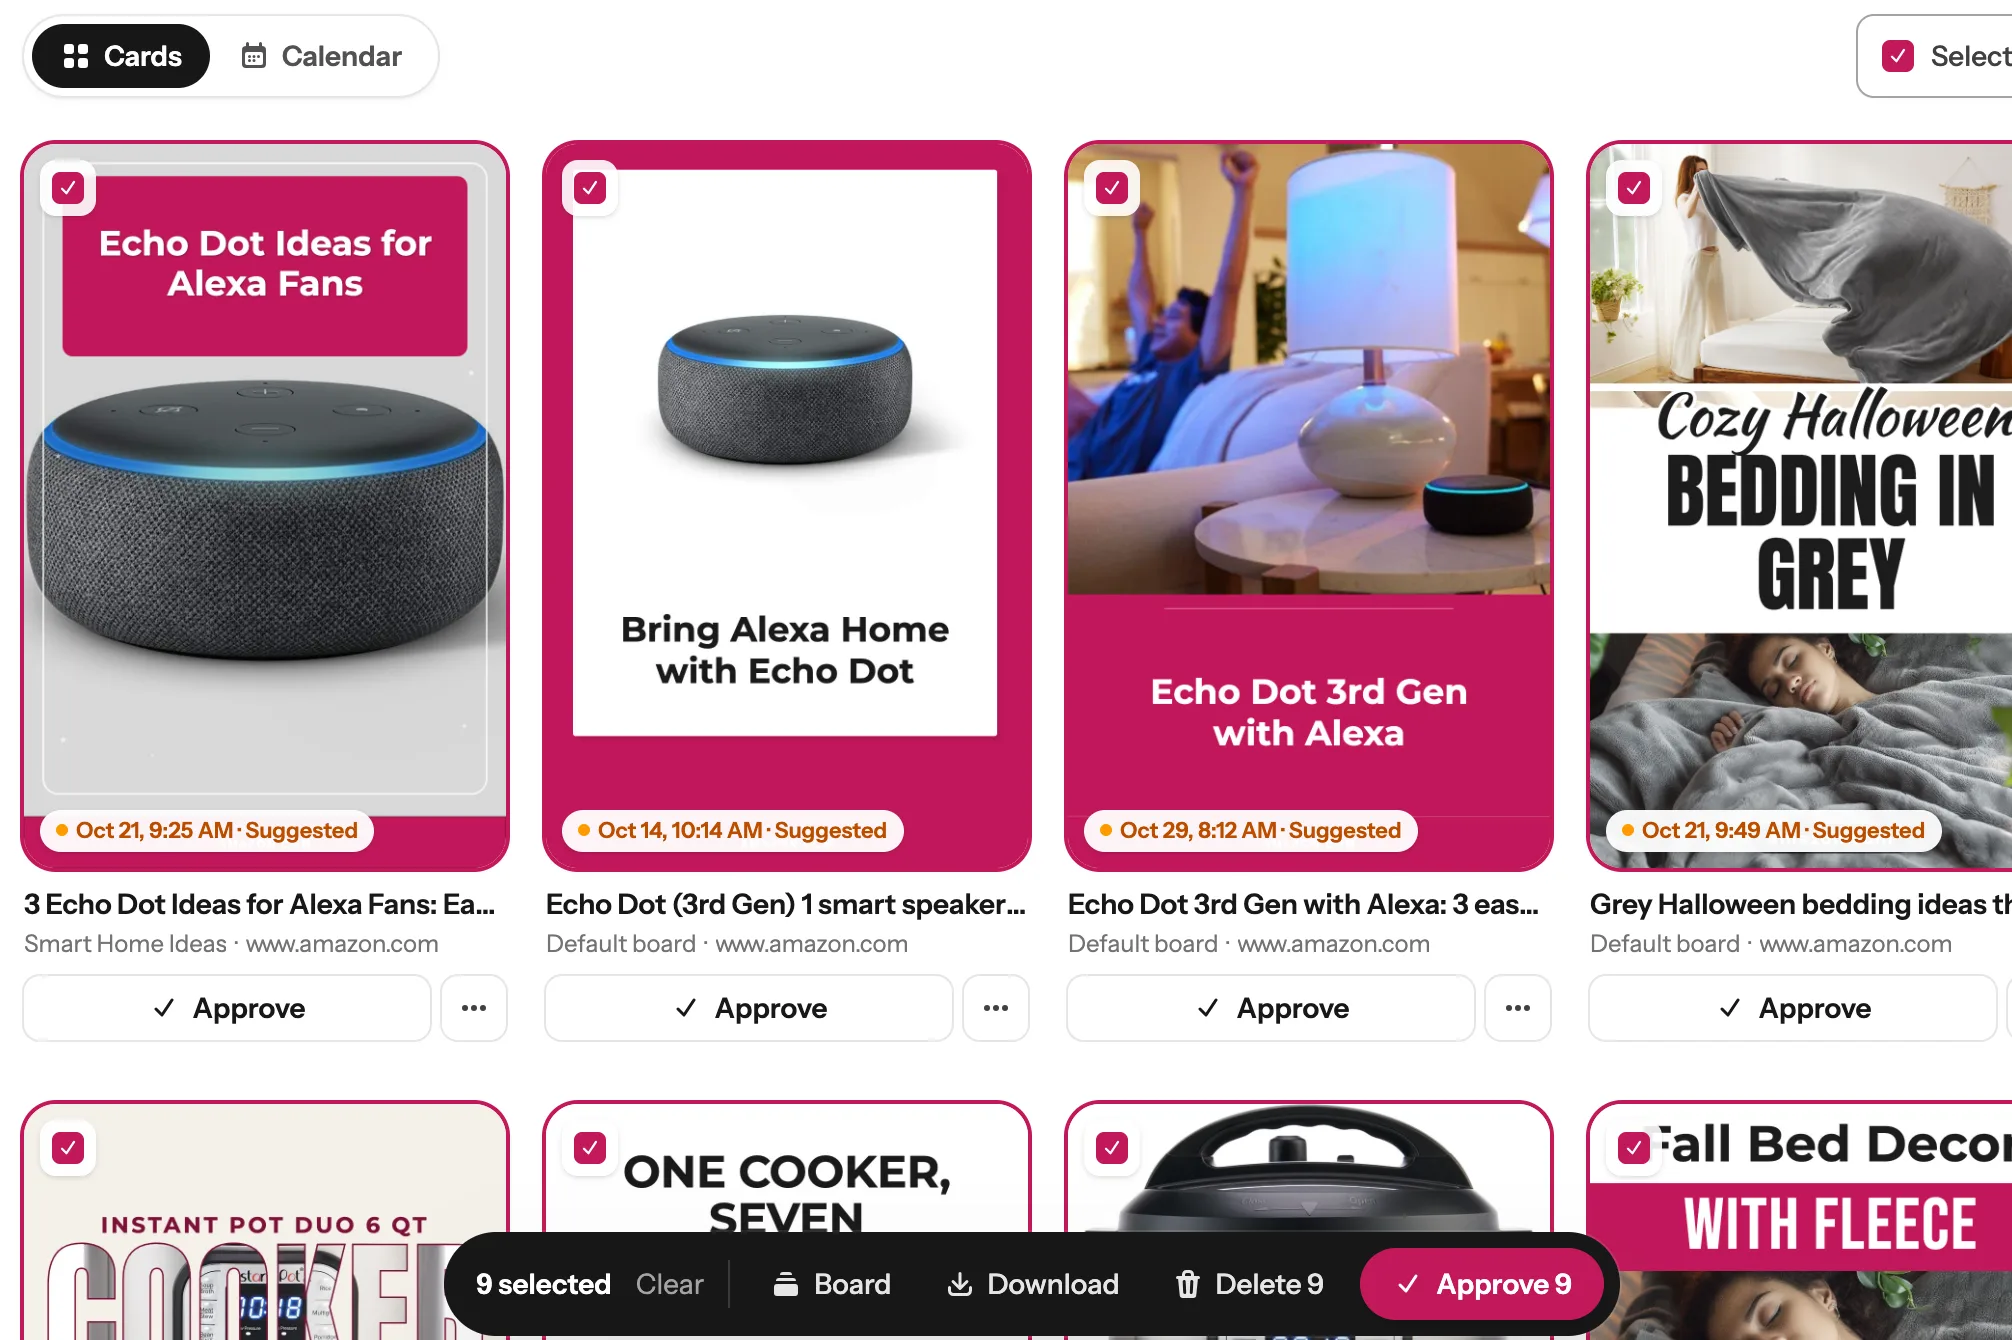
    2. 2 Several pins: tick them (or tick Select all), click Board in the bar at the bottom and choose one.
    3. 3 Click Approve 9 in the bar at the bottom (the number is how many pins you ticked), then Yes, approve. Want every pin? Click Approve all at the top instead, then Yes, approve.
    The fixed Echo Dot pin with Smart Home Ideas chosen as its Pinterest board Choose a board
    All 9 pins ticked, with Board and Approve 9 buttons in the bar at the bottom 2 3
    Tip: A pin left on “Default board” goes to the board that comes first in A to Z order. Pinterest not connected yet? You won’t see the board choices, and approved pins wait in the Pin Scheduler, where you can download them as a file to upload to Pinterest yourself, until you click Connect Pinterest.

Done! Here are the pins from this guide

Three blog posts and three Amazon links, each turned into pins in a minute.

Pinterest pin made from a Peru travel post Pinterest pin made from a Peru travel post Pinterest pin made from a Peru travel post Pinterest pin made from an Amazon product Pinterest pin made from an Amazon product Pinterest pin made from an Amazon product

Next guide

Schedule your pins, and post them to more than one board

From My Pins, or fill your whole Pinterest calendar in one click.

Questions

How many credits does Bulk Pins use?

Bulk pins are made from your pages’ own photos with ready-made designs, and your plan covers a number of these each month. The bar at the bottom shows how many you have used before you click Make. Fixing a pin in Pending pins does not use a credit.

Which plans include Bulk Pins?

Bulk Pins comes with the Solo and Growth plans.

Why not AI pictures in bulk?

AI pictures miss too often to make dozens at once without checking each one. Bulk uses your own photos, so every picture matches its post or product. Want an AI picture for one page? Use New Pin.

Can I make more pins for the same page later?

Yes. Each page can have up to 4 pins in total, and the list shows how many each page already has. Click Raise the limit above the list to allow more.

What if something goes wrong?

If your site can’t be read, a red note under the address box says why, for example that no sitemap was found. Paste your sitemap’s address, or use A list of links and paste your pages instead. If a page in the sample couldn’t be opened, click Try again. And a pin that looks off is marked Needs a look in Pending pins: open it and change its photo, words or design, or delete it.

Do my pins post right away?

No. Bulk pins always wait in Pending pins until you approve them. Then they go out spread over the next days, within your daily limit.

Stuck on a step? Just reply to any email from us, or use the chat button at the bottom right.