How to set up Auto Pin: pins for new posts and the pages you pick
Think of Auto Pin as a helper who reads your blog or shop every morning. You set it up once. Every day it checks your site, and each new post or listing gets its own pins, made from your photos. The posts you pick keep getting a brand-new pin again and again, at your pace. You decide if you review them first or let them go out on their own. Here’s the whole setup, click by click, with a real travel blog.
1You publish a post
2Auto Pin spots it the same day
3Its pins are made for you
Pins for a new post, without lifting a finger
Before you start
Pinterest connected once, under Integrations on the left.
A blog, a Shopify store or an Etsy shop. No site? You can paste single links instead.
A plan that includes Auto Pin.
1
Click Auto Pin, then choose what to pin
Sign in to Made to Spark, then:
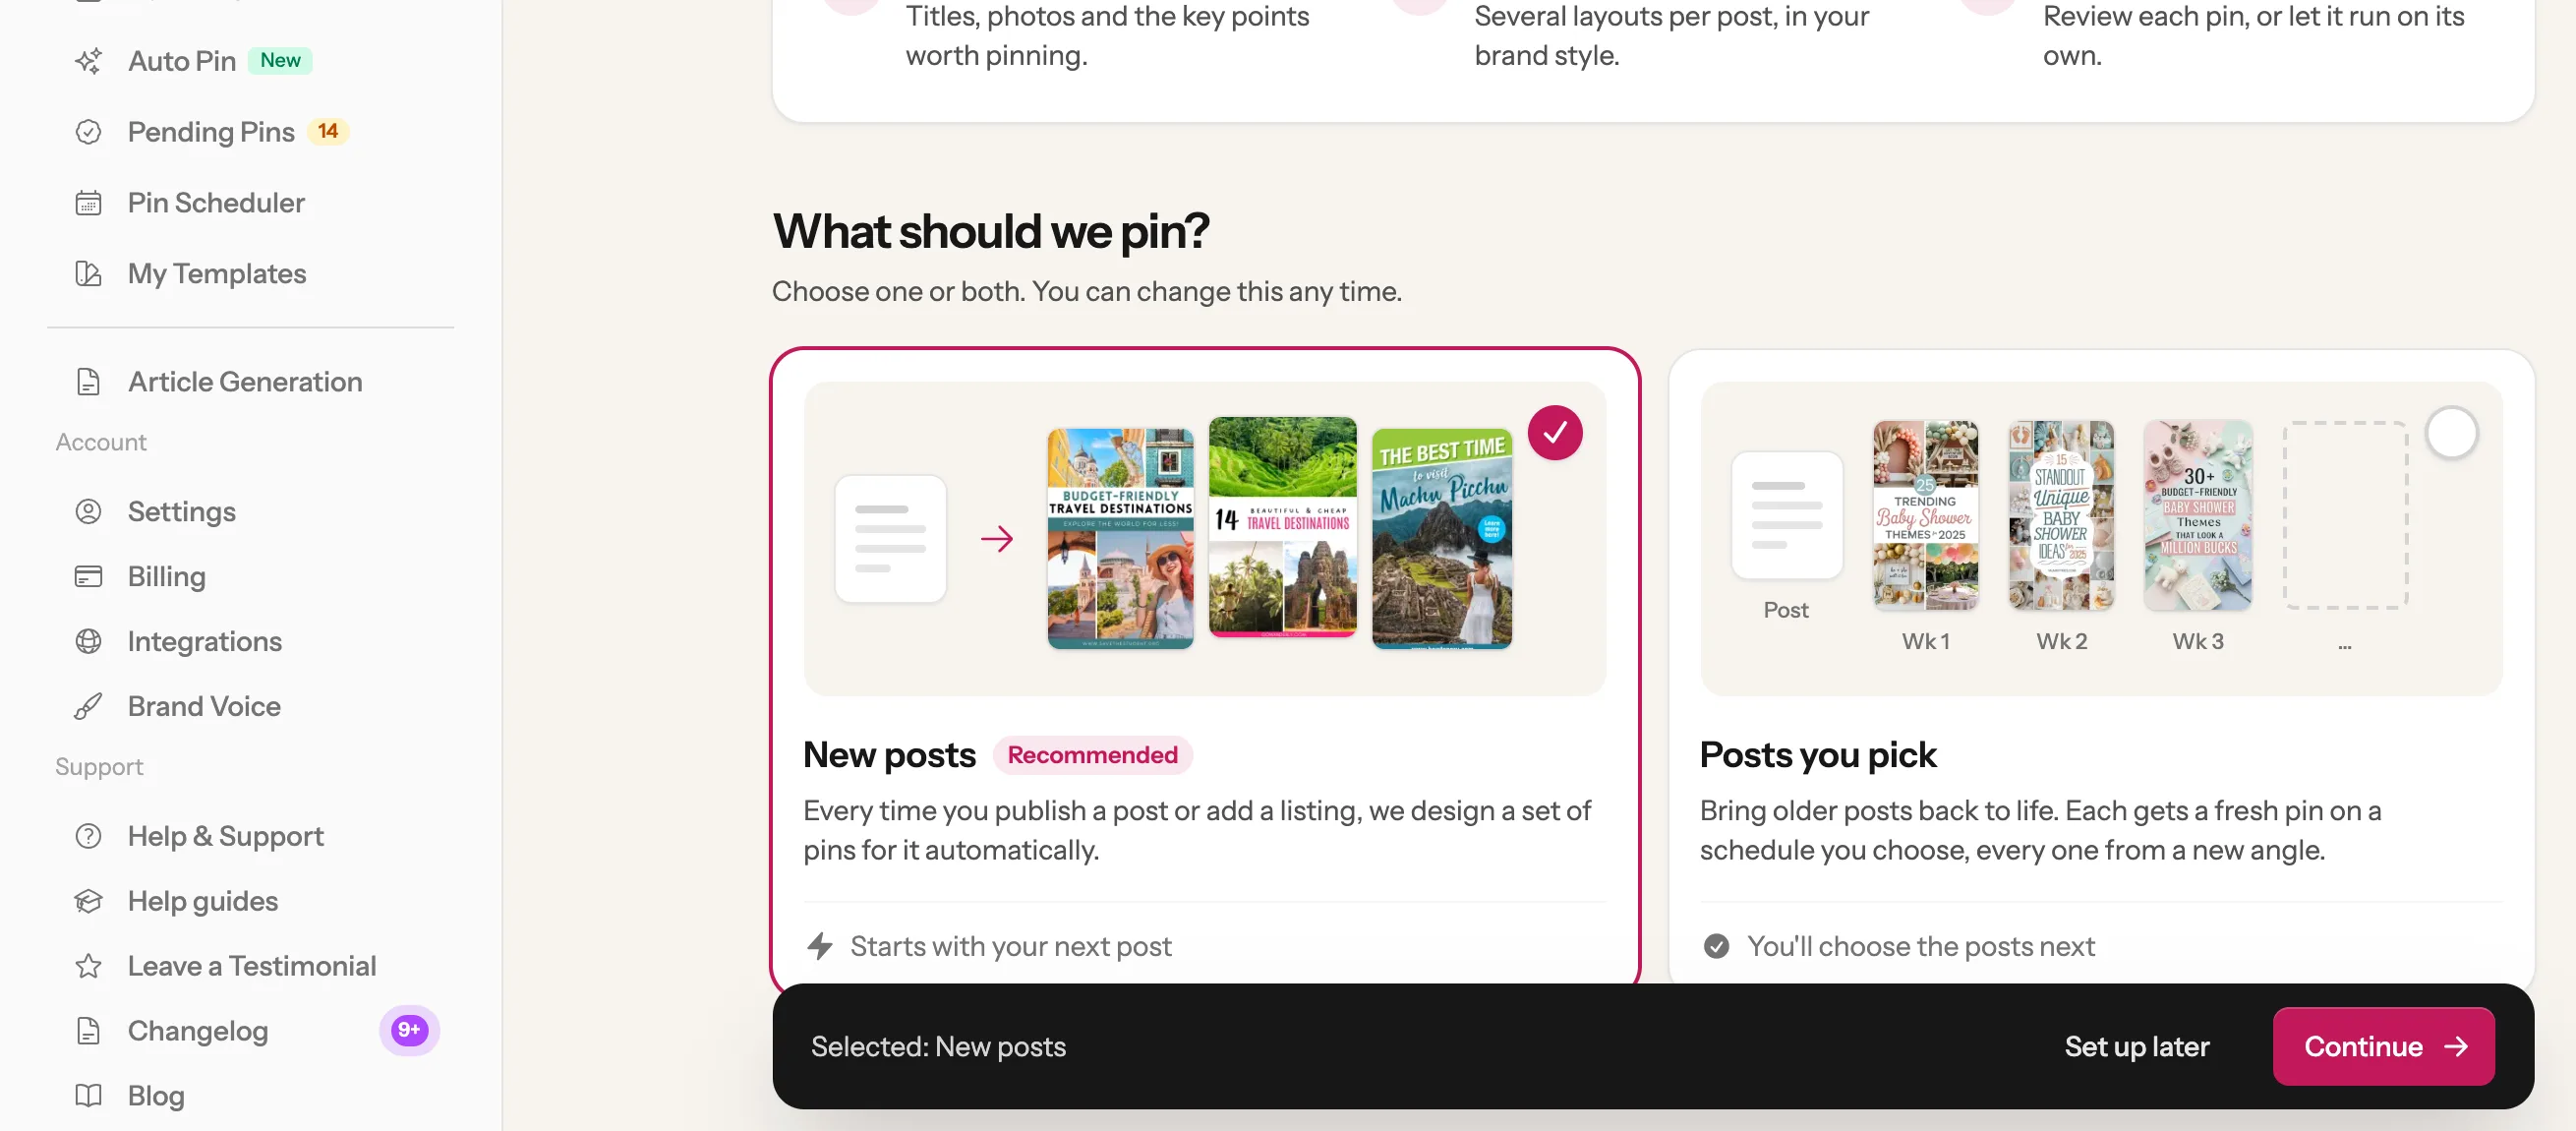
1Click Auto Pin on the left. On a phone or tablet, tap the menu button at the top left first.
2Under “What should we pin?” New posts is already ticked: every post you publish gets its own set of pins. Want older posts to keep getting fresh pins too? Also tick Posts you pick.
3Click Continue.
1223
Tip: Auto Pin sends pins to your Pinterest boards, so connect Pinterest first. If it isn’t connected yet, Auto Pin shows a Go to Integrations button. You only do it once.
2
Tell it where your posts are
Pick Your blog or Etsy shop, then:
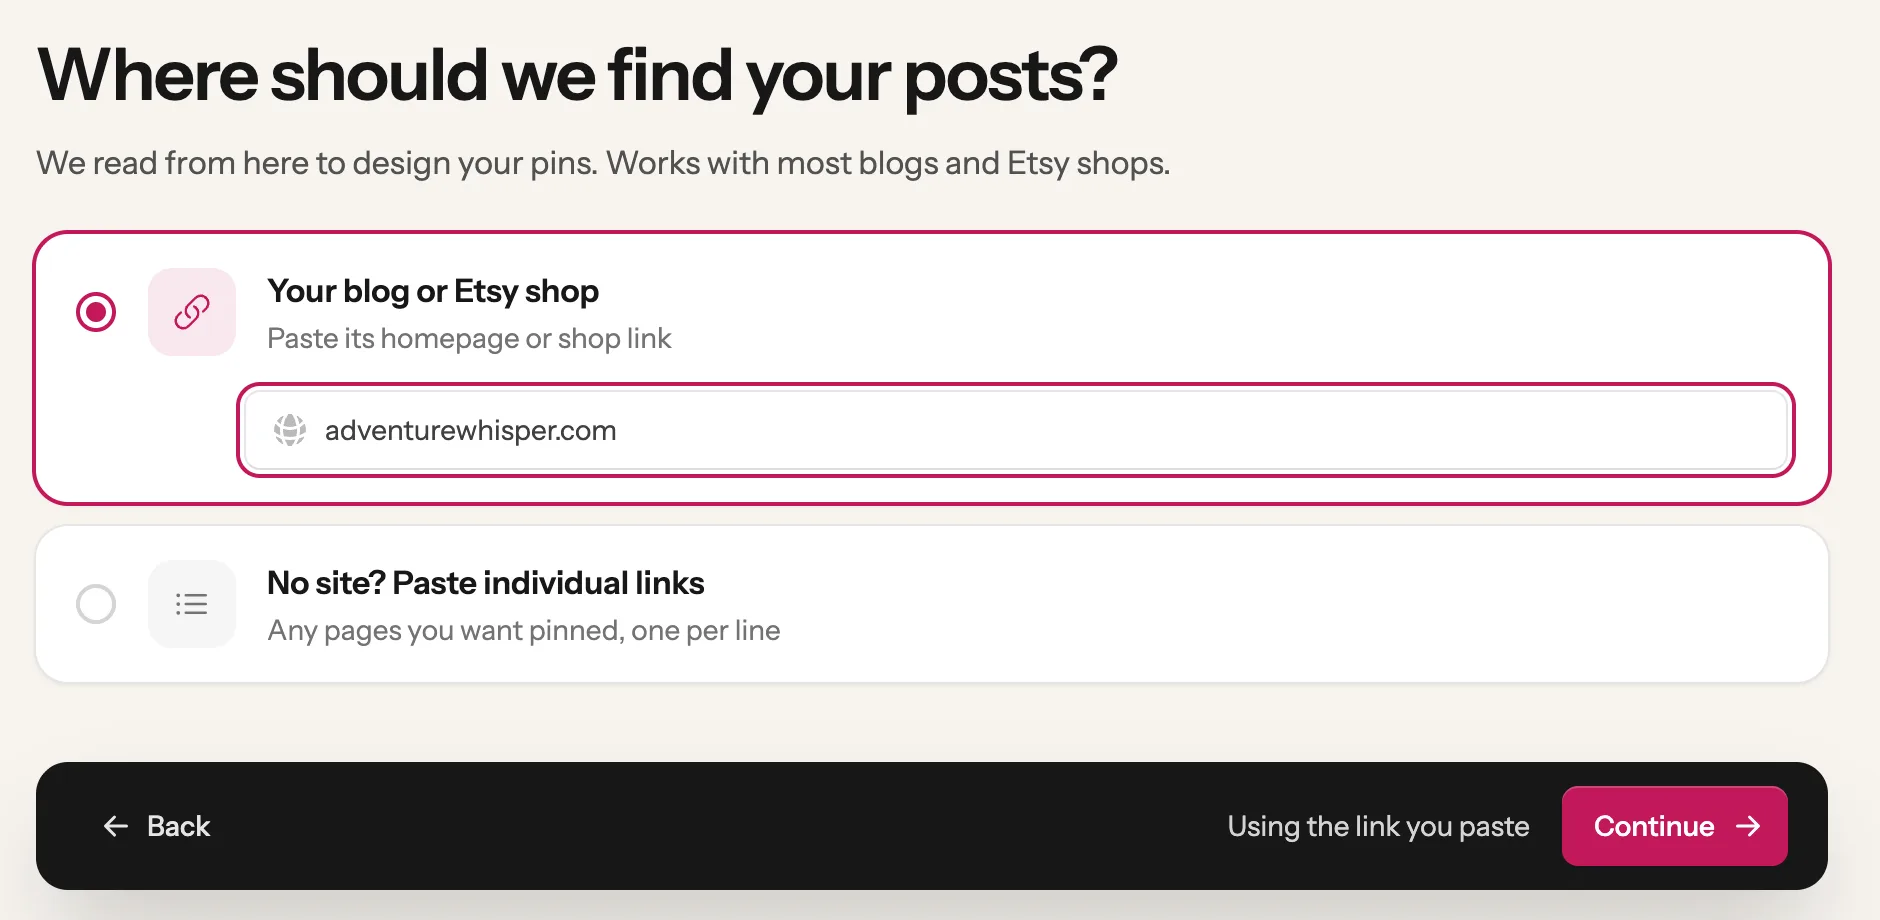
1Type your address. We use adventurewhisper.com, a travel blog. For a Shopify store, type the store’s address: Auto Pin makes pins for your products. For an Etsy shop, paste its link, like etsy.com/shop/YourShop.
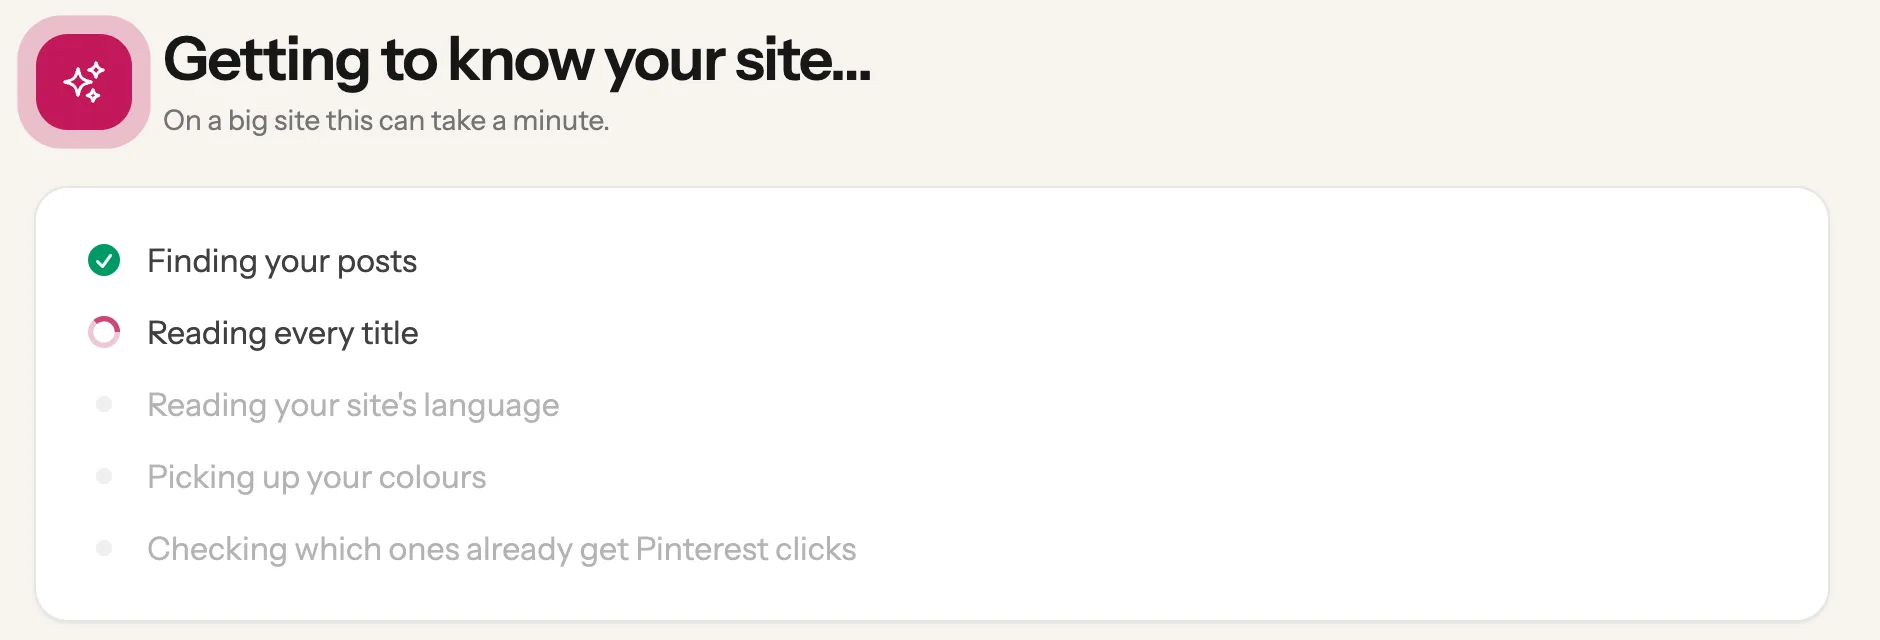
2Click Continue. Auto Pin reads your site for a moment: it finds your posts, reads every title and picks up your colours.
12
Tip: Already connected your blog, Shopify store or Etsy shop under Integrations? It is in the list: just pick it. No blog or shop? Pick No site? Paste individual links and paste the pages you want pinned, one per line. Without a site there are no new posts to spot, so Auto Pin keeps making new pins for those links instead.
3
Look at your sample pins
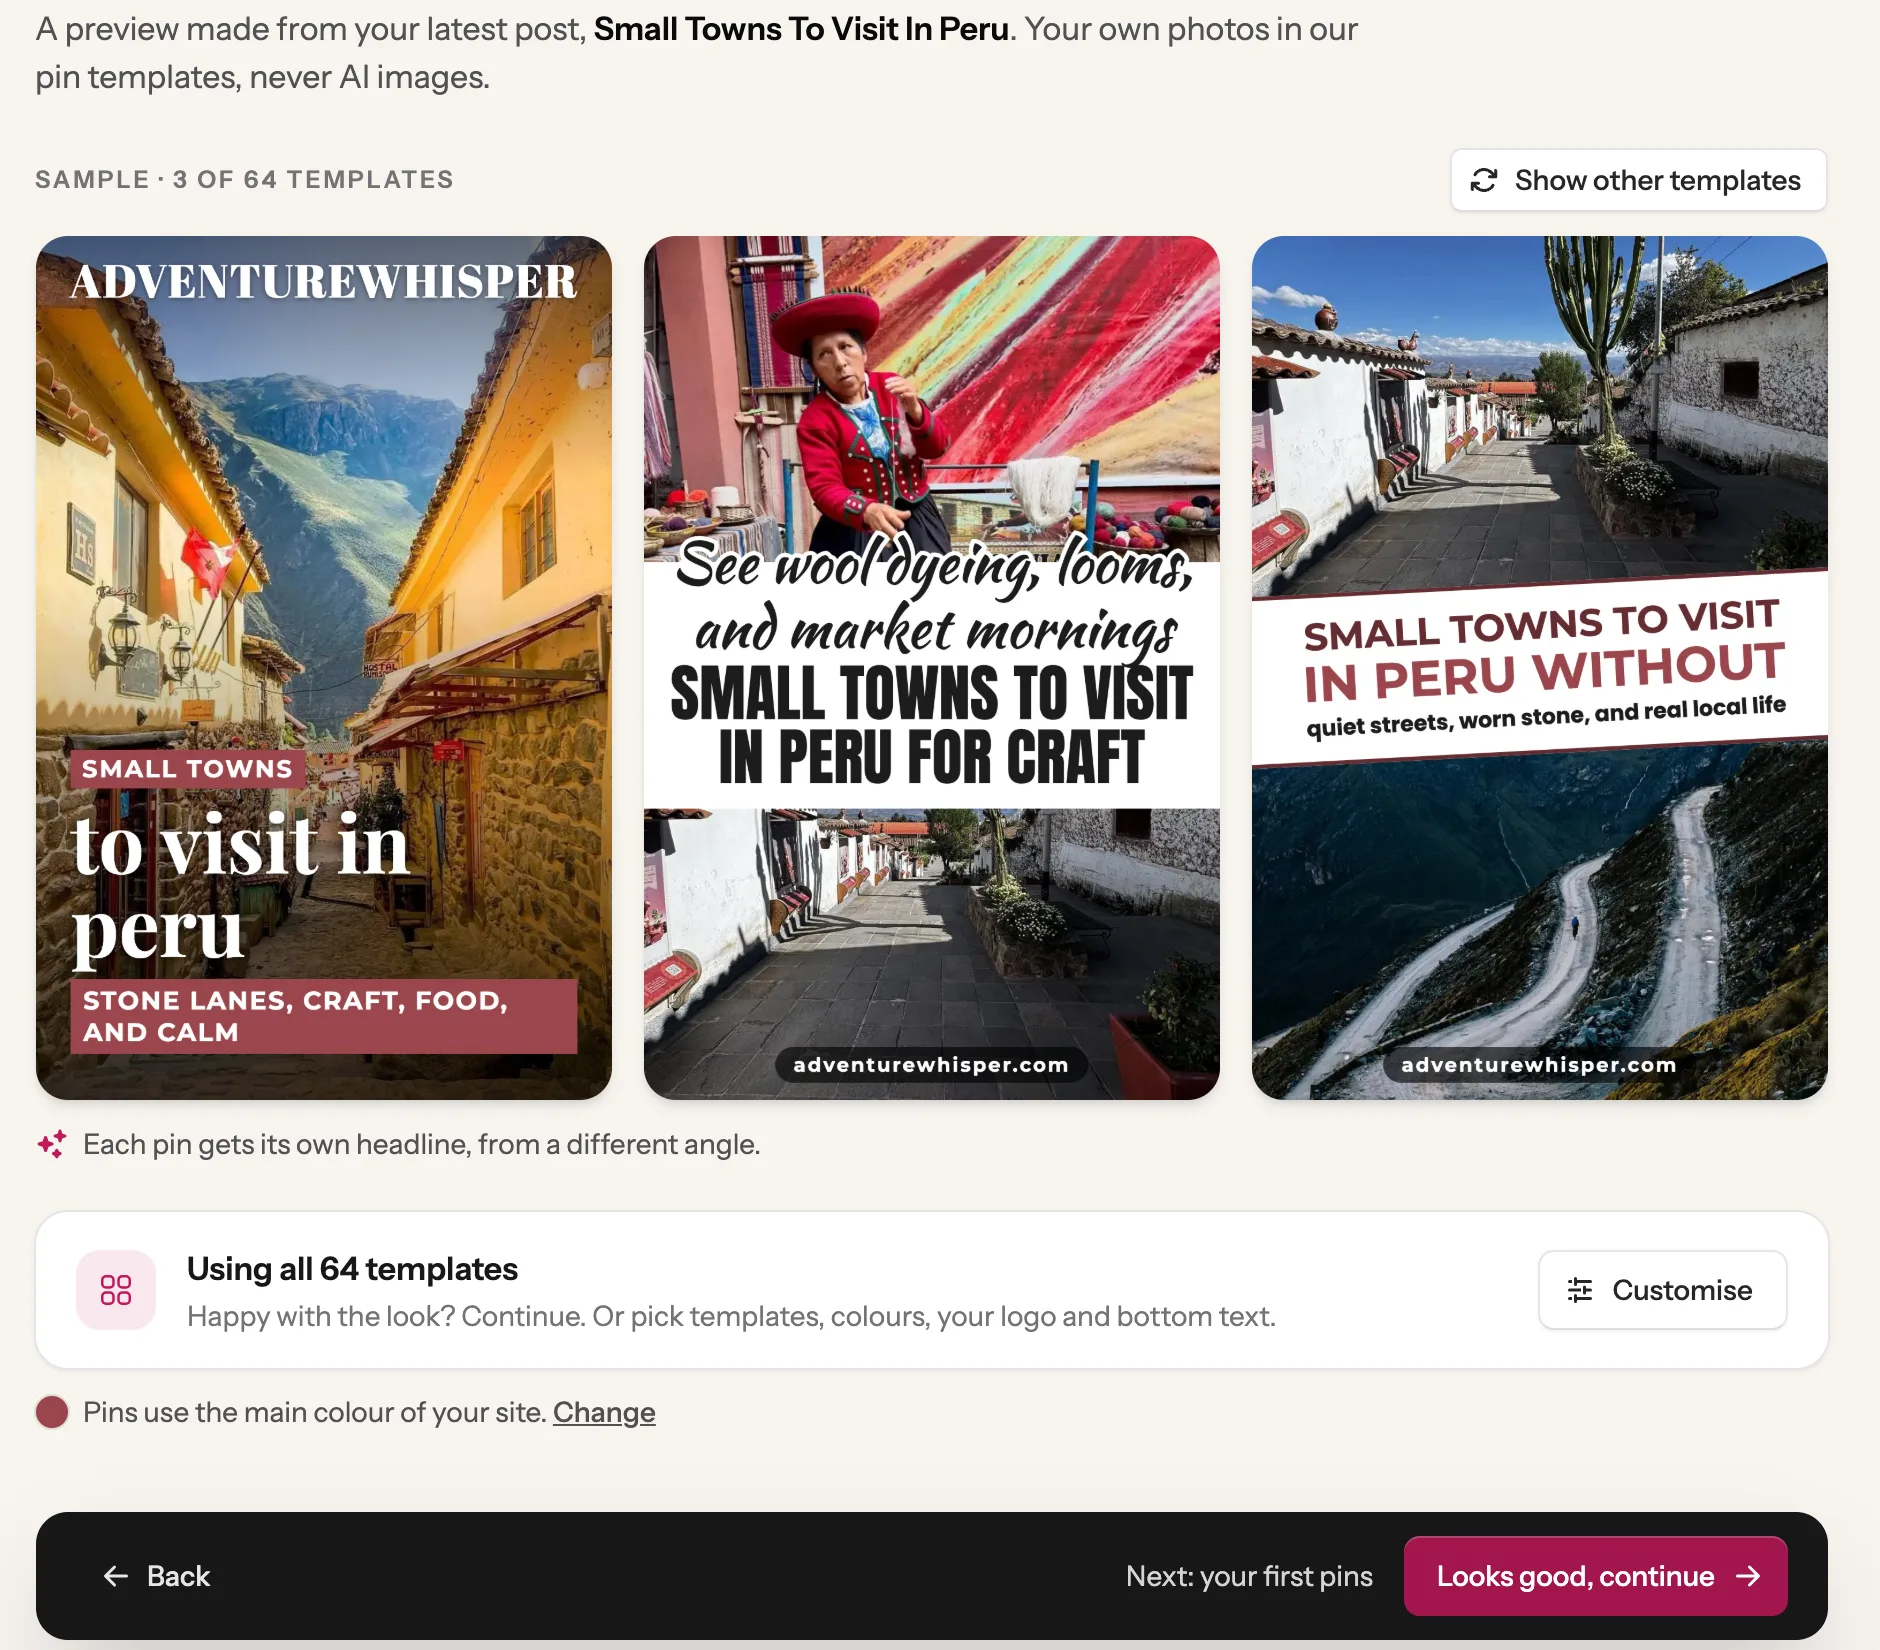
You see real pins made from your latest post, each with its own headline. Here: Small Towns To Visit In Peru. They use your own photos in our ready-made designs.
1Want other looks? Click Show other templates.
2Want your colour, logo or the words at the bottom? Click Customise.
3Happy? Click Looks good, continue.
123
4
Choose which older posts get pins
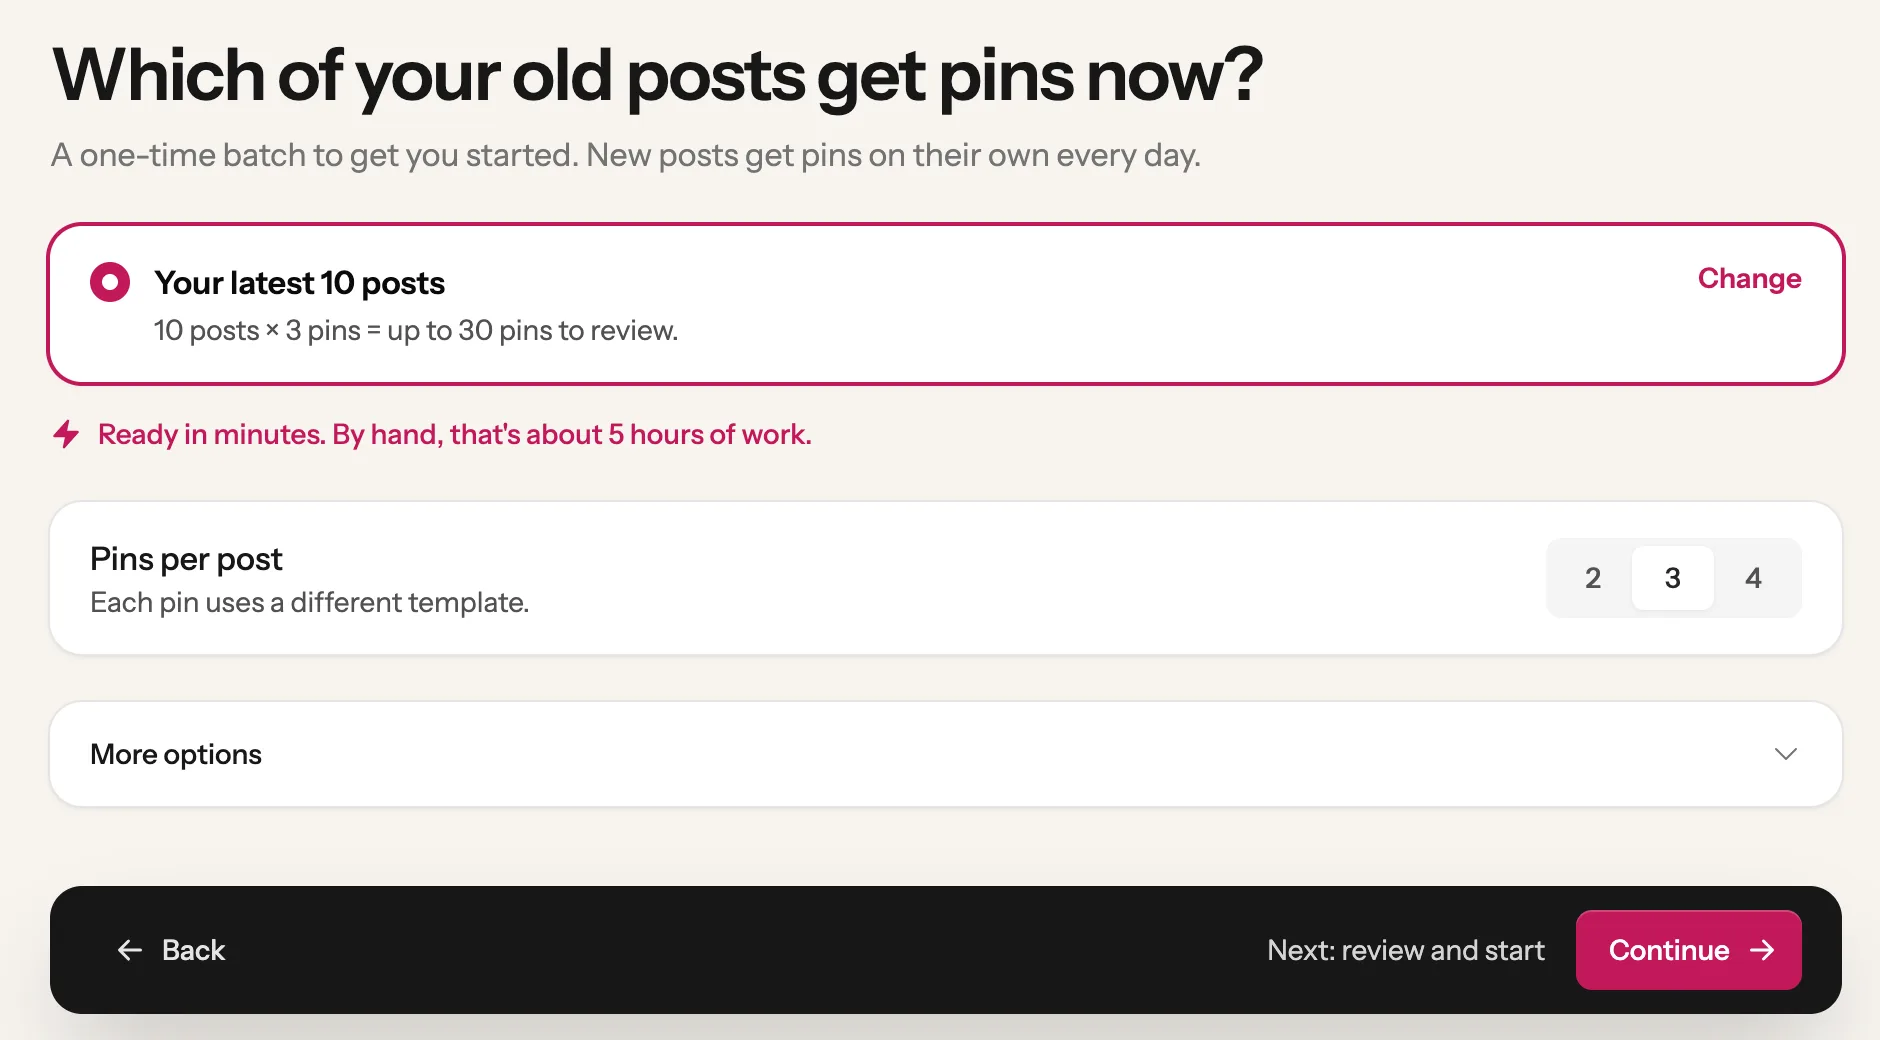
You’ll see one of two screens here, depending on what you ticked in step 1. With only New posts ticked, this step is about the posts you already have: new posts get pins on their own from now on. Auto Pin suggests your latest 10 posts, 3 pins each: 30 pins to start with. Under it, “Pins per post” lets you choose how many pins each post gets.
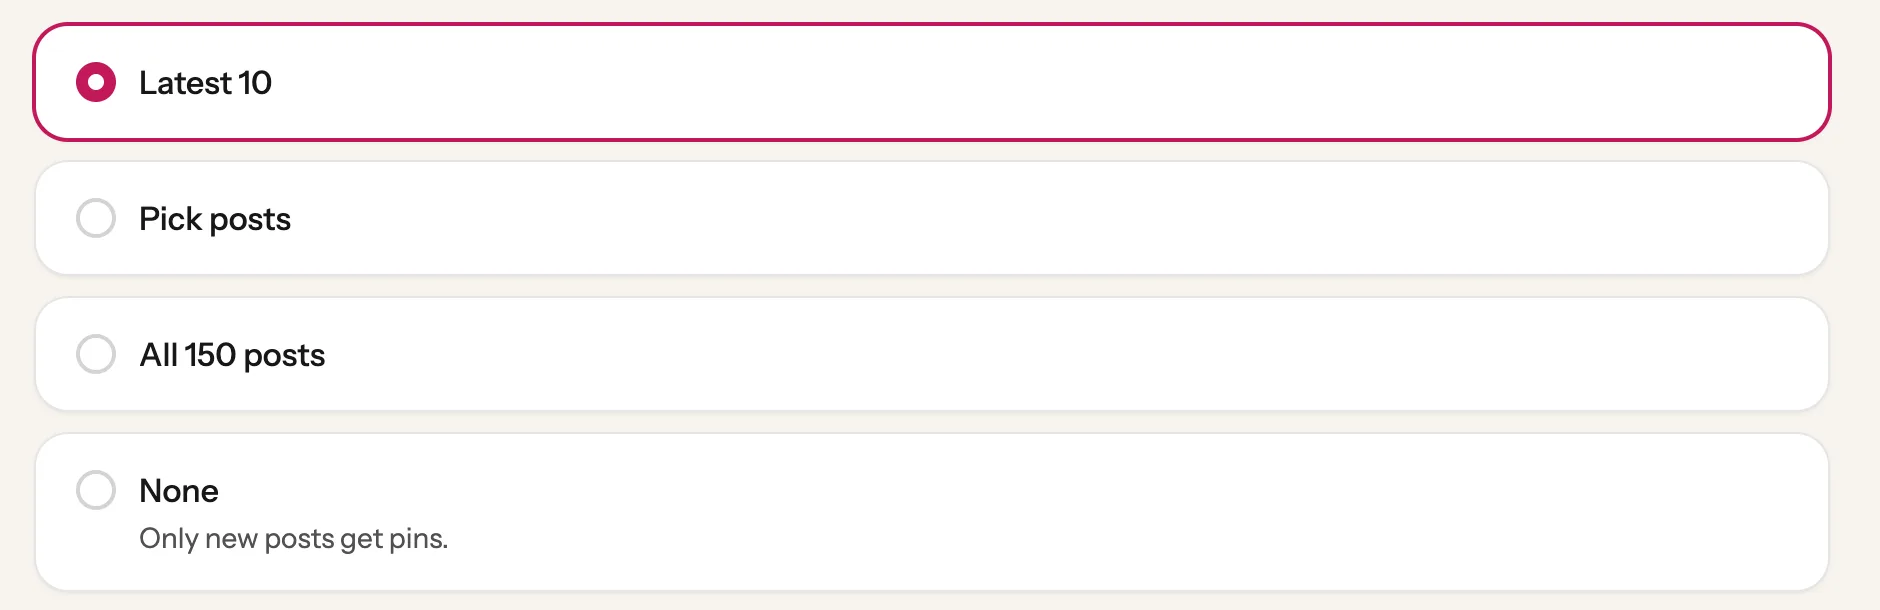
1Want something else? Click Change and pick Latest 10, Pick posts, all your posts, or None if only new posts should get pins. On a trial, “all your posts” stops at your latest 10.
2Click Continue.
12
Behind Change: the other choices.
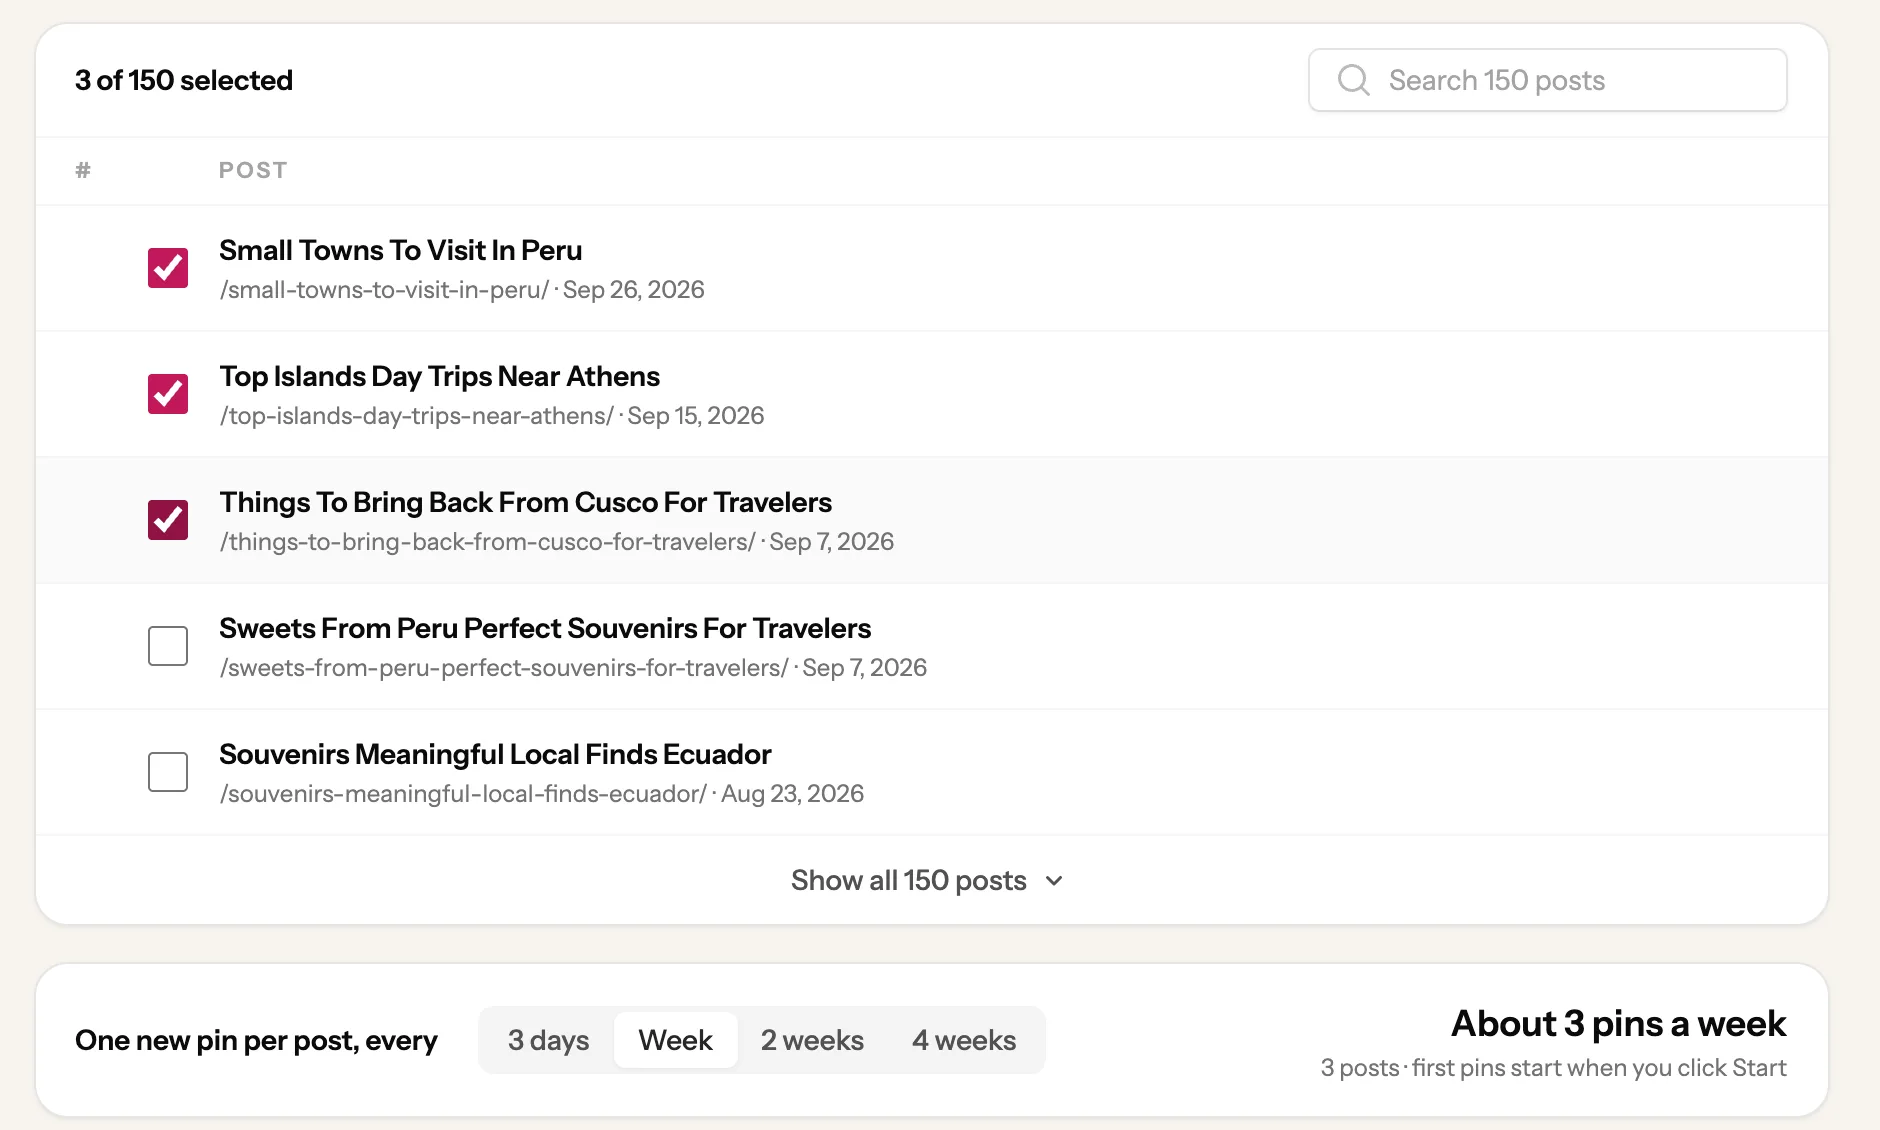
Tip: Ticked Posts you pick in step 1? Then you see this screen instead: it asks which posts should keep getting new pins. Tick them (posts that already get Pinterest clicks are ticked for you), then choose how often under “One new pin per post, every”: 3 days, Week, 2 weeks or 4 weeks.
5
Choose how hands-off, then click Start
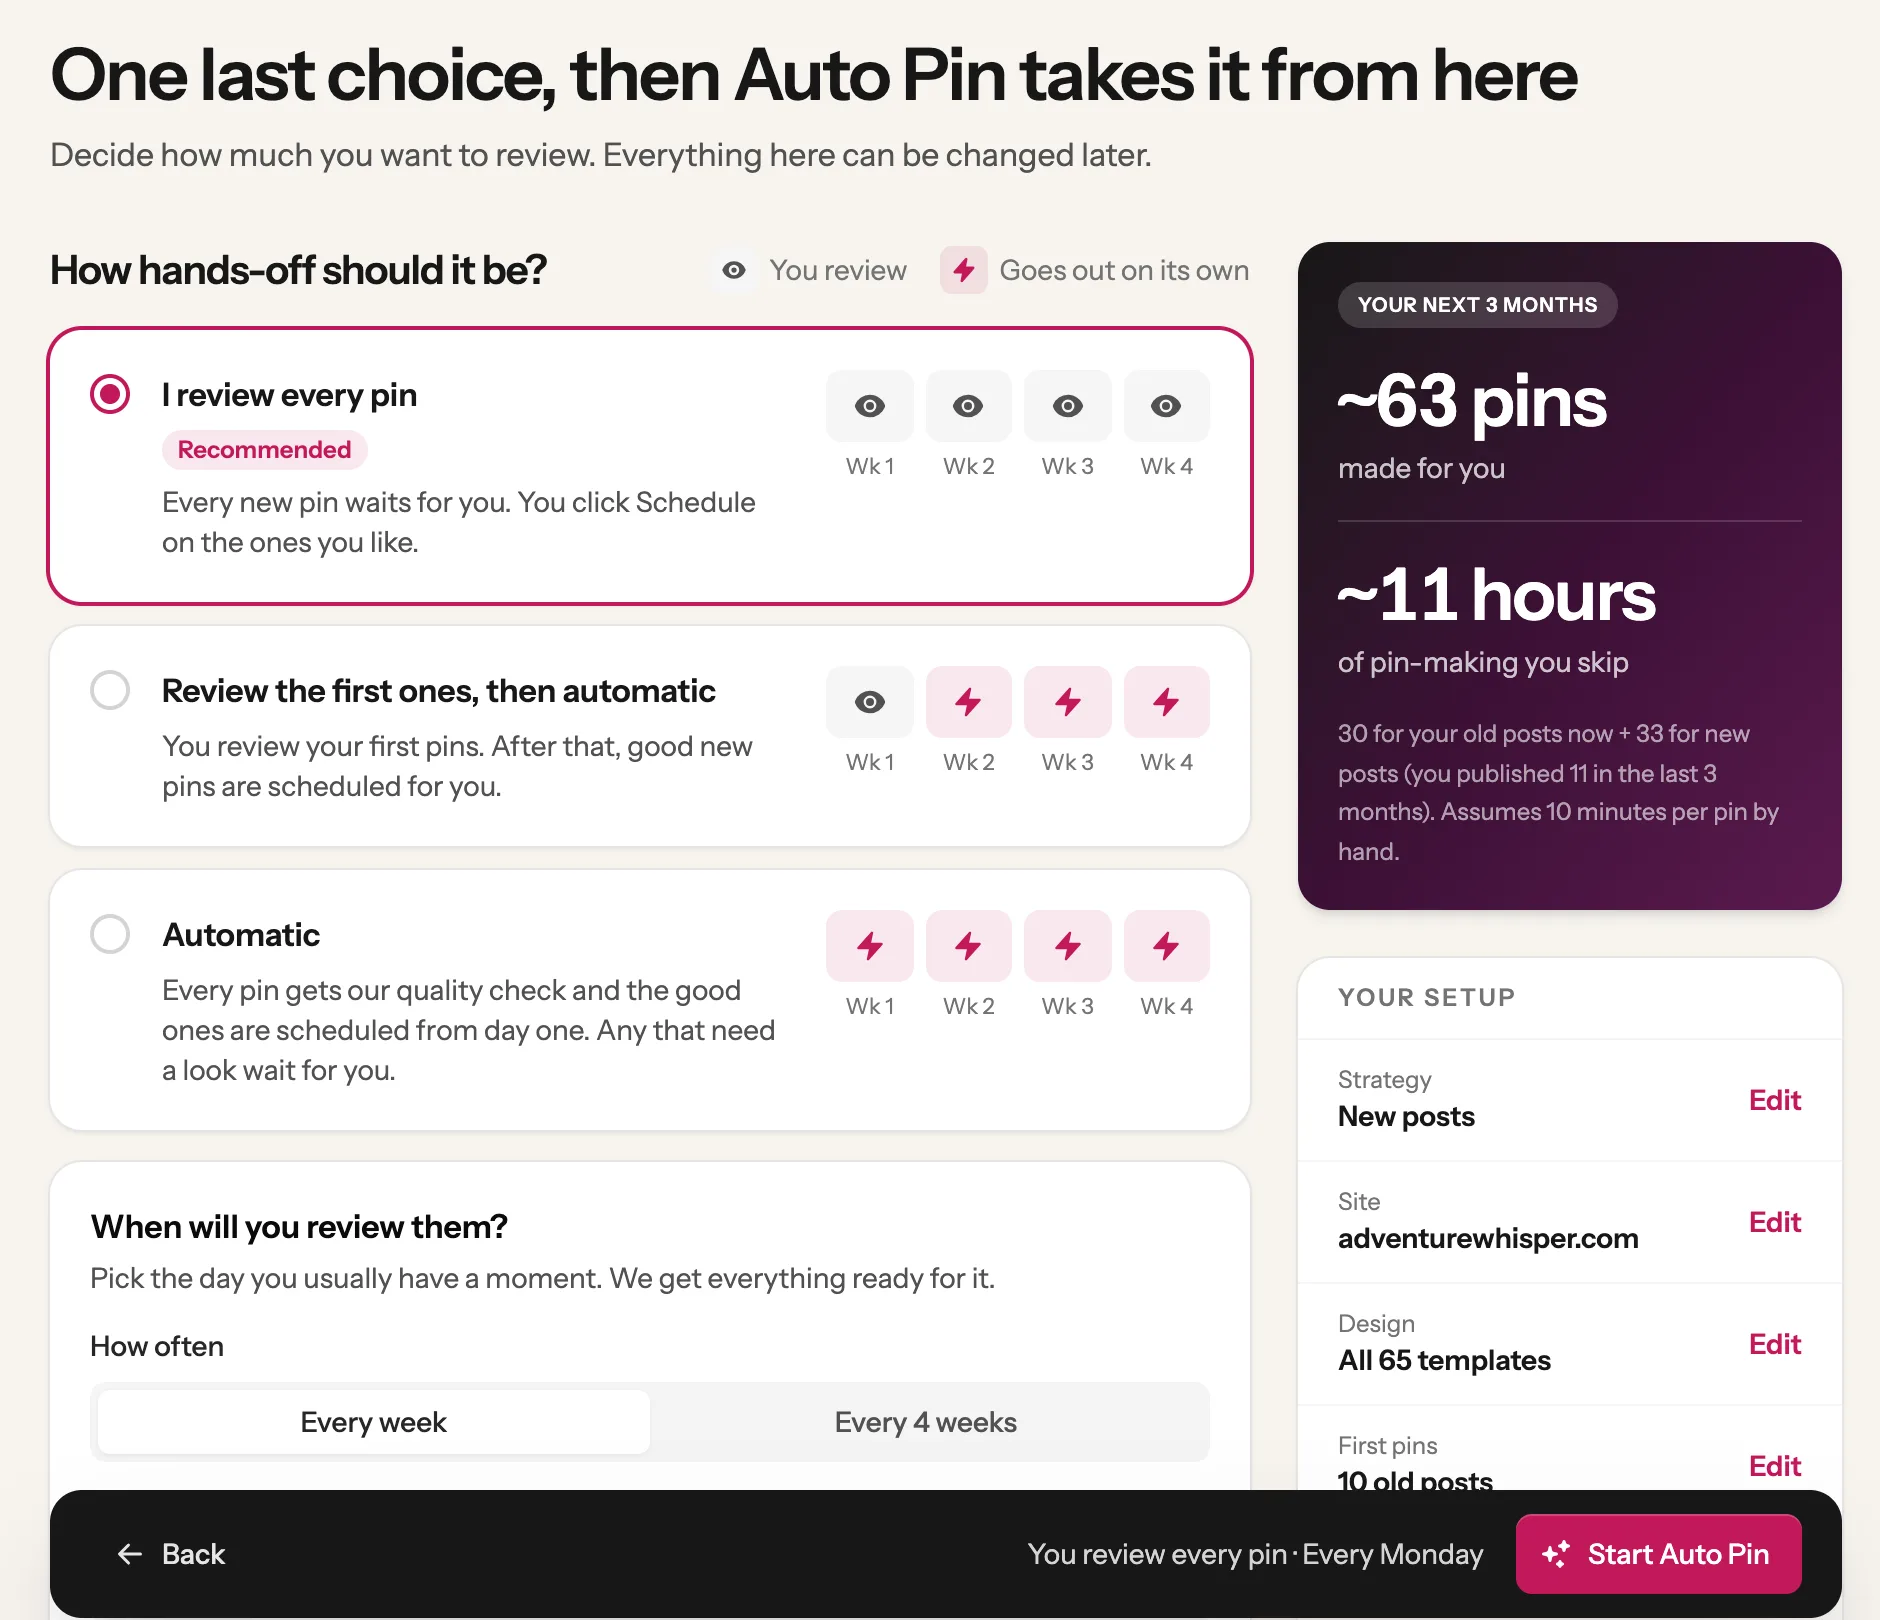
Under “How hands-off should it be?” you’ll see up to three choices. I review every pin is picked for you, and it’s the one we recommend. Then:
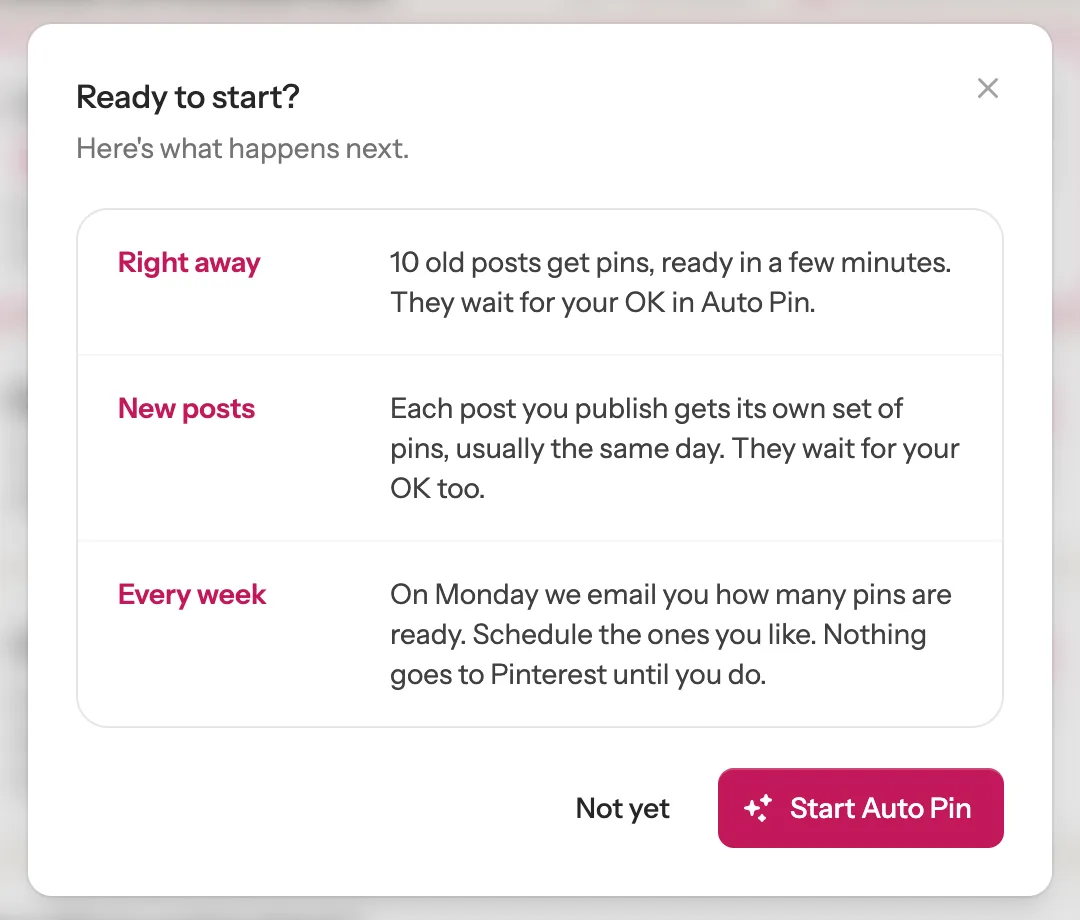
1Keep I review every pin: nothing goes out until you click Schedule. Under “When will you review them?”, choose “Every week” or “Every 4 weeks”, then the day you usually have a moment. We email you that morning.
2Click Start Auto Pin at the bottom. A window shows what happens next. Click Start Auto Pin again.
12
Tip: Want less to review? Review the first ones, then automatic: you review your first pins, and after that good new pins are scheduled for you. Automatic: every pin gets our quality check and the good ones are scheduled from day one; any that need a look wait for you. On a trial, only I review every pin is open, and the other two say “Comes with the Solo and Growth plans.” Nothing is locked in: you can pause, change or stop any of it later.
6
Review your pins
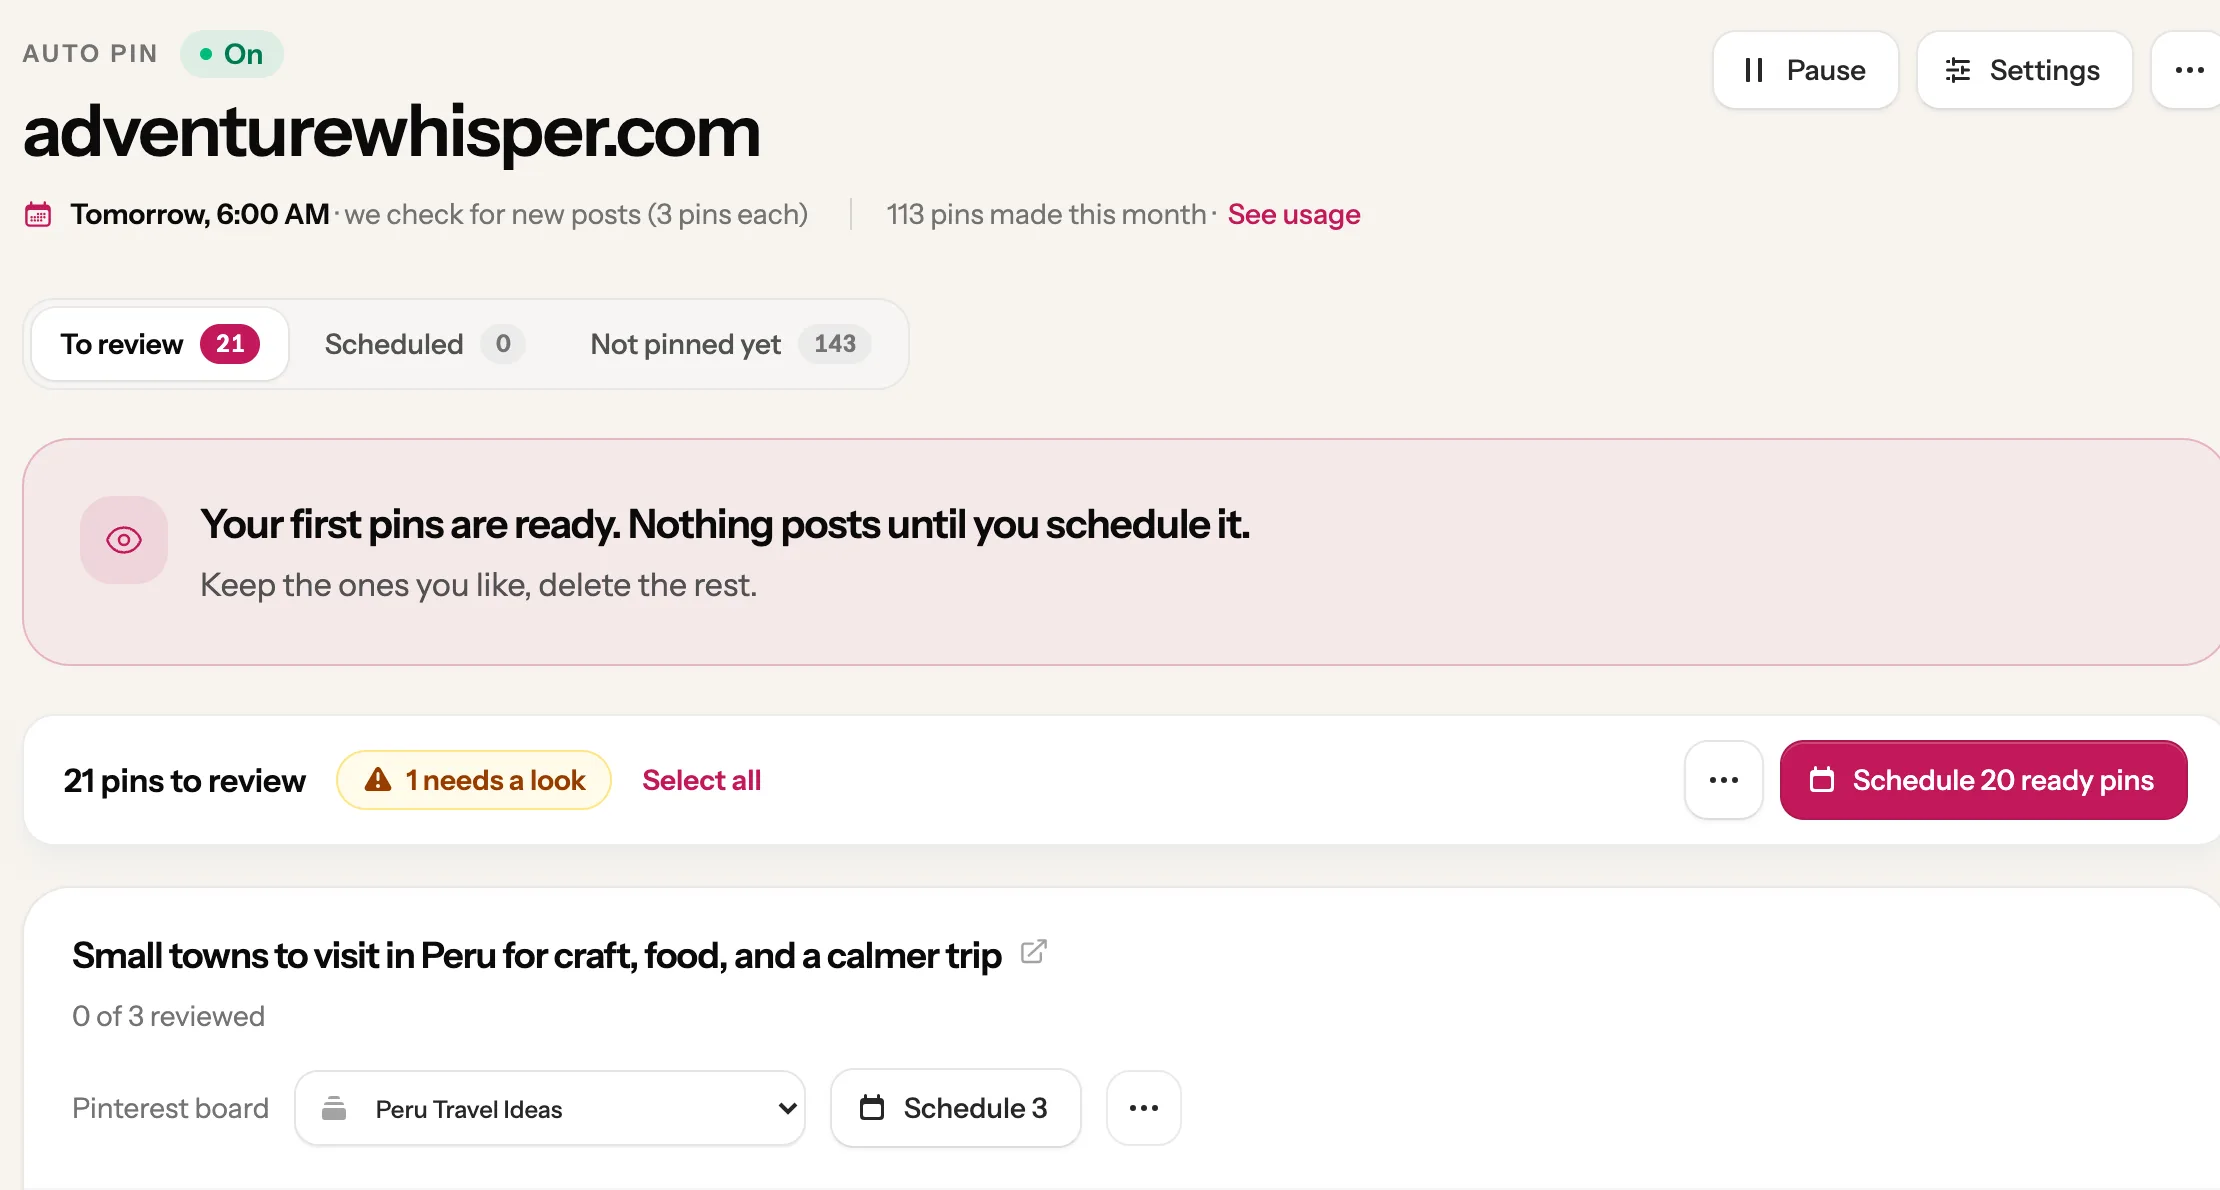
Your first pins arrive on the Auto Pin page, about a minute per post. You can leave the page: we email you when they are ready.
1To review holds the pins waiting for you. If a pin needs a look, it says why.
2Choose a Pinterest board for each post.
3Click Schedule 3 to schedule that post’s pins, or the button at the top for every pin at once: Schedule all 21, or “Schedule 20 ready pins” when some need a look first. The numbers are how many pins there are.
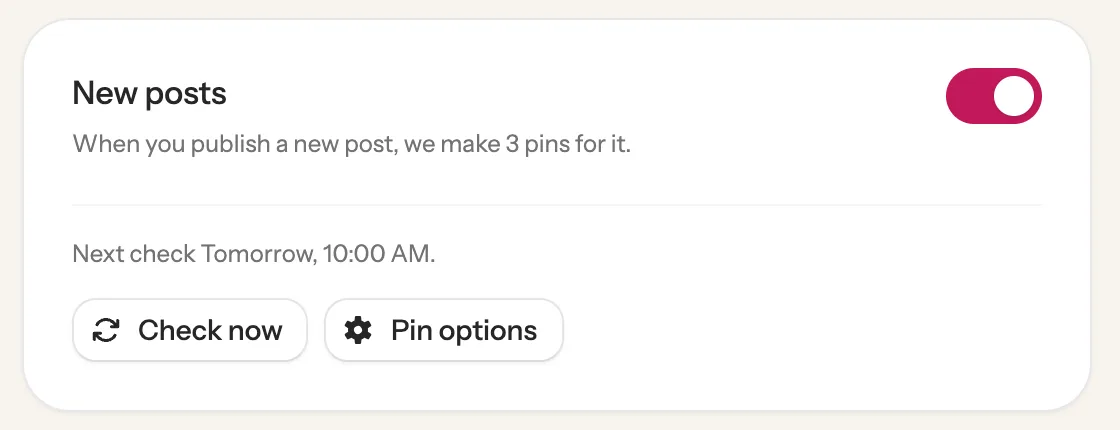
4From now on Auto Pin checks your site every day, and each new post gets its pins on its own, usually the same day. Just published one? Click Settings, then Check now. Pin options is there too: how many pins each post gets and the board for pins with no matching board.
123Or all at once4
Tip:Scheduled shows pins on their way to Pinterest and the ones already posted. Not pinned yet lists posts with no pins: tick some and click Generate pins, or Skip the ones that should never get pins. Skipped posts move to a Skipped tab, where Unskip brings them back.
Done! Auto Pin is on
From now on, every new post on adventurewhisper.com gets pins like these, the posts you picked keep getting fresh ones, and each pin links back to its post.
It checks your blog, Shopify store or Etsy shop once a day. Each new post or listing it finds gets its own set of pins, usually the same day. Want it sooner? Click Check now under Settings on your Auto Pin page.
Does anything go to Pinterest without me?
Only if you choose Automatic, or once you have reviewed your first pins with Review the first ones, then automatic. With I review every pin, nothing goes out until you click Schedule. You can switch any time.
What do the pins look like?
They use the photos from your own post in our ready-made pin designs, each with its own headline. You see real samples before you start, and you can pick the designs, your colour, your logo and the words at the bottom.
Which plans include Auto Pin?
Auto Pin comes with the Solo and Growth plans. The pins it makes come out of the same monthly pins as Bulk Pins, and your Auto Pin page shows how many you have used.
Can I pause it?
Yes. Click Pause at the top of your Auto Pin page. No new pins are made, and pins already scheduled still go out. Click Resume when you want it back. Everything you set up is kept.
How do I switch to another site, or stop Auto Pin?
Click the … button at the top right of your Auto Pin page, then Disconnect. A window shows exactly what happens, and you choose whether pins already scheduled still go out or are cancelled. Nothing on Pinterest is deleted. Then set Auto Pin up again with the new address. Want pins for a second site as well? Use another workspace.
Can I stop the Auto Pin emails?
Yes. Go to Settings, then Email Notifications, and turn off “Auto Pin emails” for that workspace. Your other workspaces keep theirs. Every Auto Pin email also has an unsubscribe link at the bottom.
What if a pin doesn’t post?
It shows under “Couldn’t post” on the Scheduled tab of your Auto Pin page, with the reason. Click Try again to send it again, or delete it.
Does it work with Shopify?
Yes. Type your Shopify store’s address in step 2, or pick it from the list if you connected it under Integrations. Auto Pin makes pins for your products and spots new ones each day.
Stuck on a step? Just reply to any email from us, or use the chat button at the bottom right.